April 27th, 2011
Dreamy Stencil Cremes
Well, I’ve finally gone and done it. For the first time in my long and stencil-y life I have my very own vanity signature line of stencil paint: Royal Stencil Cremes. Available now for your stenciling pleasure in 10 deliciously shiny and sassy metallic colors.
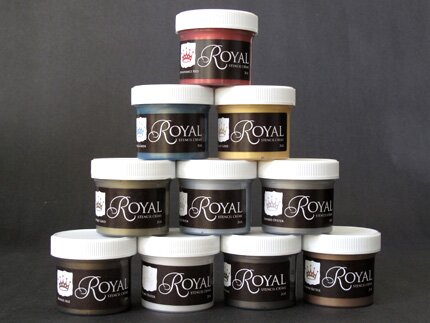
You can read all about how fabulous Royal Stencil Creme paints are for stenciling projects here in this handy “How to Use Royal Stencil Cremes” booklet that my talented creative assistant Lauren and I created for you. Meanwhile, I just wanted to share part of a DIY Stencil project that Lauren was keen to do for her own apartment.
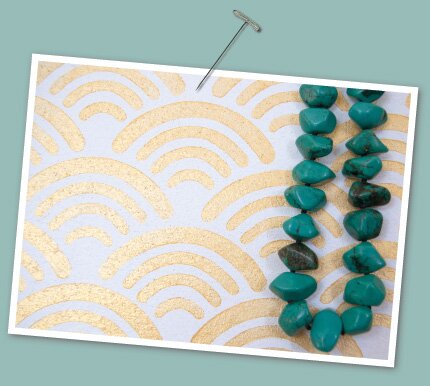
You see, Lauren is a very stylish girl with a fabulous jewelry collection culled from assorted Etsy artisans, and she wanted to create a special space to store them within easy reach.
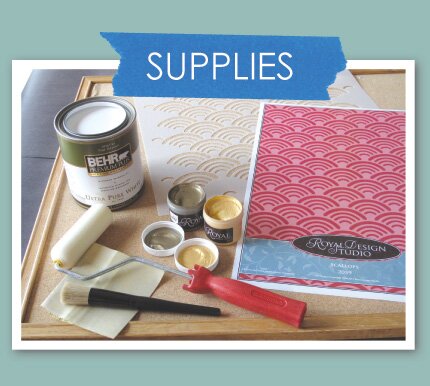
So, we gathered some supplies including a cork board, foam roller, stencil brush, 1″ Blue Painter’s Tape, NEW Royal Stencil Creme colors, and a Japanese Scallops stencil from Royal Design Studio-one of her favorites.
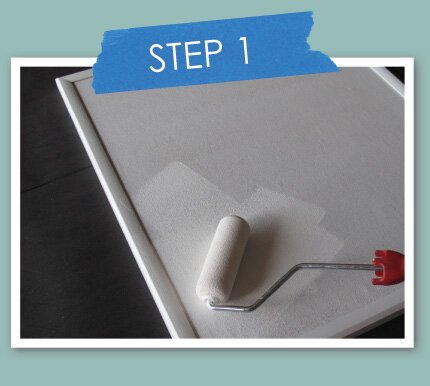
First things first, we got ourselves some good quality paint to basecoat the cork board. I know that some people like to cheap out on paint, but seriously, it’s not worth it! Good paint will cover better, and even out nicely. We got Behr’s Premium Plus paint in Ultra White right off the shelf at Home Depot. Two coats did it.
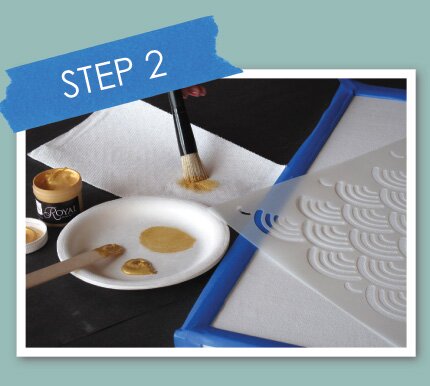
A general rule with stenciling is that “a little paint goes a long way”. With Royal Stencil Cream colors, a little paint goes a REALLY long way. (That’s a good thing) It is very important to use a very “dry” brush to keep excess paint from seeping under the stencil edges. Lauren put just a small amount of Stencil Creme out on a paper or plastic plate and dipped just the tips of the brush into the paint. Then she rubbed a bit on a clean part of the plate and offloaded EVEN MORE paint on a stack of good paper towels. The idea is to make sure the paint is distributed evenly throughout the brush bristles AND make sure that the brush doesn’t have an excessive amount of paint left on it. Trust me, you won’t need it.
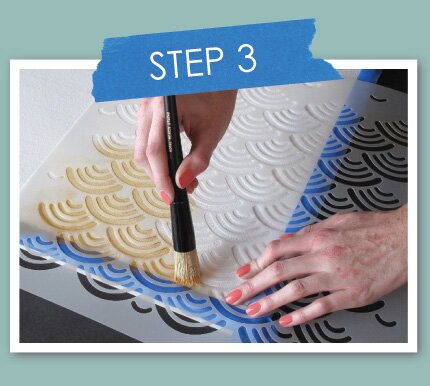
Lauren centered the stencil on the cork board (see detailed instructions) and filled in the open stencil areas. Smart girl that she is, she waited until the brush was a bit dryer before moving to the edges and pushing the stencil into the corners-again avoiding paint “run-unders”. It’s so much funner NOT to have to do touchups. Note: If you EVER see nicely painted finger nails in a photo on here, you will know it’s NOT me!
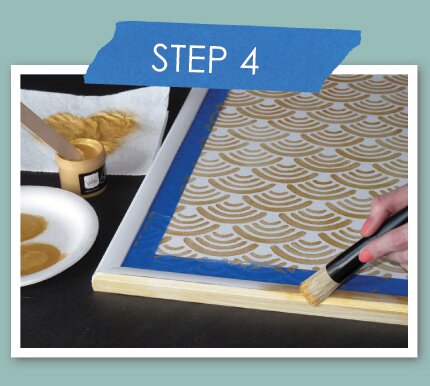
The Royal Stencil Creme colors also work great for regular painting. Two thin coats around the frame (note the protective tape) covered the frame quite nicely. OK, so this was the short and sweet version. For the long, detailed version of this DIY stencil project click here.
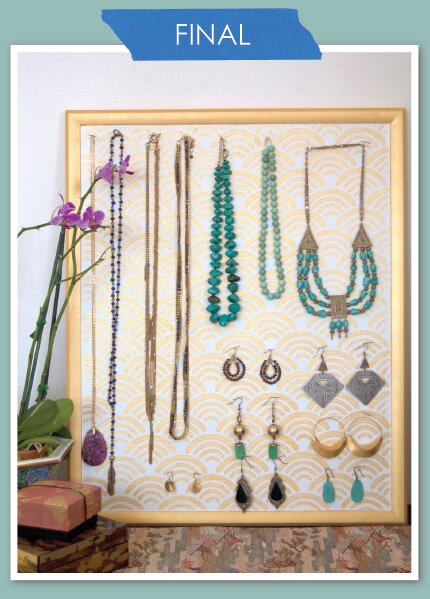
Lauren used T-pins (Office Depot) to hang some of her favorite coordinating jewelry pieces. Yes, I’m jealous. Until she decides where on the wall to permanently hang the board, she just has it leaning up against the wall, which seems perfectly fine too! I was thinking if you have a lot of nice jewelry and plenty of wall space it would be super fun to create a series of boards in different patterns and colors and put together some curated jewelry collections on them. If you are someone who has that jewelry making and selling gene, this would make for some interesting displays!
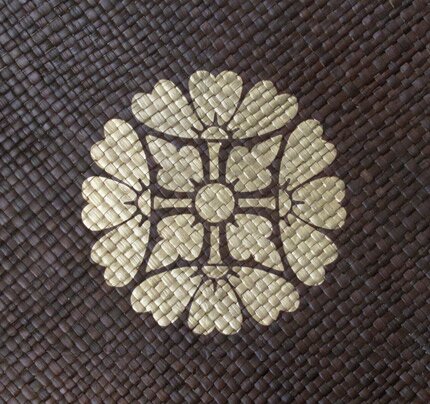
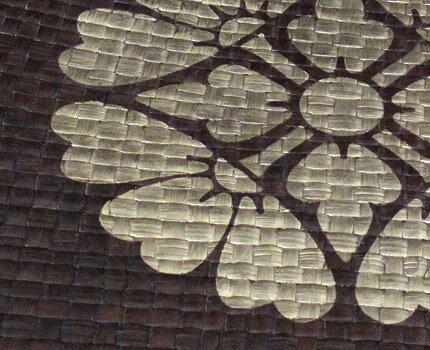
Like I said, you can read all the details about Royal Stencil Creme colors here, but I just wanted to show you how beautiful the Antique Gold color worked on this woven placemat. It pretty much covered in one coat (OK, I DID add a tiny bit more here and there) and you can see how wonderfully crispy and clean the edges are. I am a very crispy and clean kind of girl, so this thrills me. Now, I’ve been doing this for awhile, but seriously, the Stencil Cremes are designed to make stenciling easy for beginners, pros, and everyone in between.
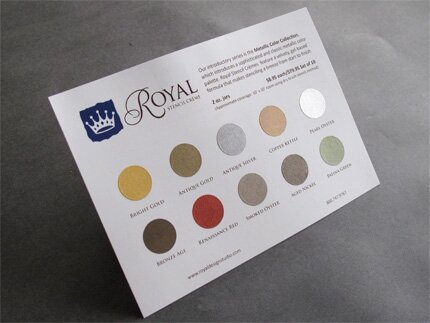
Would you love to be able to see all the colors firsthand? We have a card for that! We will send you a FREE hand painted color card with any Royal Design Studio stencil web order. Just be sure to check the order box on this page or ask for it if you call us.
Here are the handy links again:
Royal Stencil Creme Colors
Introduction to Royal Stencil Cremes
DIY Stencil Project: Jewelry Cork Board
April 22nd, 2011
Shades of Sea Glass
Sea glass is the beautiful, natural result of something “not so pretty” OR natural: littering. Glass bottles and jars that are tossed or washed into the sea get broken up and tossed about in the currents. Over time, the sharp edges of the shards of glass get worn down and the surface becomes etched by constant contact with waves, water, and sand.
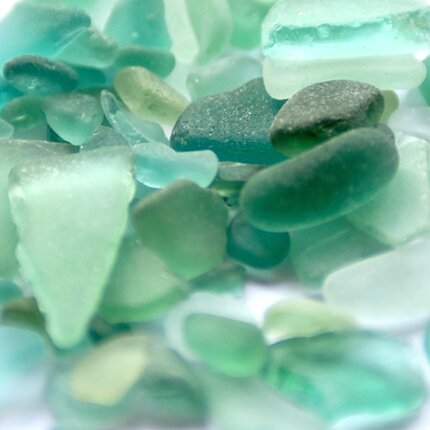
Sea glass can be found in many colors, but some of the most lovely are soft shades of blue/green.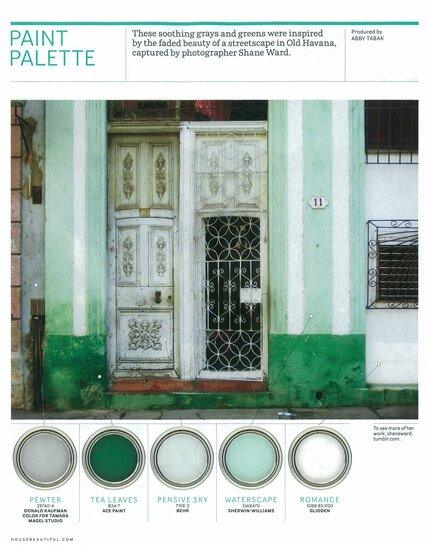
This beautiful photo of a set of doorways in Old Havana, as seen in the current issue of House Beautiful caught my eye. Not only because I LOVE historical architecture, and anything that looks distressed, crusty, rusty, faded, well-used and well-loved. The colors also reminded me of blue/green sea glass, and we have been using these colors quite a bit in our inspirational stencil pattern photos….
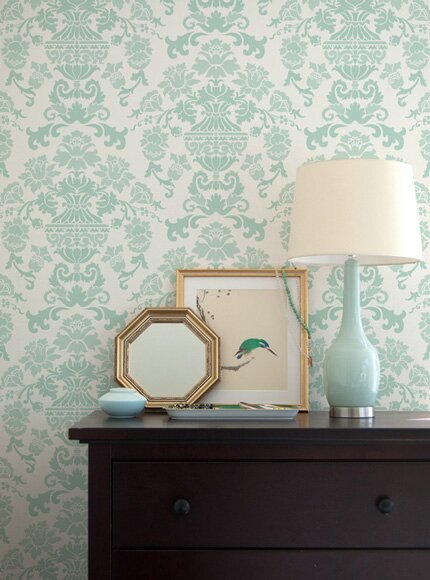
Our new Encantada Damask wall stencil from The Hearst Castle Collection.
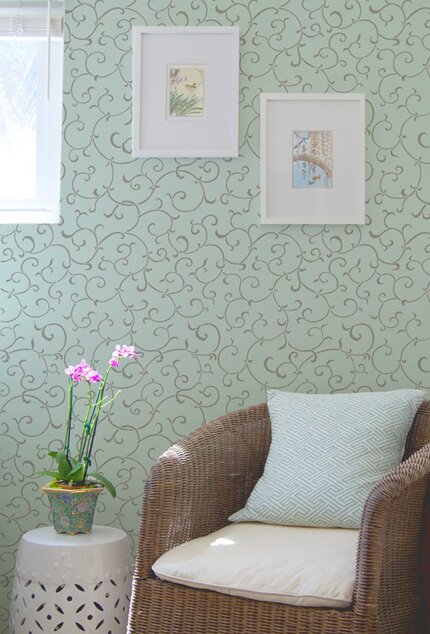
Our delicate Oriental Vine allover wall stencil.
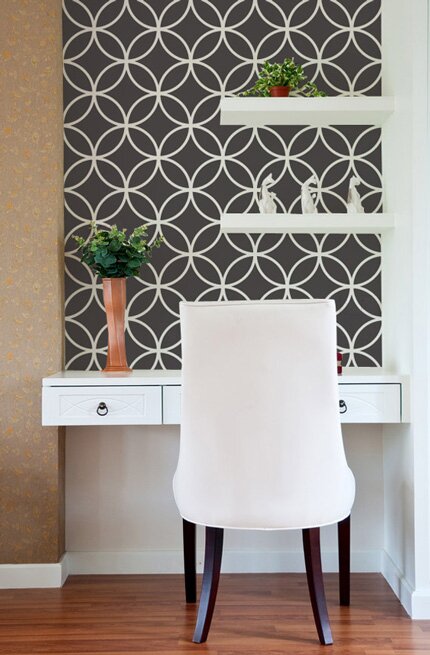
Yes, this one isn’t blue or green, but I had to include it, because the Endless Circle Lattice stencil pattern is shown in the door grillwork above, and the black and white add a certain “punch” to the page, don’t you think?
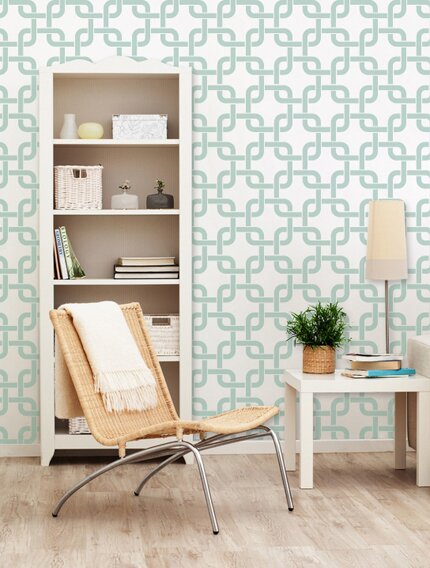
Back to blue, the Linked In modern wall stencil looks very fresh on a white wall….
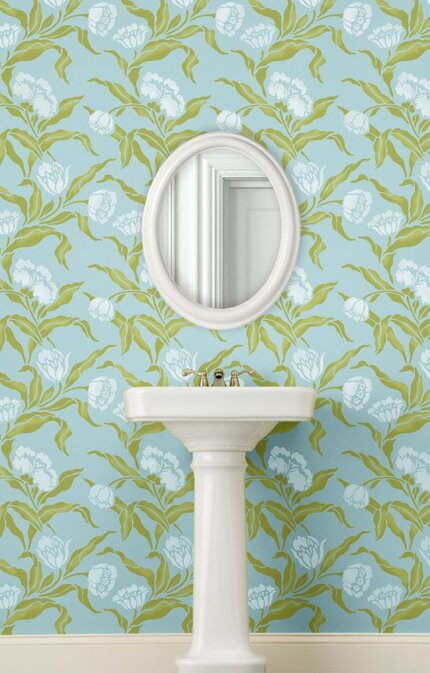
…and the Large Phoebe’s Tulip Vine stencil (also from The Hearst Castle Collection) is perhaps the freshest Spring look of all! Authentic sea glass is becoming more and more rare, but you can certainly bring the soft colors into your home or decorative painting project with the right shades of paint!
April 21st, 2011
Before and After Bathroom
WHOA! Check THIS out….this is an amazing bathroom transformation from the ever fabulous Gracie Reed, of Grace Designs Dallas.I have posted quite a bit of Gracie’s work here, as she is super talented and was also a featured artist and cover girl for our inspiration book, Modello by Design, Volume 2.
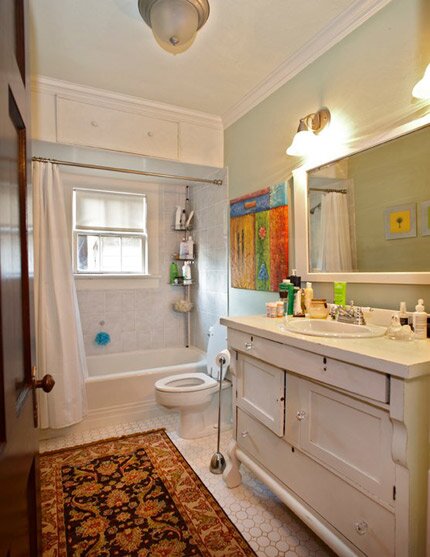
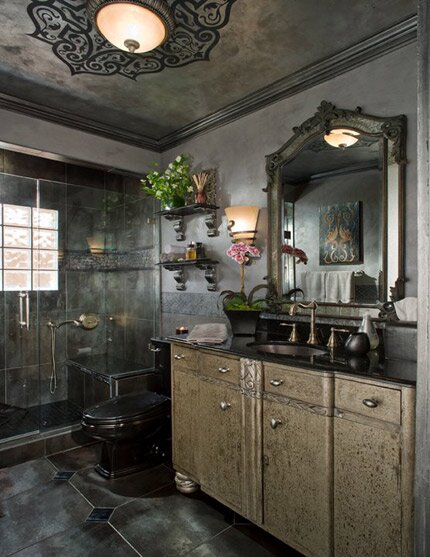
For this project, Gracie acted as the general contractor, decorator, and decorative finisher to turn this ugly duckling bathroom into a black swan. Modello masking stencil used: EasCen103. I wouldn’t normally use the word “sexy” to describe a bathroom, but I think it’s totally appropriate in this case, don’t you?
April 19th, 2011
Simple. Sophisticated. Stencils.
Lisa of Lisa Goulet Design, an interior decorator in Ottawa, Canada recently posted a simple and elegant stencil transformation on her blog that is too chic not to share here.
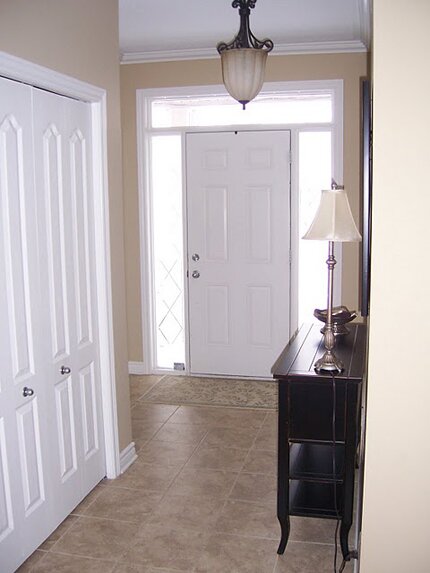
Lisa’s foyer before. Nothing horrible here, yet nothing memorable either.
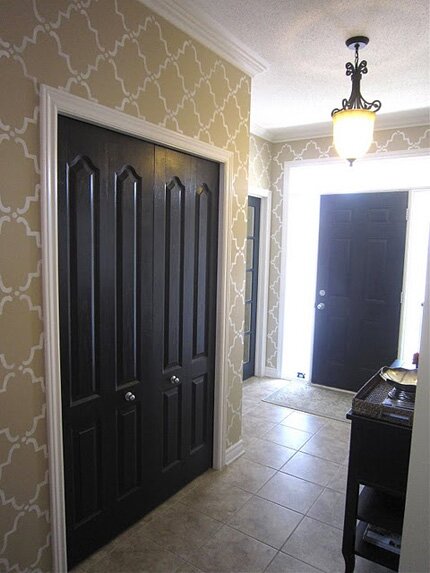
Lisa used our classic and simple Moorish Trellis stencil in a creamy white over the golden beige walls. The black painted doors add so much sophistication, and would be a brilliant idea to copy if your daring and want to add some designer dash to a neutral space.
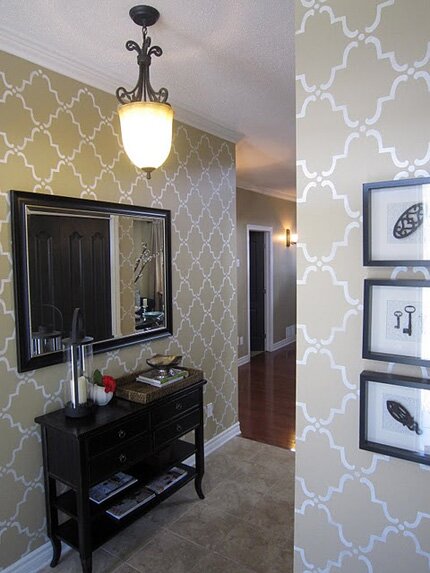
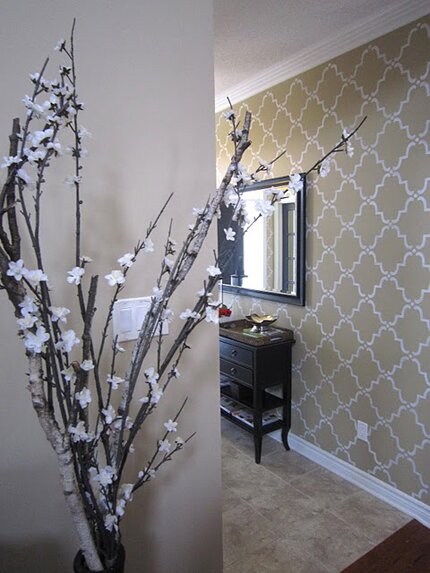
These other views give you a good idea how the stencil design is used in a limited area, yet relates well to the surrounding spaces. Do you have a Royal Design Studio stencil transformation up your sleeve that you would like to see posted here?? If so, please share! ![]()
April 15th, 2011
The Art of Procrastination
Today being “tax day”, April 15th, they ran a story on the news last night pointing out that a full 25% of Americans put off filing until the last two weeks before the deadline. I’m guessing THOSE are the people who aren’t expecting refunds?! Anyhoo, it prompted me to come clean on a character trait I have that I am none to proud of: I am a serial procrastinator. This fact is all to evident in my own house (and lack of regular blog posts), where the wheels of decorating grind slowly and projects get get pushed off for years. As in, MANY years. Gulp.
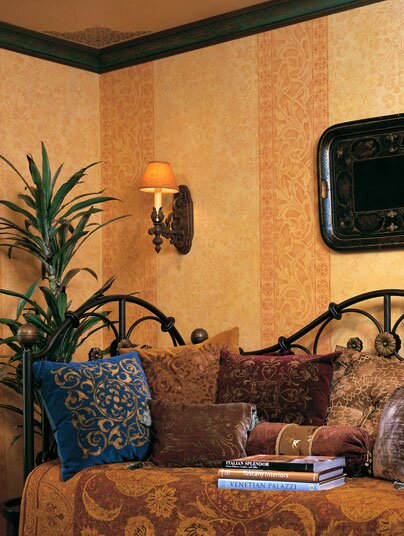
It’s been 4 years now (she writes incredulously-where DID that time go??), since I wrote this post about redoing my home office. I actually dismantled the room shortly after writing that post, and it’s been living in “no man’s land” ever since.
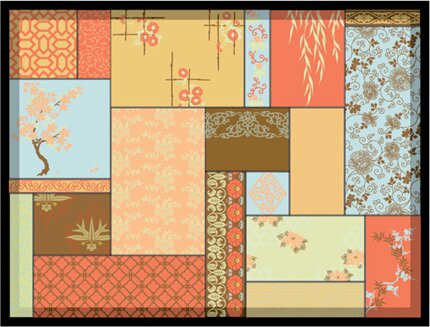
Back then, I was SERIOUSLY into Japanese decoration. Actually I still am, but the problem is, I am seriously into lots of OTHER decorating themes as well. That seems to be the problem. I have been back and forth, up and down, and even sideways trying to settle my mind on something that I will want to live with-and so, I’ve done nothing. Brilliant, huh? Until now…
I have loosely settled on a boho/contempo/Moroccan/upcycled/glam theme. Actually, that’s not a theme at all and obviously my brain is still crankin. But while my brain takes its time getting it’s thoughts together, I have at least started something. I am decidedly NOT a linear thinker, and take an “organic” approach to design. What that really means is that I figure it out as I go along. The main thing is to GET STARTED, and I am starting with the floor.
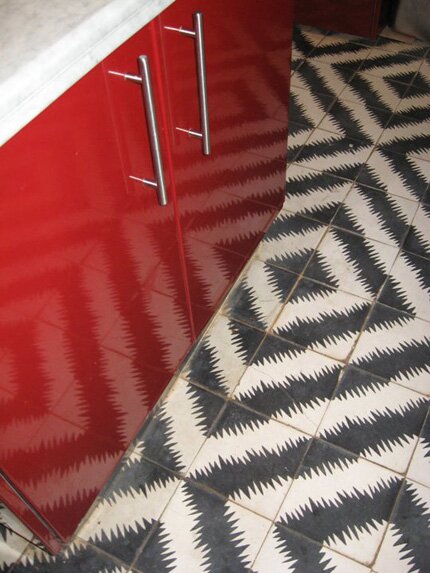
On my trips to Morocco, I have always been drawn to the zigzag zellij tile patterns on the floors-usually done in black in white or green and white. I was also inspired by Maryam’s kitchen floor tiles. I love the dusty look of concrete tiles and SkimStone is the perfect medium to give me that.
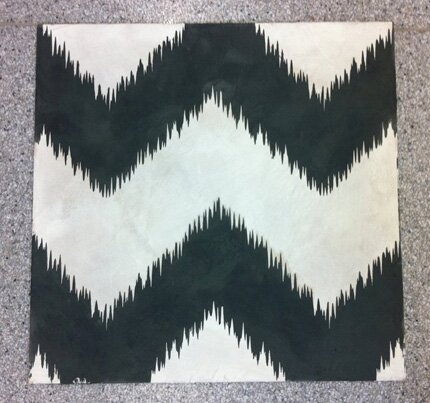
So, I came up with this sample, and havc the floor all ready prepped with the creamy white layer of SkimStone. Note: to get here, I removed the existing carpet from the concrete slab and spent some time removing the excess glue and scrubbing the heck out of it to get it super clean.
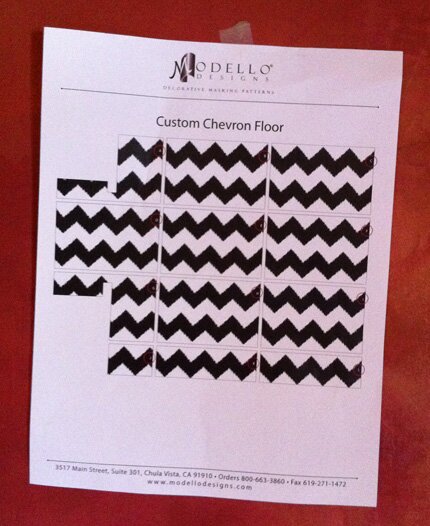
It’s going “down” this weekend, with the help of a custom-fit, Modello masking stencil, and here how it all lays out. It’s a smallish room (11′ square, more or less) and the stripes will definitely help to enlarge is visually. I will be adding an area rug at some point, but I really wanted a “neutral” but zingy (or should I say ziggy?) floor as a starting point.
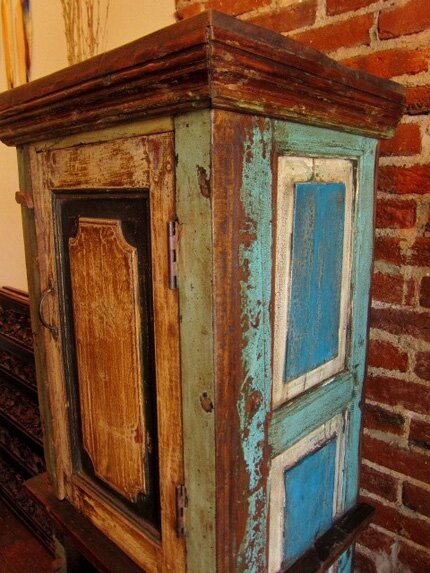
So then what? Well, after considering about 183 different options, I think I am going to do a dado, made from upcycled cabinet door parts. I am quite partial to the look of this furniture piece I saw on this “Get the Look” post on the Etsy blog. Again, it reminds me of Morocco, where they reuse EVERYthing. I will need to cobble together a mix of old pieces and new pieces that I just make “look” old. I have been dying to check out Annie Sloan’s Chalk Paint, and think this will be the perfect opportunity to do just that AND utilize a bunch of unfinished cabinet doors that I’ve had sitting around for years now ;).
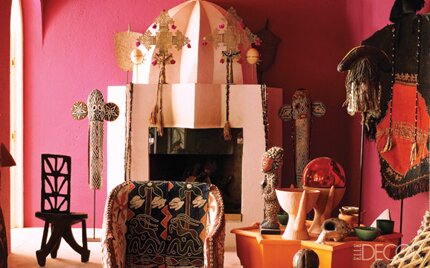
And what else?? Well I currently plan to cover the rest of the walls with an off-white organic plaster, and am DYING to do the ceiling with this pink color as seen in the May issue of Elle Decor (it’s in Marrakech-where else?!). This will probably be done with Sydney Harbour’s Interno Lime Wash.
This is unsurprisingly turning into quite a project….let’s just get the floor done first…BTW, if you were one of those who put off doing your taxes till the last day, you’re in luck! The IRS is giving you till the end of the day Monday! So….you can put it off till after the weekend….
April 13th, 2011
High Style, High Gloss
Are you loving all the digital design magazines that are popping up everywhere these days?? Personally, I prefer the feel of paper over plastic keyboards, but I find it exciting that so much design inspiration is coming through amongst the email clutter I receive daily. I was SUPER excited last week, when I got the email announcing the latest edition of High Gloss magazine. This is the second issue of this magazine, which is the brainchild of Paloma Contrares of the blog, La Dolce Vita.
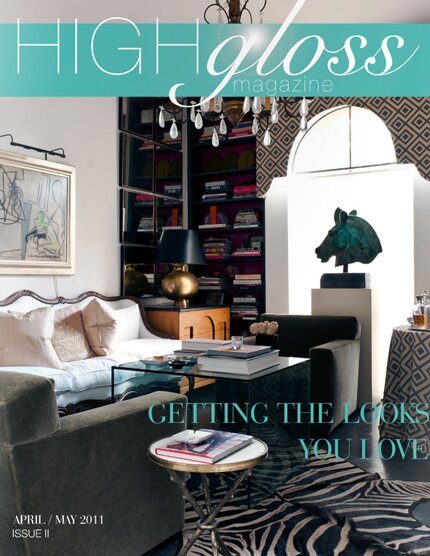
While quickly scrolling the current issue and guzzling coffee, I nearly choked when I saw one of my original stencil designs, Chez Sheik, featured on a page spread called “Get the Look” of Martyn Lawrence Bullard.
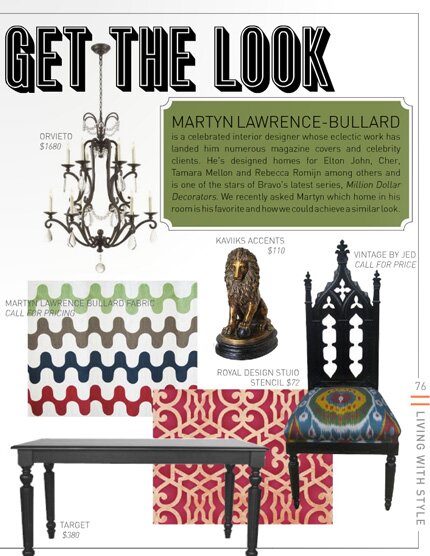
Now, I had previously not heard of Mr. Lawrence-Bullard (though I have probably seen his work multiple times!), and I dare say it’s quite possible he has still never heard of me, but I am certainly happy for the association-however small. He will be one of the design stars on the upcoming Bravo show, Million Dollar Decorators (which looks like wicked fun!) Besides designing rooms for celebs such as Elton John and Cher, he has designed a seriously awesome furniture line, as well as fabrics, rugs, and candles. I had a grand old time looking through his company website at projects like these…
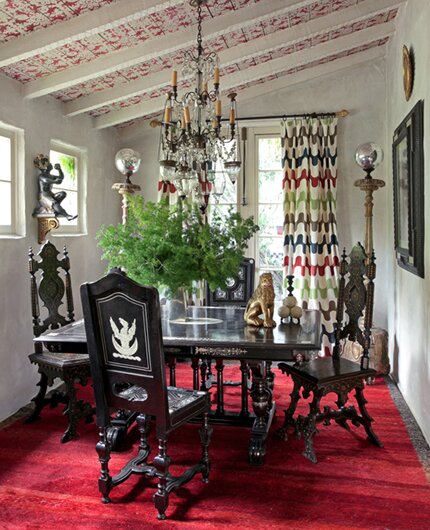
Yes, that’s a pink and white stenciled ceiling with a red rug. I especially loved seeing this as I am planning on doing a deep pink ceiling in my home office that already has an alcove done in deep metallic red tones. More favs….
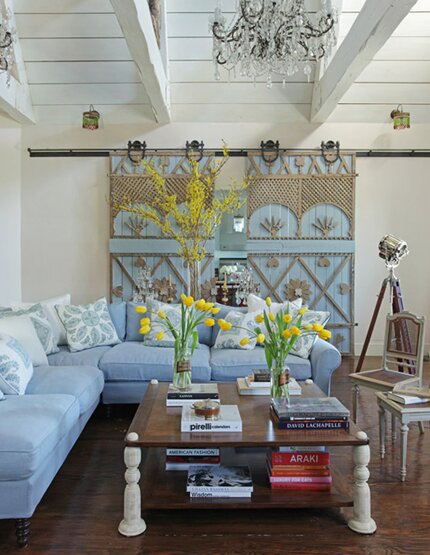
I had wanted to do big sliding doors in my work studio, but didn’t. Something like this “would have” been nice!
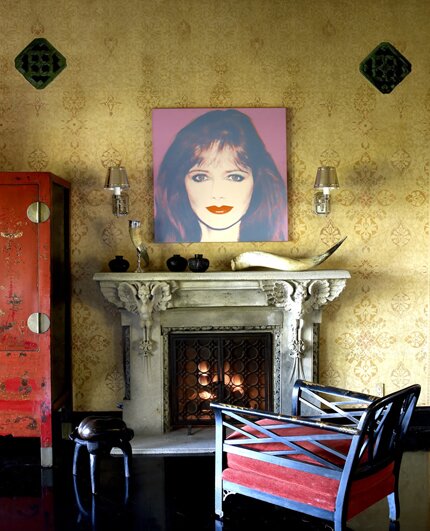
I’m not sure if this is wallpaper or stenciling, but it’s divine and Cheryl Tiegs agrees!
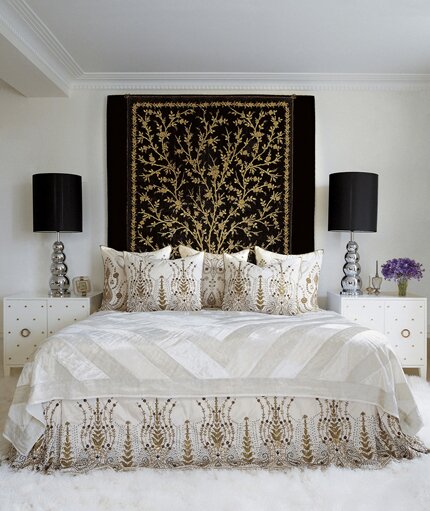
Amazing embroidery and the hanging tapestry reminds me of the black and gold mural we did in Marrakech.
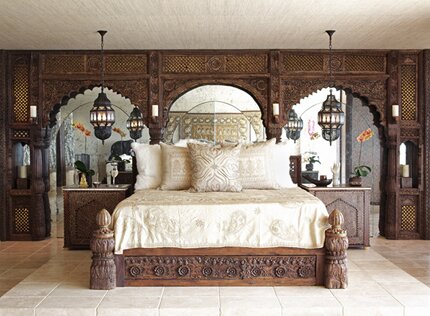
Simply put. I want that arched carving and mirrored wall!
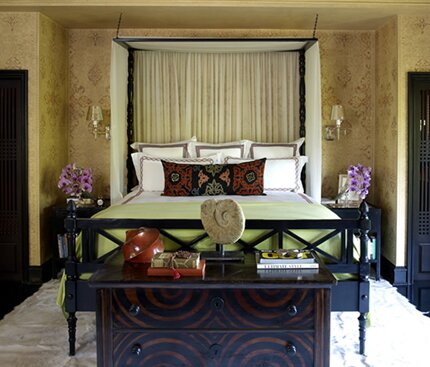
This is the same wall pattern from above. Check out the chest here.
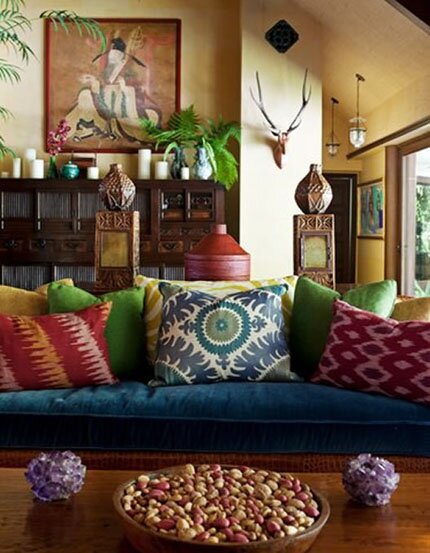
I could TOTALLY curl up with a book on this couch-and I love nuts!
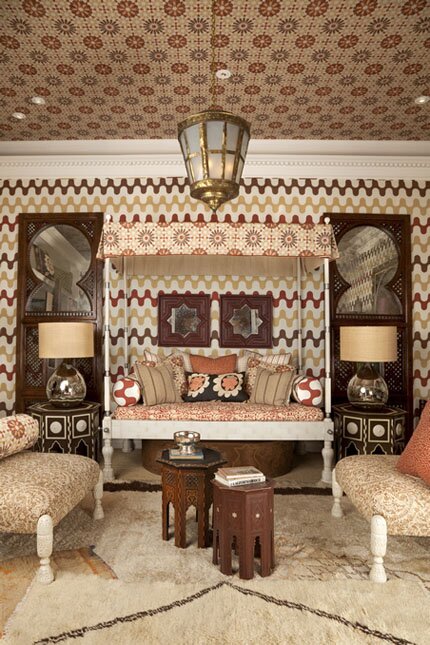
Not many people would enjoy this much pattern in a room-but I’m not one of THOSE people. Hope you enjoyed! Do you have a favorite?
April 8th, 2011
Rockin at Rocketown
It’s already been a couple of weeks since I attended and taught at the Concrete Decor Show, but it’s never to late to share a great project! I told you about it first here in this post. Besides teaching an 8 hour hands-on training class with Katrina Johnson from SkimStone, we left a fabulous finished floor at a very unique and deserving and thriving community center in Nashville called Rocketown. Rocketown was founded in 1994 by singer/songwriter Michael W. Smith as a place to give teens a positive alternative to the many negative pressures they face in the world these days.

The first of its kind in the Southeast, Rocketown has grown into a regional outreach as well as a model for faith-based relational outreach across the country. Their goal is to lead and inspire youth through creative programs and mentoring relationships that are culturally relevant and eternally significant. Participant circumstances span the range of neglect, abuse, poverty, absent parents and normal peer pressures. Rocketown engages local youth with a facility that houses a coffee bar; photography, art and dance, and recording studios; stages for live entertainment; and Middle Tennessee’s only indoor skate park. To date there have been more than 425,000 visits with an average of 1,350 teens from across Middle Tennessee participating in programs each week. It’s quite an amazing place, and we were happy to donate our time and materials to make it even more special, along with many other decorative concrete artisans who left their art in various rooms and areas throughout.

Audie Adams was one of many teens who actively participated and benefited from Rocketown’s programs and influence. A local stencil/graffiti artist, he has contributed much of the artwork that is found on the walls in the various studio rooms and offices. The project for Modello Designs and SkimStone was the recording studio/music room, and Audie provided the design inspiration that we adapted for the large floor graphic. I slightly simplified his original design concept to make it “doable” in two days and three layers, and Michelle did an awesome job of setting up the Modello stencil patterns in record time!
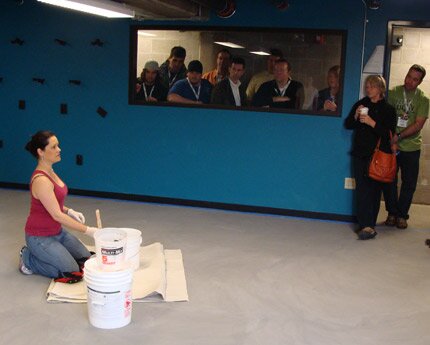
Katrina led off the class, which was a combination of hands-on and project demo, by discussing the basics of prepping for a SkimStone floor and mixing it all up. Her brother Pablo had done an awesome job of prepping the floor a couple of days early by applying a layer of their Bonding Primer over the existing finish.
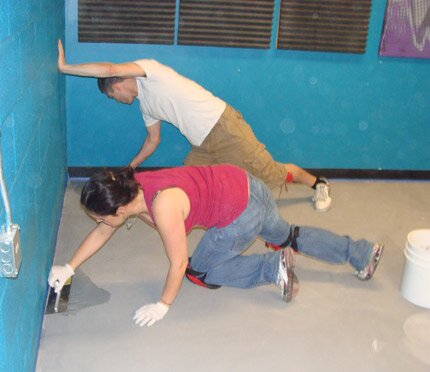
Katrina and Pablo then power-troweled out the first coat of gray SkimStone over the Bonding Primer basecoat while the students looked on.
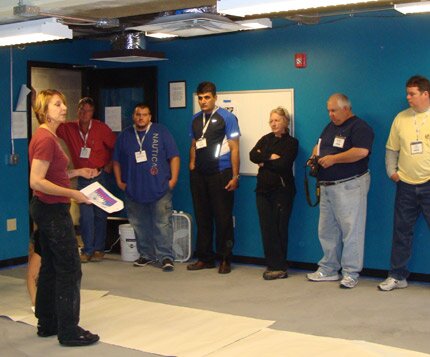
After a couple of hours drying time, I explained the design and stencil pattern process that we used and began the laying out the first layer of Modello stencils for the areas that were designated to be blue.
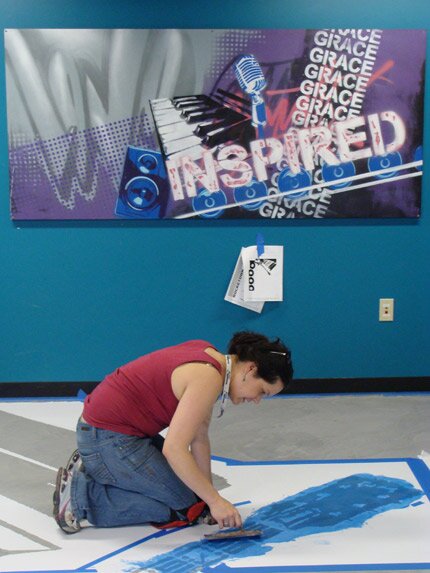
With all the vinyl stencils securely in place, we began applying an overlay of blue-tinted SkimStone. You can see the art canvas on the wall that Audie Adams created, which was the inspiration for the floor design.
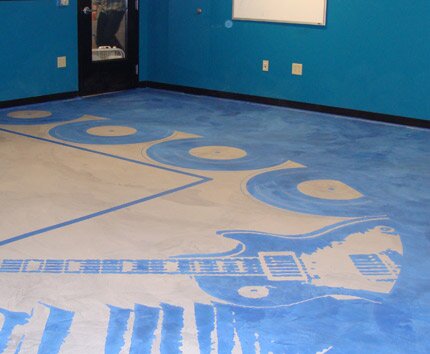
With the blue color down and the first layer of Modello stencils removed, we began the next day…
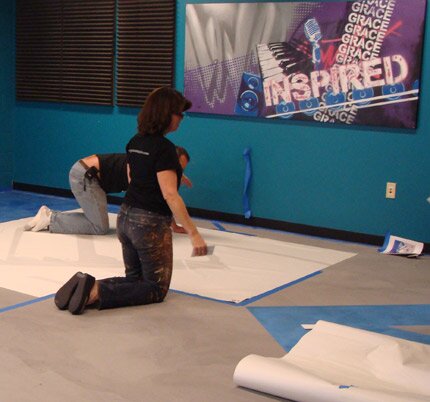
…and laid down the second layer of Modello stencils to complete the white areas of the design.
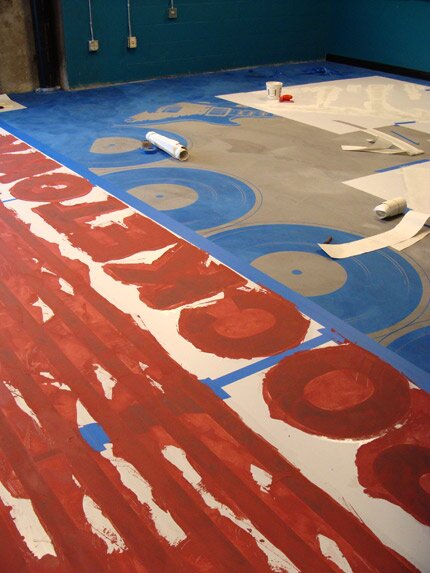
The last layer of Modello stencils added the finishing touches in bold red.
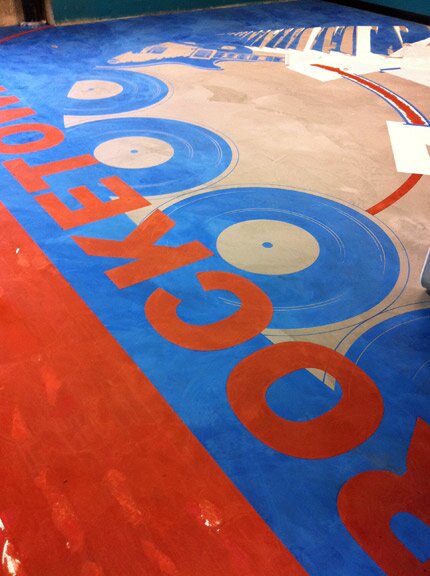
The red areas of the design overlayed right on top of the blue. Because SkimStone is an integrally colored overlay, it is possible to adjust the color to make it either opaque or translucent. We did two quick trowel layers of red for complete coverage and began removing the stencil immediately.
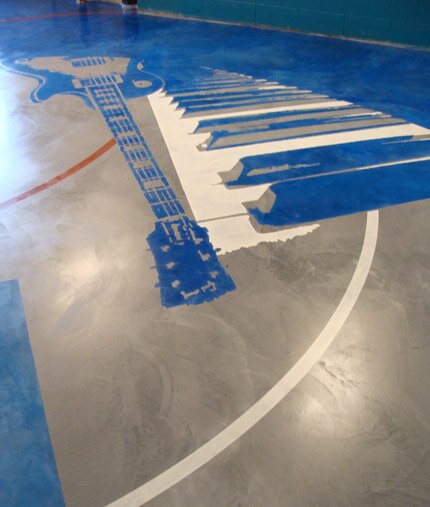
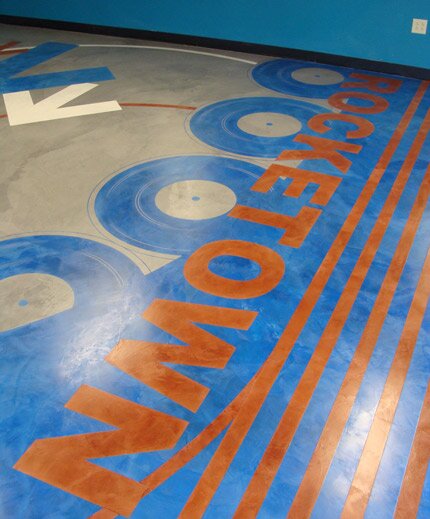
And here is the finished floor after sealing with 4 quick coats of Penetrating Sealer the following day. Rocketown reports that everyone there is thrilled with the floor, and we were so happy to be able to leave this “gift” to them!
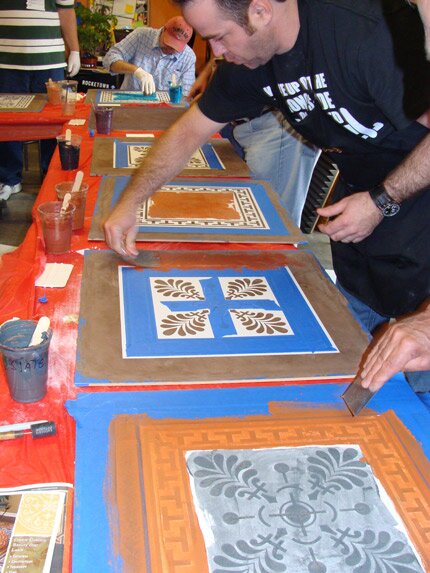
Meanwhile, as the floor was “in progress”, Katrina and I kept the students busy in the other room learning all the ins and outs of SkimStone and how to creatively incorporate Modello stencils for custom graphics and design additions. Phew! It was a very busy two days but everyone was left happy!! If you want to find out more about the Concrete Decor Show, Dana Tucker did a great overview post over on the Fauxology blog. Next year’s show will be in San Antonio, one of my favorite cities in the country of Texas!
April 6th, 2011
IDAL Again?!
It’s that time of year again! Time to reveal my age longevity, and turn my attention to the upcoming annual IDAL (International Decorative Artisans League) Convention. I joined this organization (formerly The Stencil Artisans League) in 1983 as member #31 as a wide-eyed stencil-obsessed novice. After dibbling and dabbling around with what I wanted to do when I grew up, I attended my first convention as both a stencil company exhibitor and a teacher in 1994-and the rest is “history”. Actually, quite a bit of history. I just added the years up on my fingers and toes and came up with the realization that this will be my 18th year in a row to continue with that tradition! Good grief!!
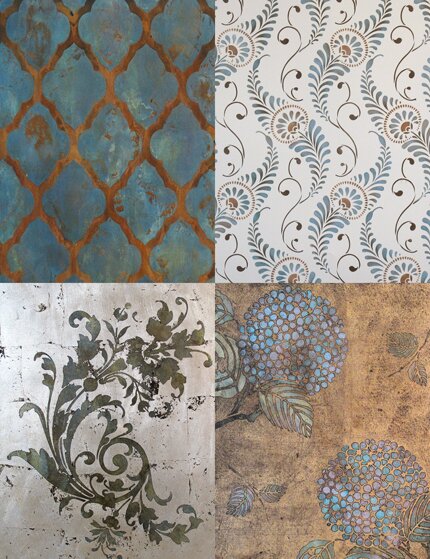
The organization and convention, like most of us, the “industry”, and the world, has undergone many changes and weathered some storms, but it HAS SURVIVED as THE place to to be, see, and be seen in the decorative painting biz. The annual convention combines one-stop shopping for the best selection of instructors, classes, new products, inspiration, networking and (dare I say) partying. It’s a great time to come together as a community, recharge our creative juices, and reconnect with what inspired us to devote our lives to decorative painting in the first place.
I will be teaching a 4 hour hands on workshop called Shining up Your Portfolio. The focus is on incorporating metal leaf, metallic foils, patinas, distressing and more with paint, stained, and plastered finishes. Each student will leave with four loverly samples, as well as our new, enlarged Japanese Hydrangea stencil and Feathered Damask stencil.
I will also be repeating the Double Vision class from last year with the incomparable Helen Morris from The Stencil Library. There are some really fabulous classes being offered this year, and the online registration makes it SO easy.You can also easily see all of the class listings on the new Artisphere Online site, which is where you will also find the official online magazine of IDAL.
This year’s convention will be helf July 20-24 in Hampton, VA, which should be a relatively easy drive for those of you living on the East Coast. As always, the Expo Hall will be open to the general public for a nominal daily fee. When I’m not teaching, I’ll be in the booth and demoing stenciling techniques nearby. Come see me!!
April 4th, 2011
Artistic Reflections
Just north of the city of Barcelona, in the soft hills overlooking the Mediterranean Sea, sits an historic, former Gothic monastery, Sant Jeroni de la Murtra.
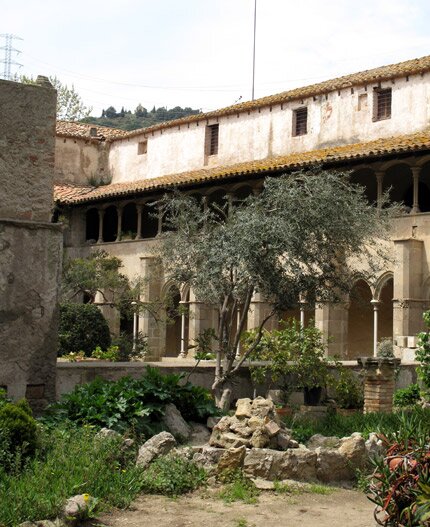
For my upcoming June painting adventure to Barcelona, I have decided to switch up the order of how I usually plan these tours and finish with the painting class and group project here AFTER spending the first week exploring and enjoying the sights, sounds and surroundings of Barcelona, Tarragona, and Montserrat.
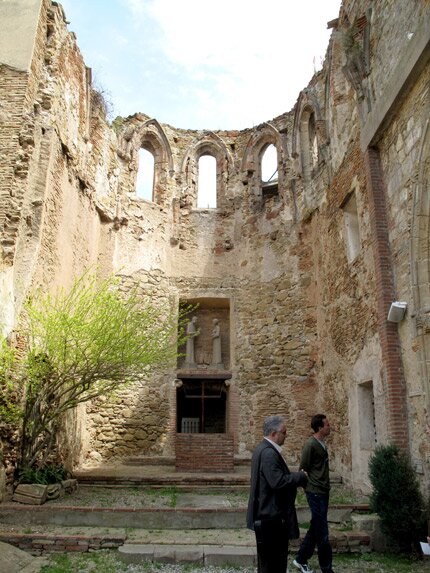
I think that this will be the perfect way to end the trip: relaxing, reflecting, hiking, exploring new painting techniques and creating original art on individual canvases (more on that later!)
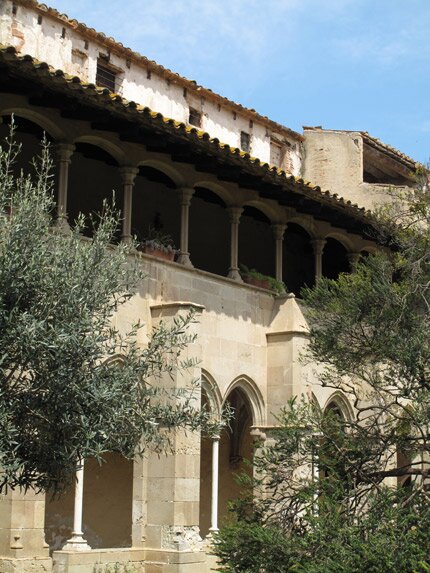
This monastery, established in 1416, originally belonged to the order of the Jeronimos. None other than Christopher Columbus met with the kings of Spain here after his first of 4 trips to the New World. It was occupied by the monks until a fire destroyed a good portion of it in 1835.
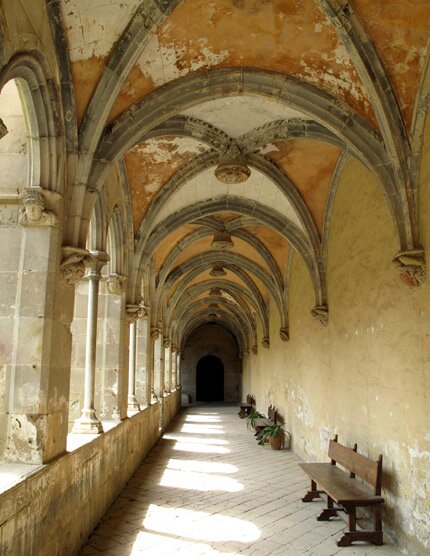
According to a translation of the Sant Jeroni website it was then ”inhabited by an interesting colony of holidaymakers” ?!?! through the late 19th to early 20th century. Hmmmm, wonder what that means?
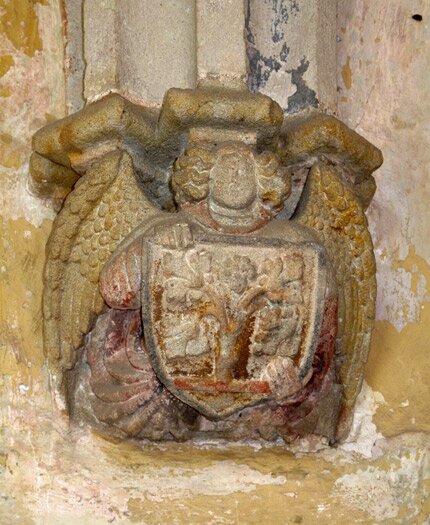
In 1947 it was purchased by Francesco Guell to begin the restoration to return it to a place of reflection, peace, and solitude.
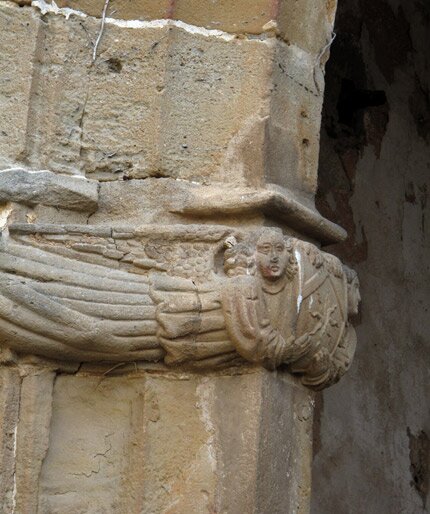
Today, it is maintained by a dedicated small group of laypersons, overseen by the charming Father Jaume, and supported by a local association, The Friends of the Murtra. It is now the sight of multicultural conferences, concerts, recitals, and art exhibits.

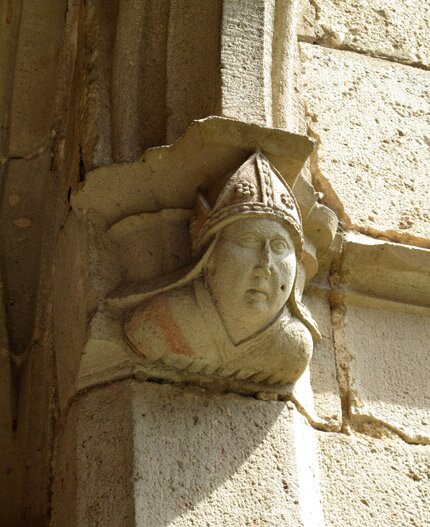
One of most beautiful aspects of the space is the open cloister, with its Gothic arches and polycrhome decoration of the sculptural elements.
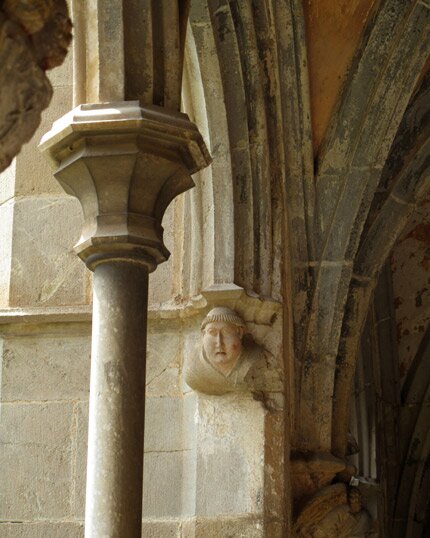
I love the faces of the individual saints, keeping careful and quiet watch around the courtyard.

If you would like to join us for an artist’ retreat in this special place, and for the rest of this AMAZING trip, we still (as of today) have 2 openings available.
You can find more details on the Barcelona Painting Adventure here. Have a peaceful and lovely day!


 Copyright © Designamour