August 17th, 2012
Protected: Rocking the Stencil!
July 19th, 2012
Stencil Star: Carmen Benoit
This week’s installment of our Stencil Star™ series has us traveling virtually to Arizona to see the incredible works of Carmen Benoit of Carmen Illustrates. She uses Royal Design Studio wall stencils and patterns in creative and unique ways for her murals, decorative paint finishes and her fine art pieces. Her love of stencil patterns and rich colors stem from her experience as a textile designer, love of design and travels.
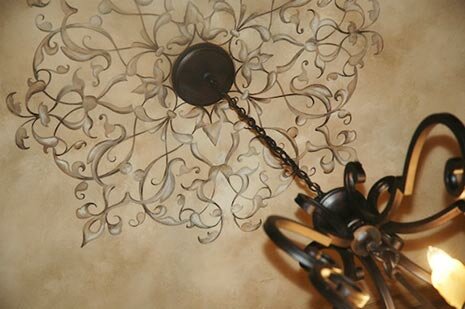
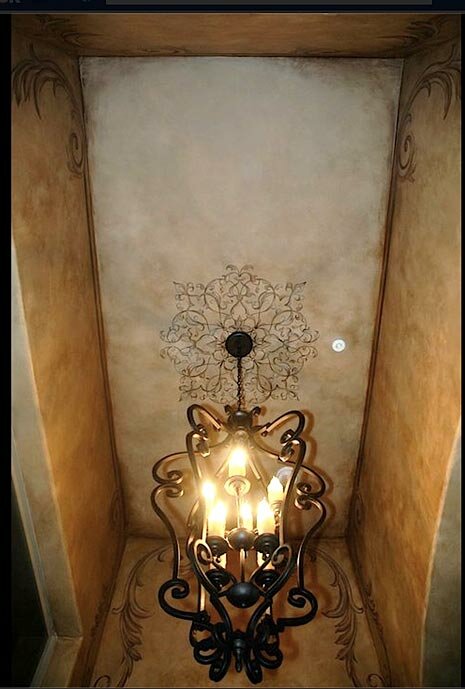
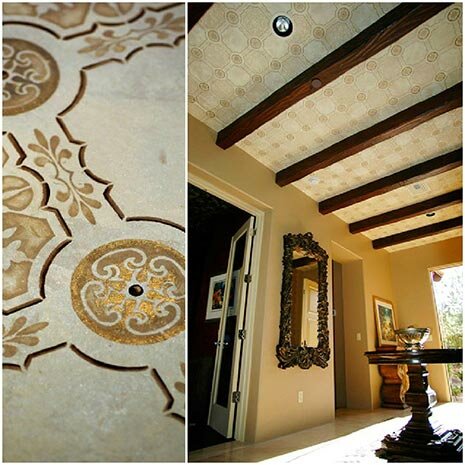
(above, below) A close-up and full shot of an entryway. A Modello Eastern Center design (EasCen135) was selected for the base of the lighting fixture and done first. Then there was glazing followed by hand painting in highlights and shadowing on the stencil design. Carmen shares, “This was the first Modello vinyl stencil I ever used and I have been hooked ever since! Its ease of application offered many more possibilities over the tracing paper method I was using before.”
ABOUT CARMEN ILLUSTRATES
Her first stop was to achieve a degree in Fine Arts from ASU. After graduating, she created textile art for the clothing industry, working for an Indian company and later for a resort wear line. Exciting as the textile industry proved to be, the direction was not fulfilling enough not where she ultimately wanted to apply her talents.
In 1998, she decided to create her own business, Carmen Illustrates, to apply her talents toward the home decor market and commercial properties. She has since painted murals and created artwork for clients all over the country. “From the beginning, it has always been about establishing sound technique––drummed into my head every time I dipped the brush…perfect the circle, push the negative space, achieve greater balance. I still remember my art instructors barking orders as they circled my canvas, arms folded. But in a unique way, it established the foundation of my work ethic. Art was a discipline and I needed to understand that,” she explains. “I love to travel and study wall finishing techniques all over the world. I enjoy life with my “official fan club” – my husband Edwin, and our two cocker spaniels, Bianca and Enzo,” Carmen says. “There is no greater reward then seeing people achieve a better quality of life through an enriched environment. I have incorporated Modello Design stencils to help enhance my environments. These products have proven to be a time saver and add a new dimension to my service offering.”
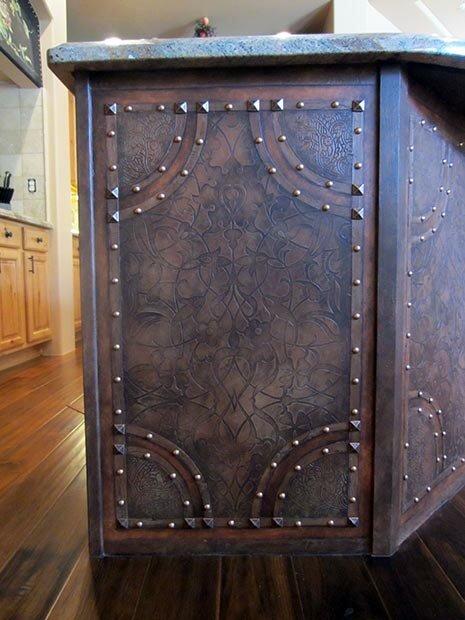
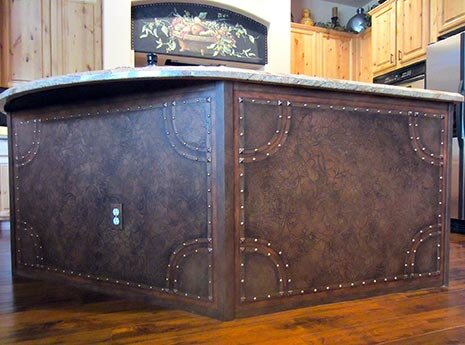
(above, below) Close-up and full shot. A plain particle board island was given a face lift in a kitchen as opposed to getting all new cabinetry. Plasters were used to create the embossed look of leather with the help of the Allover Arabesque Moroccan stencil in the central panels. The corner quadrants were created with an Indian block print. The raised seaming was done and copper tacks pounded in. On a side note, have to say that the Modello weeding tool that is included in every order came in quite handy for first creating the holes where the tacks would go!
(below) An elegant pattern in between the beams was desired so the Modello Marquetry vinyl stencil (MarqALL102) was made into a custom mylar stencil but slightly altered so that every other space was left open. (The client was concerned it might get too busy.) The ceiling inserts were done on canvas in the studio and then later installed. To this day I love the pattern and my next vision for it involves an outside umbrella!
What draws you to Stenciling?
Stenciling has become another tool just like a new brush or specialty paint. I love the ability to create dimensional effects as well as layering looks. It also is a very cost effective way to transfer a design without using the traditional tracing paper method to create a template and then to elaborate on. I am learning new applications everyday and love how I can pattern a wall, pillow, drapes or an outdoor umbrella in no time. I find the possibilities are endless…
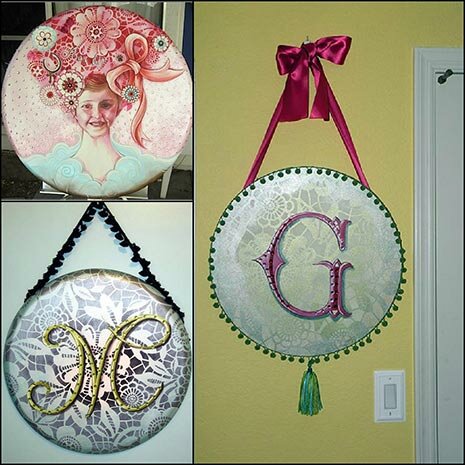
The images above are all of custom canvases done with the Skylar’s Lace Floral stencil from the Allover Damask Collection. I absolutely love this pattern and find it quite versatile!
What would be your dream Stenciling project?
Teaming up with an incredible group of talented artisans to work an exotic location like Morocco. The Peacock Pavilions Moroccan painting trips come to mind…or in a church in San Miguel del Allende (perhaps stenciling some beams with incredible patterns of color)…or being ask to collaborate on an Anthropologie retail space to enhance their environmental design. All would be perfectly fine with me!
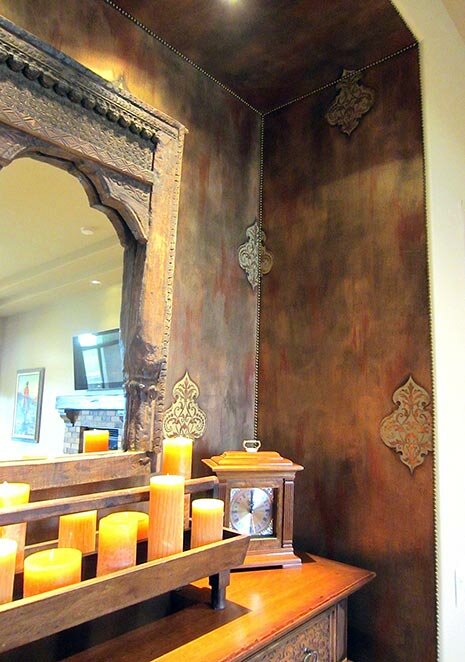
A master bedroom had two niches that required a little bling and definition. The solution? Modello Designs Turkish Emblems stencils, a metallic foil treatment and French upholstery tacking to frame it off.
What is/are your top Stenciling tips?
If there were any helpful tips I could offer based on my experience it would be to keep the stencil moist while working. Also make certain to keep it clean. I have noticed that especially when working with dimensional plasters that there is a build up of material as you work. Wiping over it with a damp rag as you work helps keep your lines clean (no seepage) through the pattern and less clean up in the long run.
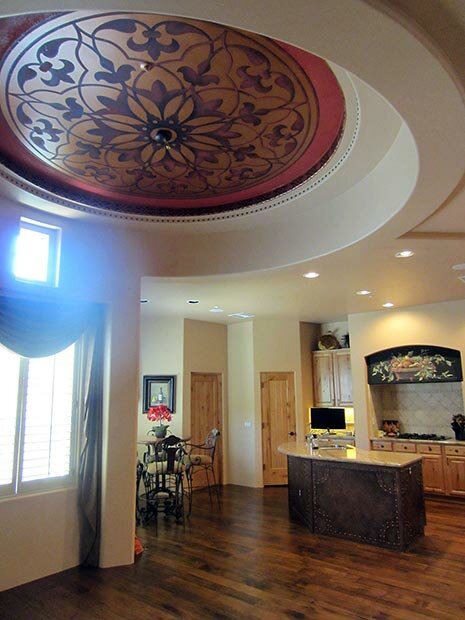
(above) “My latest ceiling was a rotunda in a dinette area. Once again the Modello design team accommodated my request of taking an Eastern Border vinyl stencil pattern (EasBor314) and adapting it into a mylar stencil. The finish techniques involve metallic paints and foils as well as glazing and Venetian plaster,” Carmen explains. For the center, she used a Modello Easter Center stencil (EasCen136) and after the Modello’s removal, hand painted details were applied. Tacks were added as a finishing touch. You can spy the embossed leather island in the background.
It’s been such a pleasure sharing Carmen’s stencil and Modello pattern work with you! I am also really enjoying learning more about the backgrounds of our artists through this Stencil Star series! Her talent, education and textile design background really show through in her attention to detail and quality of her work, don’t you think? To see more of Carmen’s talents do check out her website, Carmen Illustrates, and follow her projects on her Facebook fan page.
July 12th, 2012
Stencil Star: Maggie O’Neill
In this weeks installment of our weekly Stencil Star™ series, we feature the hottest restaurant designer in D.C., Maggie O’Neill of O’Neill Studios. She and her team of artists create some of the most innovate decorative painting finishes incorporating Royal Design Studio wall stencils and patterns in her creative, contemporary projects. She also weaves in fresh color combinations and stencil designs in her fine art pieces. I first met Maggie when she came on our 3rd Peacock Painting adventure to Marrakech: The Tent Trip! I can tell you that she is even more fun than she looks!!!
Maggie O'Neill
ABOUT O’NEILL STUDIOS
Maggie O’Neill is a Washington, DC based fine artist and the Creative Director of O’Neill Studios, the decorative painting company she founded in 2001. Maggie attended the College of the Holy Cross in Worcester, MA and pursued a Masters Degree of Fine Art at the University of Georgia, enrolling in their Cortona, Italy program. “In Italy, I was moved by the rich art history of the Renaissance and the integration of commissioned fine art during this period,” she says. Maggie focused on drawing and painting (concentrating on portraiture) and the decorative arts, with her studies also including Fresco painting.
After Italy, Maggie continued to travel, eventually living and working in Tamarindo, Costa Rica, where she completed her first commercial exterior mural. “It was at this point that I fell in love with the creation of utilitarian and public artwork that the surrounding community could enjoy.”
Returning to DC, she decided to continue working in the vein of commissioned artistry and opened O’Neill Studios in 2001. In the time since, Maggie has built O’Neill Studios into one of the most well-respected decorative finishing companies in the Washington area. The team’s productions can be seen in some of the city’s most notable private residences, embassies, churches, restaurants and commercial spaces.
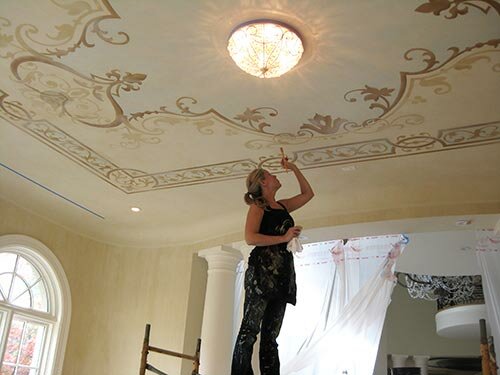
A custom Modello vinyl stencil design on a restaurant ceiling.
How do you determine which pattern will work for your project?
There is never just one determining factor of why or what pattern I will propose to a client. Sometimes we have an inspiration paper or fabric to work from and the project becomes about replicating the same properties; scale, color, etc. I typically think about the following three features of the space to select patterns and stencils that will work: Style, Scale and Palette. What is the style of the space? Does it require something stylized with a high level of impact or something more delicate and understated? What is the existing palette working in the space? Do we need to introduce more color or keep it a neutral pattern to create a backdrop for other features or artwork? What features in the room allow us to play with the scale of the pattern?
I think to have a stencil custom-made to scale for your space is the smartest thing anyone can do when introducing allover pattern. You may love a pattern on a sample fabric or even an item of clothing but it’s not right for your ceiling or the back of your bookshelves. Any of these things can direct you to the right stencil and technique. I highly recommend doing some research into the style or look you are trying to achieve before purchasing. Also, cutting out shapes to the scale of what your thinking and understanding where they will repeat and run off, measuring the space to understand where it will start and stop is also helpful.
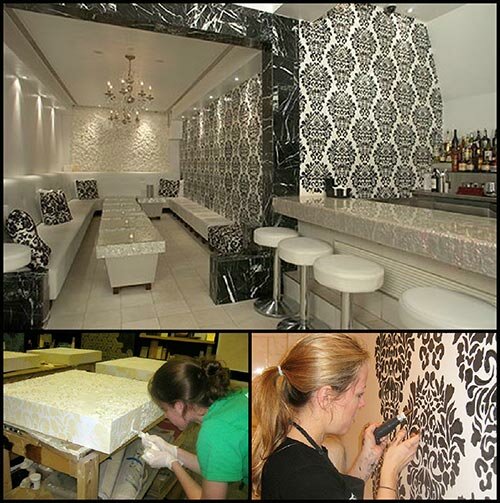
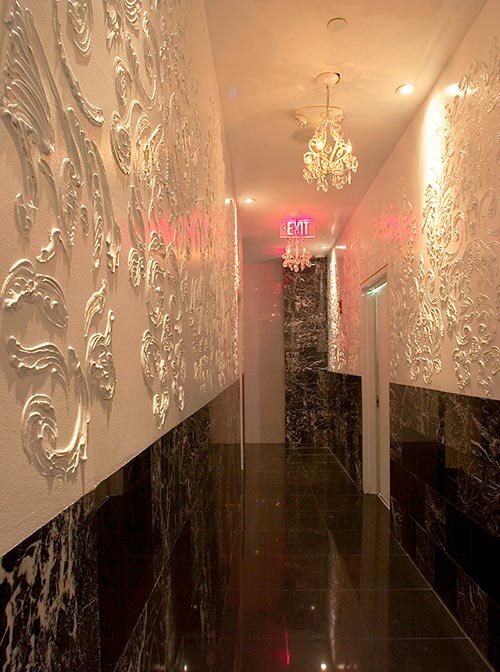
At the OYA Restaurant in DC, Maggie and her team add 3-D elements to the Allover Fabric Damask stencil for both furniture tabletops and walls. So inventive!
Please share your top Stenciling tip with us.
My favorite technique is a bit messier then the average application. I enjoy seeing the interruption of one color and the introduction of another. I also prefer to see a bit of depth in the application. For this reason my favorite technique is a drop shadow or a “pulled silk” effect. This is at least a two layer stencil technique. The first layer of glaze or paint is a bit slippery so that it has a longer open time and transparency. Immediately after you stencil, you use your brush like a strie brush and pull through the pattern lightly. Pulling one direction is important. I prefer to use gravity and pull down. The second layer is the same stencil (cleaned off of course) and place the stencil about 1/8- 1/4 of inch above where you originally set the first layer. Using a lighter more opaque color is helpful to achieve a raised appearance. This creates the look of hand worked fabric or pulled silk or ikat look.
Maggie also enjoys creating fine art pieces and incorporating stencils within. Here, the Intricate Zelij wall stencil from the Allover Moroccan Stencil Collection supports the supports and enhances the beautiful central figure.
How does stenciling enhance your creative business?
My business is ALL about how creative I can be for my client and how can I work with what they already have. Turning something totally ordinary to something extraordinary has been the cornerstone to my business. Initially, stencils gave me the ability to offer high impact results with relatively quick turnaround and affordable prices. However, stencils have pushed open new creative doors for me as an artist and designer. I experiment with more techniques and applications that include 3D elements and unconventional methods . I am constantly looking to wallpaper and textiles for inspiration and take note of the techniques used to create nuances in each design.
Maggie working with our one of our Modello Ornamental Center patterns (OrnCen162) in a more traditional space.
Stencils are tools this are just as important as the paint itself, allowing me to explore new methods. I now examine every space and surface with a different perspective and understanding of how to embellish or apply pattern. I realize that you don’t need to stencil everything BUT YOU CAN! The creative options stencils have introduced have overflowed in to my own fine artwork and now end up in most of my paintings. Stencils have been a juggernaut for my creative business and have opened the doors of my portfolio to include fabric for window treatments and table runners, wrapping paper, furniture makeovers, and even clothing.
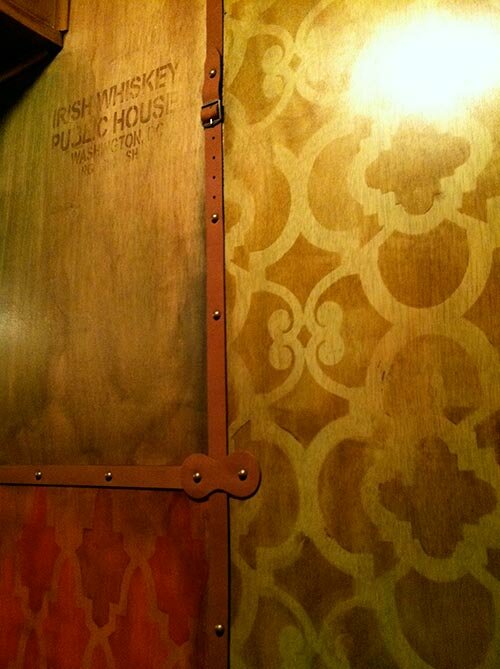
At the Irish Whiskey Lounge, Maggie mixes both Modello vinyl stencils and traditional mylar stencils to incorporate multiple patterns, textures and typography to create an unforgettable stairway. Pictured is our Endless Circles Lattice, the Moroccan Arches and Chez Ali stencils — all from the Moroccan Stencil Collection.
Maggie is a creative visionary who designs incredible, contemporary spaces. Do yourself a favor (and be prepared to spend some time!) by browsing both her sites, O’Neill Studios and Maggie O’Neill Fine Art. For a more personal look, follow Maggie and her painting team via her two Facebook pages, O’Neill Studios and Maggie O’Neill Fine Art as well.
June 26th, 2012
How to Stencil Workshop
Have you ever wondered how to stencil like a pro? Did you know that I’ve been teaching stencil classes for almost 20 years? Geesh! That’s a LOT of stenciling!! It’s been quite a few of those years since I offered beginning stencil classes, but with the resurgence of interest (THANK YOU!) in stencils lately I decided to dust off my basic stencil skills and start sharing them again in a hands-on stencil class at my studio here in San Diego.
Now, I realize the most of you reading this quite possibly DON’T live in San Diego, but on the off chance that you do or maybe lucky enough to have someone here to visit, I thought to share….We cover basic stencil techniques as well as how to stencil emboss, stenciling with glazes, stenciling on wood with stains, fabric stenciling, and more. It’s a super fun, 5hr class that will teach you all the basics and inspire you to spread your creative wings and fly-held here at the home of Royal Design Studio stencils.
April 9th, 2012
Stencil Amour Pinterest Contest
I pin. You pin. We all pin for a stencil win! I know that many of you are already BIG Pinterest fans (like me!), as well as Royal Design Studio stencil fans. SO…..we are so pleased to announce our first Pinterest pinning contest, Stencil Amour. This is your chance to pin all those stencils you’ve been coveting in one place and possibly WIN a $250 Shopping Spree.
We’ve set up the contest rules and commenting to enter on our new Stencil Ideas Blog on our stencil website. Go to the post there to see the easy rules for entry and start pinning your fav Royal Design Studio stencils to your own Royal Design Stencils Love Pinterest board. Then, keep your fingers crossed that you will be the lucky winner of a super $250 stencil shopping spree. Don’t forget to enter the contest by commenting on the post on Royal Design Studio. Good luck to all you pin-happy people!!
April 3rd, 2012
Fab Furniture Stenciling
It seems like everyone is painting and stenciling furniture these days. And why not? Furniture makes a great little canvas for stencil patterns and you can accent details like table tops, drawer fronts, door panels SO easily and quickly with stencils. The availability and popularity of the the amazing Annie Sloan Chalk Paint™ is inspiring people all over the country to scour thrift stores and flea markets for furniture pieces that can be transformed in a day with some creativity and a can of paint!
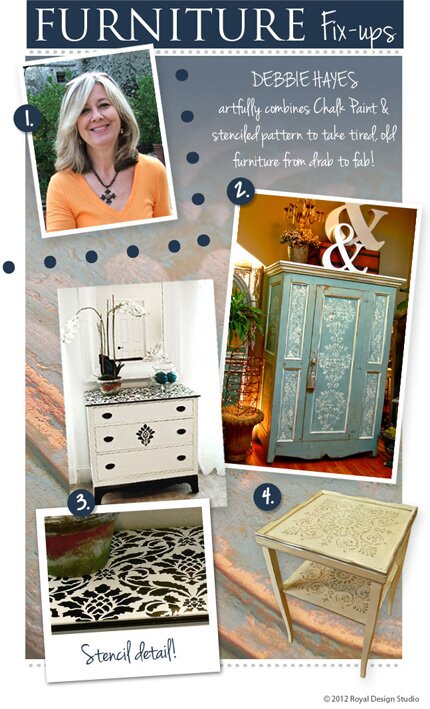
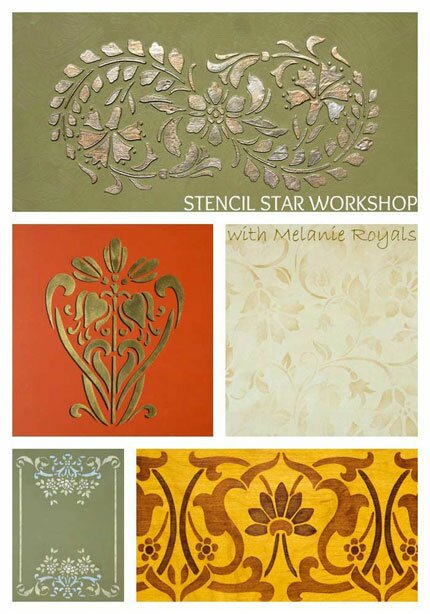
One of my friends who has caught the furniture painting bug bad good, is Debbie Hayes of Faux Design Studio. Debbie is a long-time decorative artist who has the MOST amazing studio in a converted fabric mill in Greensboro, NC. There she paints endlessly (it seems!), sells her one-of-a-kind furniture pieces and also teaches others how to do the same. Debbie has such an artful approach to using Chalk Paint™ and stencil patterns we were inspired to create this lovely graphic to showcase her work.
You can find all the details about the Royal Design Studio stencils and Chalk Paint colors Debbie used in this Fabulous Furniture Stencil post on our website. I hope it inspires YOU!
March 29th, 2012
Stencil Project Featuring…You?
There is nothing more inspiring to me than to see finished projects that our customers have done with our wall and furniture stencils! One of the things I am most excited about is that our new stencil website give us the ability to SHARE these projects with others on a weekly basis on our Stencil Ideas Blog-right from within the site! I want to encourage you all to share YOUR projects with us, because we really want to show you off!!
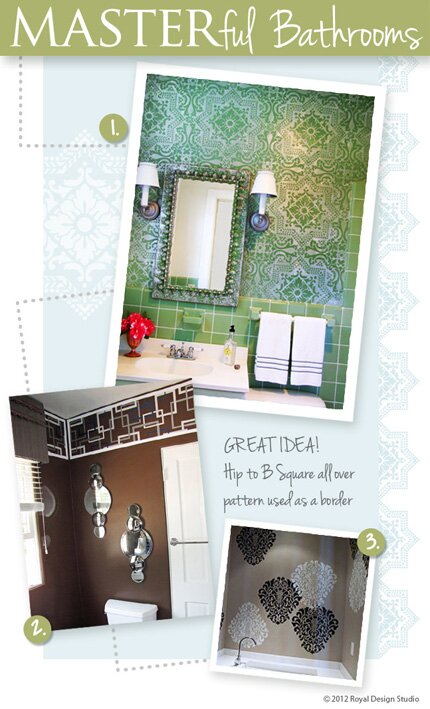
Here is one of our first features showing stylish stenciled bathrooms. Bathrooms can be super fun to stencil because they are little rooms unto themselves and you can be a bit bolder with your choice of color, pattern, and scale-if you want! These three stenciled bathrooms show a nice range of ideas.
The first photo from Michelle Lopez of Sparkle Faux Designs features an allover stencil pattern treatment with our Lisboa Tile stencil. Stenciling an allover pattern in a bathroom can be a bit of a challenge because you generally will have more obstacles and areas there you have to “cut in” with the design: corners, fixtures, tile, and molding. The end effect is super stunning, though, as this photo shows. Believe it or not, allover pattern treatments actually help to visually “push out the walls” and can make small rooms seem bigger!
The second photo by Karen Jorgenson of KJ Decorative Finishes offers a brilliant alternative treatment for an allover pattern stencil. Here, Karen took a modern allover stencil Hip to B Square stencil and turned it into a graphic border. You can achieve this by using tape to mask off and paint a “frame” of pinstripes and simply stencil the allover pattern within them. I think that this amount of pattern and color is just the right compliment to the dark painted walls that offset the bright white paint and fixtures. VERY punchy!
The third photo shows another way to create the look of an allover design without stenciling every square foot of wall space. This works particularly well for a feature wall. Here, Rina Krumholz using our Grand Damask stencil and stenciled it randomly around the room in two different colors. By layering the designs here and there and turning them upside down occasionally, you can quickly stencil a unique custom look that fits your space-something you could NEVER get with wallpaper!
So-how about you? Do you have some stencil tricks and special projects up your sleeve that you’d like to share? We’d love to see them and possibly share them on our website. Please send pics of your projects using Royal Design Studio stencils to [email protected] and let’s keep the inspiration flowing!
March 28th, 2012
New Stencil Site Has Arrived!
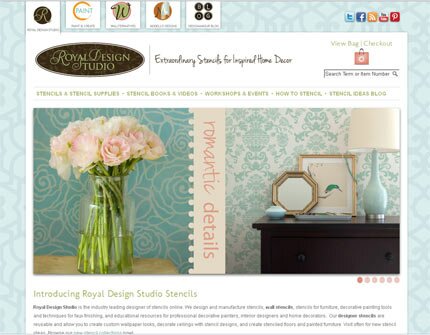
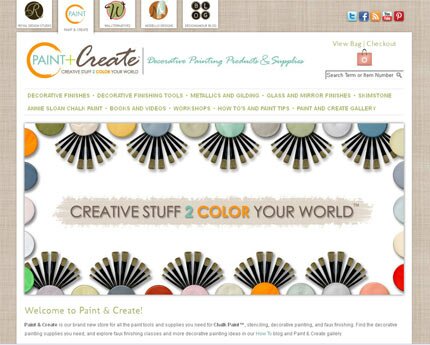
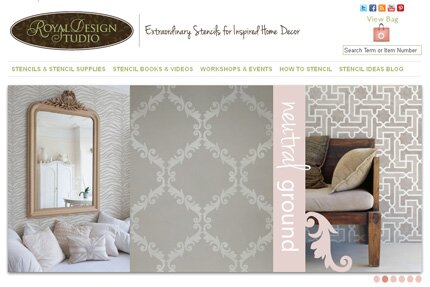
It’s HERE! After months, years really, we have our new Royal Design Studio stencil website to unveil. Actually, it’s a Royal Design Studio stencil website 2.0, because we’ve taken the leap to putting multiple sites within a site. There is still a lot of work to do and much to add (isn’t there always???) but we have started off with our stencil site, seen below, and a new site called Paint and Create (more on that later)!
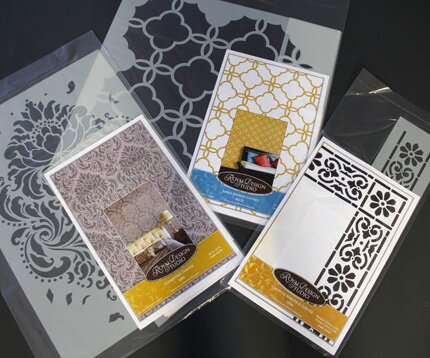
Leading off is Royal Design Studio-the original stencil business I founded in 1994. It still looks pretty fresh, doesn’t it? Kind of like me. *cough*. The primary feature of this site is our stencil collection, of course, and we have done some fluffing up by adding cool, new graphics and reorganizing our stencils into new, more logical categories.
For instance, we broken down our Allover Damask Stencils into subcategories like Allover Floral Stencils, Allover Moroccan Stencils, Allover Modern Stencils, etc. so it’s easier to pinpoint that perfect stencil for your feature wall!
Furniture painting is uber-hot right now. Actually, it’s been popular 4ever and we’ve always had a wide range of stencil patterns for furniture painting. Difference is-now they are easy to find all in one place.

Want to create a global vibe with wall stencils? In addition to our popular moroccan stencils, we have categories for Japanese Stencils, African Stencils, Indian Stencils and more.
Another new category on the site is Children’s and Nursery Stencils. My very first attempt at stenciling was back in 1984 when I stenciled my son’s nursery with a border of my own design of ducks, hearts, and rocking horses. Alas, you won’t find THAT design here, but there are lots of cute floral stencils and lots more fun designs in the works.
Your notice that there are now tabs at the top of the site that lead to different areas. Some of these are still in progress, but we have finished up our new decorative painting site Paint and Create. This is where you will find all the cool tools and decorative painting products that you can use alone or combine with our stencil and Modello Designs masking patterns.
Of course, we are super happy to be carrying the full line of the amazing Annie Sloan Chalk Paint. This is the ORIGINAL Chalk Paint™, developed by Annie Sloan 20 years ago in England as the ultimate furniture paint.
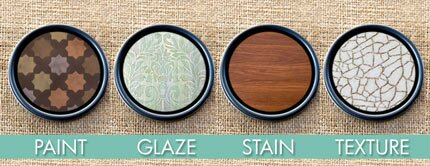
Almost from the beginning of my stencil career, I have used stencils in combination with decorative and faux finishes. I find it so much more interesting to combine pattern with glazes, crackles, metallics and textures and you can look for lots of information on how you can too now and in the future in our Paint How-tos and Tips area.
Speaking of metallics, we have a whole section devoted just to Metallic Paint, Metal Leaf and Metallic Foil. Here’s a way to indulge in all of your gilty pleasures without an ounce of guilt! Who doesn’t want and need a little more sparkle in their life?
OK, that’s just a little peek into the new site. It’s still a bit of a work in progress and I will be sharing more in the coming days, but please check it out and browse around for yourself and let me know what you think and what more you’d like to see!
January 20th, 2012
Sneak Peek: New Stencil Site
I have something to share with you.
This something has me feeling excited, stressed, creative, anxious, thrilled.
This something keeps me focused, overwhelmed, engaged, up at night.
This something can’t happen soon enough. This something seems like a project without end.
This something is something that I hope will thrill you. This something is something that I hope doesn’t kill me.
Website (and blog!) redesigns. Coming soon. Fingers crossed.
January 10th, 2012
Floorcloth Fancy
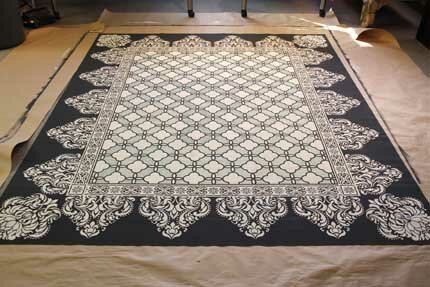
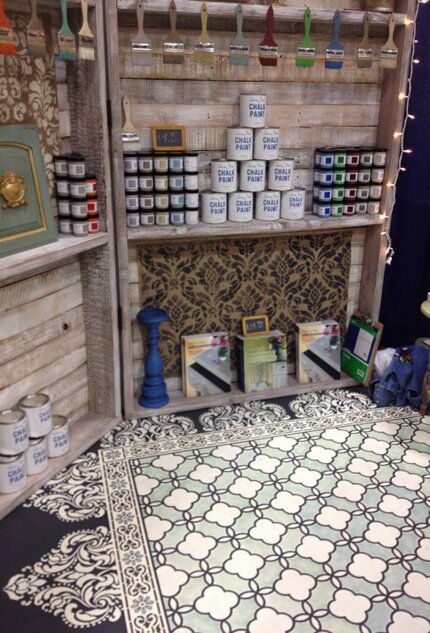
I created a stenciled vinyl floorcloth using Annie Sloan Chalk Paint recently for a booth display that got rave reviews so thought it would make a good step-by-step tutorial to share!
Stenciled floorcloths (sometimes referred to as oil cloths or floor canvases) have a long history of use in both England and the United States. Often made from recycled canvas ship sails, painted and stenciled floorcloths offered a less expensive and more hygienic alternative to carpeting and were used extensively in homes both grand and common prior to the invention of linoleum. Most modern day floorcloths are still made from heavy canvas, which requires priming, stretching, and hemming. As I was looking for a quick and easy alternative-fast-I turned to another modern option: flooring sheet vinyl!
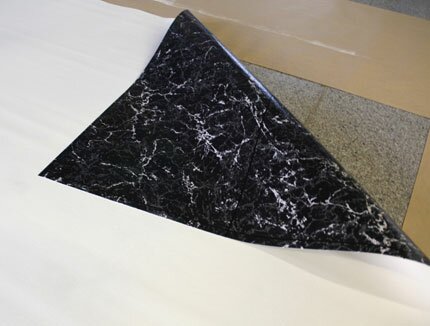
Now, as you know, sheet vinyl comes in many different colors and patterns including brick, tile, and more. Because I wanted a nice smooth surface and blank canvas for my floorcloth, I chose a roll of sheet vinyl that had a smooth, felt-type backing and painted on THE BACK side. NOTE! I just purchased a very inexpensive, thin vinyl that was pre-cut and prepackaged for my trade show floor, but if you are doing this for yourself I highly recommend that you go with a much thicker, harder, and better quality vinyl.
After applying a coat of white primer and allowing that to dry, I rolled on two coats of Graphite Chalk Paint. Now, you could use any latex and/or acrylic paint for a floorcloth. I happened to choose Chalk Paint because
- I love it, and
- I was showcasing Chalk Paint in my booth!
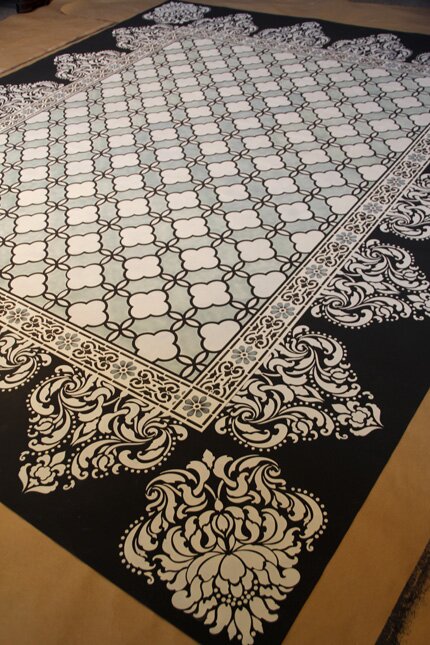
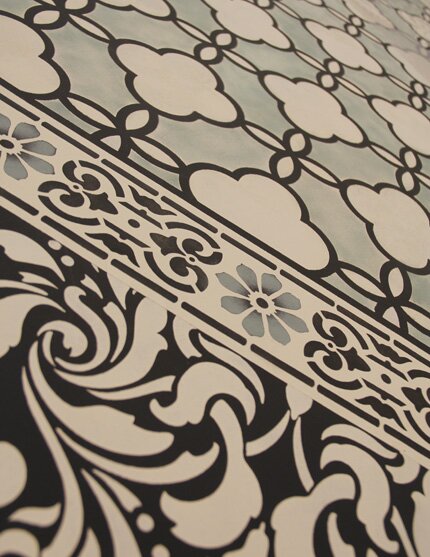
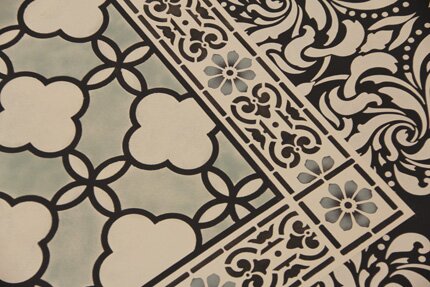
I found it super easy to use on this large scale and quite ideal for stenciling! I LOVE combining complimentary stencil patterns on a project and this large 8′ x 10′ surface provided lots of space to be creative! I decided that I would use our Large Eastern Lattice stencil as the centerpiece and frame it with the Classical Border and Corner stencil. For a lacy scalloped edge, I chose the Florentine Damask stencil, with plans to just have the bottom portion of it coming off the linear border. When picking patterns to go together, I generally look for ones that offer a variety of scale but also contain unifying elements. To my eye, the lattice pattern has a petal effect that is echoed in the border pattern. The border pattern has some small dots in it which are echoed in the damask pattern. Works for me!
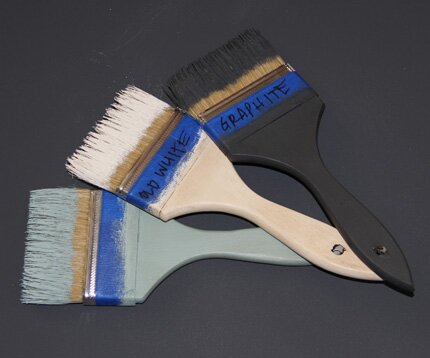
For a color palette, I chose Old White and Duck Egg Blue over the Graphite. I think that the addition of the Graphite with these soft, classic colors adds a little big of a fresh modern edge.
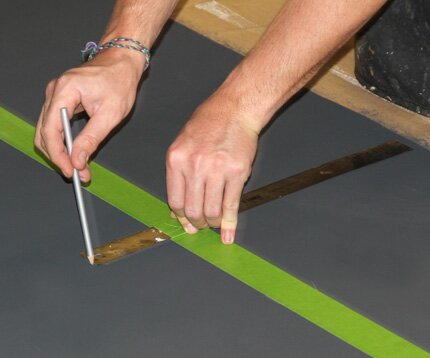
The first step was to determine where to place the Classical Border and Corner “frame”. Since the Eastern Lattice stencil is a symmetrical allover pattern, I knew that that could be repeated as much or as little as needed, but I HAD to determine how much space to leave at the edge for my Florentine Damask “lace edge” on my 8′ by 10′ floorcloth. We then measured 14.5″ in from the edge, made tick marks with a chalk pencil and ran tape on the outside of those marks. Then we measured in 4″ from there (enough to accomodate the border design and ran tape on the inside of those marks to leave a 4″ opening between the strips of tape.
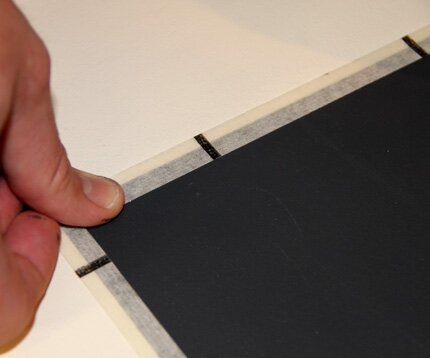
We burnished the tape well and rolled on two coats of Old White Chalk Paint with a short-nap 4″ roller (not shown). When dry, we used a translucent tape to overlap just inside the frame. This was placed at roughly the width of the lines of the lattice stencil to preserve a nice black outline there. If you don’t have a similar tape you could mark lines and use blue or green painter’s tape.
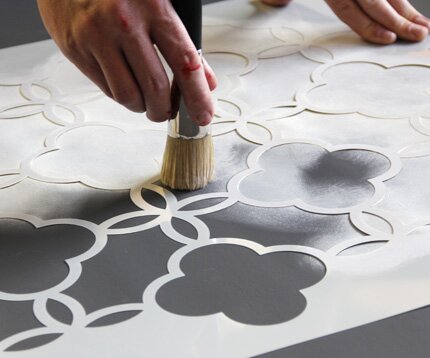
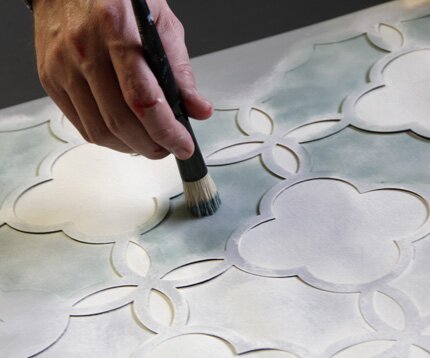
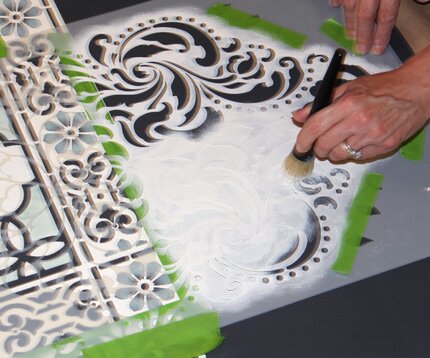
Now to the stenciling! We measured to locate the center of our large inner rectangle and centered one of the cloverleaf elements over it. This ensures that your symmetrical pattern will end the same at opposite edges. I used our new larger 2″ stencil brush to stencil the whole design first with Old White Chalk Paint. The Chalk Paint covers very well, but it did take two passes to get full coverage with the white. Fortunately, the Chalk Paint dries SO quickly that you can go immediately back over it. This isn’t possible with latex paint-you must let the first coat dry so you don’t lift it off by going back over it too quickly. Of course, I used a dry-brush method with the brush, meaning I dipped just the tips of the bristles into the paint and offload a bit onto paper towels before stenciling.
The Duck Egg Blue color was then stenciled right over the Old White, JUST in selected areas of the design. In order to avoid the hassle of taping off the pattern to isolate this area, I simply switched to a smaller, 3/4″ brush which allows for more control. You just have to be careful as you near the edges to keep the bristles from creeping in the areas you want to remain white.
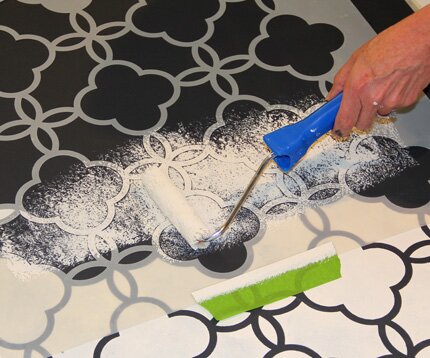
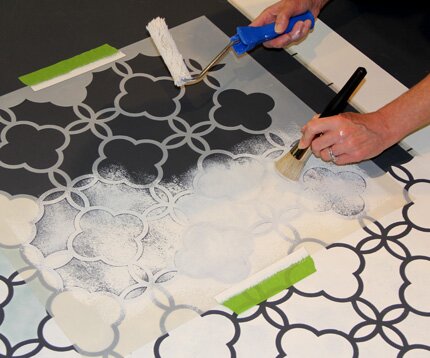
After a few repeats like THAT I decided to try for a speedier method. The dry brushed method looked fabulous, but I was in a time crunch, as always! I switched to a roller/brush combo that worked quite well with the Chalk Paint! After offloading the roller slightly (again on paper towels) I used a light pressure to roll the wet paint onto a portion of the stencil repeat.
Then, while the paint was still wet, I used the brush to smooth and swirl it out on the surface for the first layer. This was definitely faster, but I did have some paint seepage here and there which I touched up easily with Graphite at the end. Once I switched to this technique I just continued on doing all the white and then went back and replaced the stencil to apply the blue.
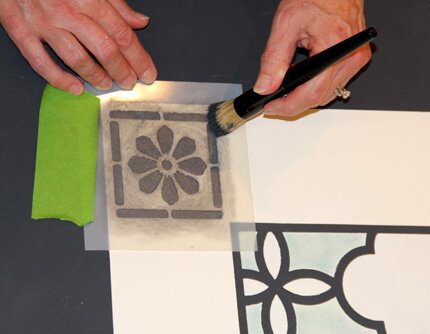
Next up! The stenciled border. The Classical Border and Corner stencil is perfect for this because it comes with a corner tile piece that gets stenciled in the corners and the border design can simply run in between. These were visually centered in the corner area and stenciled in the Graphite Chalk Paint again.
To finish off the border with a nice clean edge, simply use the edge of the corner piece to mask off and protect the area, leaving a nice open space that mimics the stencil “bridges”.
The border design was centered in the space between the corners (simply mark the center point and place a central element right over it) and then stencil with the repeat until you hit the corner. This way, your design will naturally end at the same point on opposite corners.
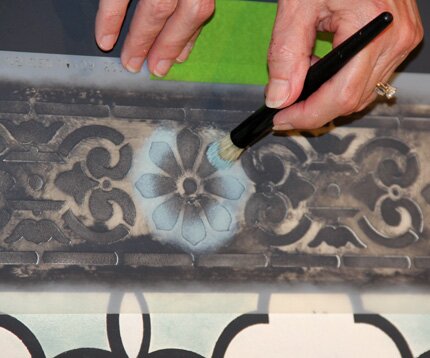
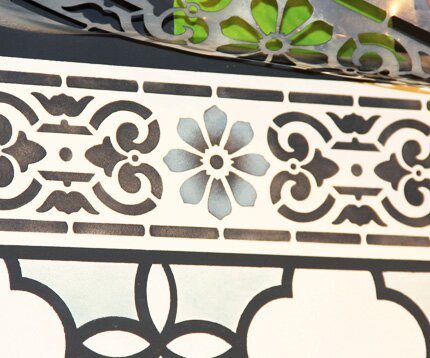
I wanted to bring a bit of the Duck Egg Blue Chalk Paint color into the border pattern so used a dry-brush technique to shade it just around the outer edges of the flower petals.
Voila!
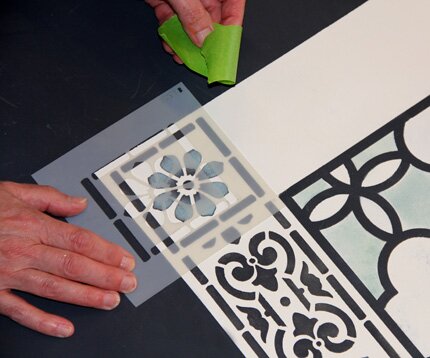
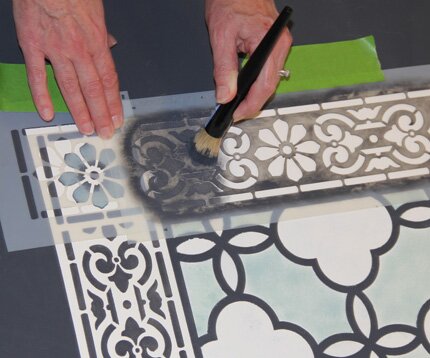
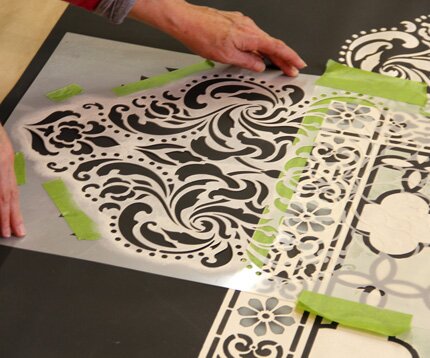
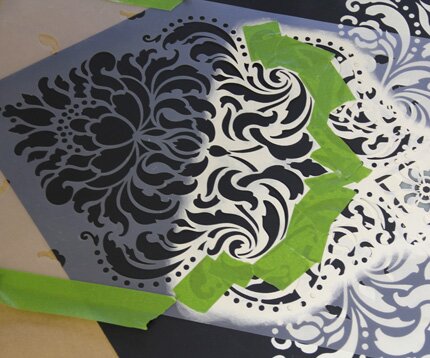
For the lacy edge, I positioned the Florentine Damask stencil at the same point each time. Notice that tape was placed over the border area to protect it from having Old White paint creeping into the black parts of that design.
I began by stenciling on either side of the corner first and dry-brushed on two quick layers of Old White Chalk Paint. Once I had my corners done, I spaced the damask repeats out equally along each side between the corners. On the long edges I was able to stencil 5 repeats total, and 4 repeats total along the short edges. How much space you will have will depend on the size of your floorcloth and it’s best to measure plot it out on paper beforehand if you are doing a different size than our 8′ x 10′.
I could have left the corners as is, but wanted to add a little more detail, so I flipped the stencil around and played with it till I found a nice “fit”. Then I isolated that area with painter’s tape and stenciled in the finishing touch!
Happiness! I love this combination of colors and patterns, which would also look super fab on a ceiling or tablecloth, I think. To protect my lovely floorcloth I used two thin coats of Annie Sloan Lacquer. This is a matte, water-borne finish that is designed to work with the Chalk Paint-particularly over concrete floor surfaces. It is very thin, and penetrates the paint surface to provide a highly durable finish.
It was quite dirty after being walked on at the Home Show, and I was able to clean it up nicely with a Mr. Clean Magic Eraser without any ill effects to the paint finish! Unfortunately the cheap, thin vinyl did get some tears in it here and there. Like I said above….buy good, thick, vinyl-or paint directly on your floor or traditional floorcloth canvas-available here! For another cool idea for a hand painted vinyl floorcloth, check out this Pinterest pin!
I hope you enjoyed this floorcloth idea and tutorial! Let me know….













 Copyright © Designamour