October 26th, 2009
High Style in High Point
My good friend, Barb Skivington, has undeniably one of the loveliest decorative finishing teaching studios in the whole country-Faux Works Studio in High Point, NC. Besides a state-of-the-art studio area, it also includes an elegant showroom full of interesting decorative treatments. Many of the featured treatments incorporate Modello patterns. Am I biased? Maybe. Are they fabulous? Definitely. Take a look…
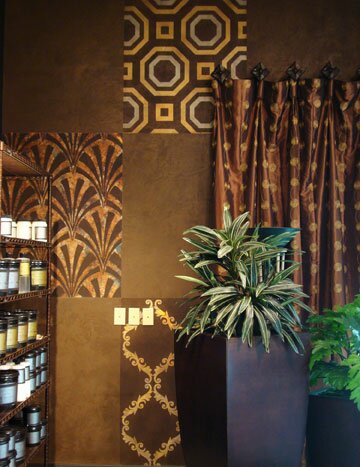
Multiple Modern Allover patterns are worked into an allover metallic wall treatment. The tile idea is a great way to work in different patterns and slight color variations while maintaining a cohesive look, don’t you think??
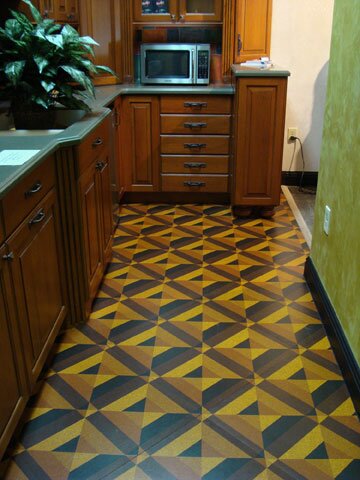
This is one of our exclusive Marquetry patterns, MarqAll106 done on cork tiles in the coffee bar area. One of the benefits of staining pattern on unfinished cork tiles (as we did also in our showroom spaces at Modello Designs) is that you can do the pattern work prior to installation-much easier than working down on the floor!
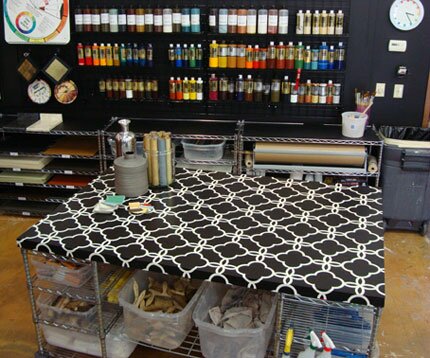
An allover Eastern Lattice pattern, EasAll106, painted on a table in the teaching studio.
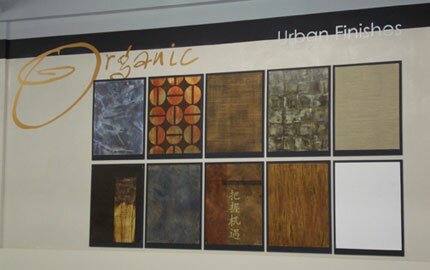
Some custom Typography to define different workshops and the unique finishes that Barb teaches.
Barb will be teaching one of her famous cabinet finishes classes here at our San Diego studio this November. The class is sold out, but you can find Barb teaching both at her own studio and other great studios around the country throughout the year-including a “date-to-be determined” back here in San Diego. Just check the Workshop page on the Faux Works Studio website.
May 8th, 2009
2128 Mirrors
They say that the best things come in small packages-or something like that….Well, I think that our little studio bathroom (in progress) is definitely proof of that.
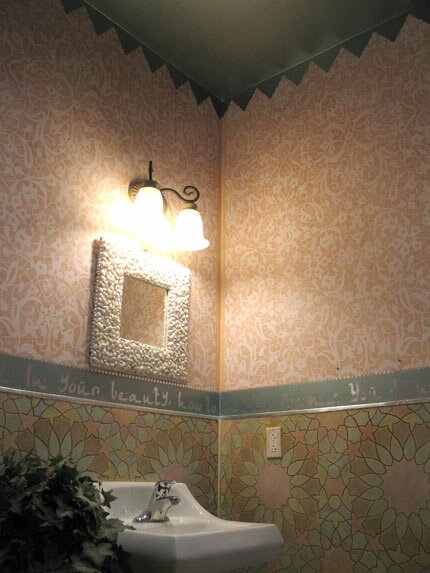
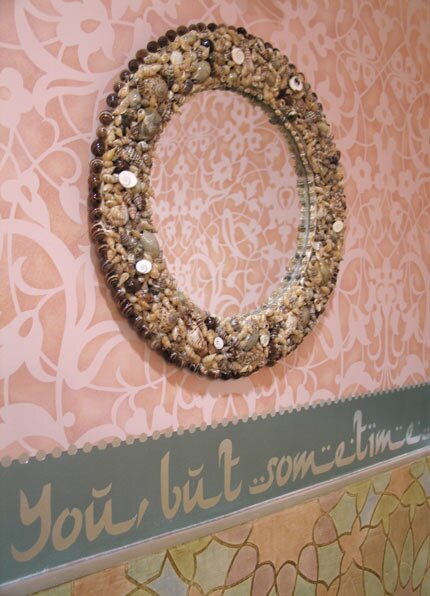
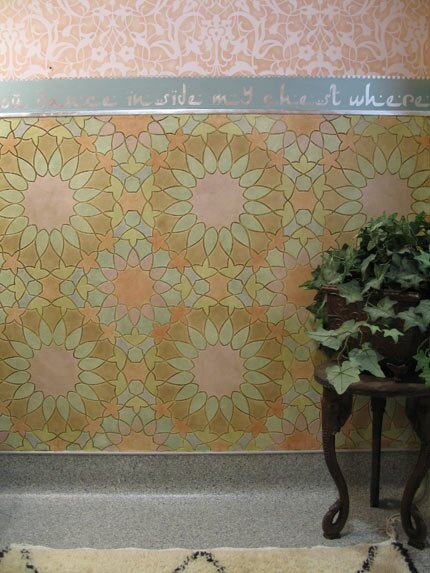
After spending quite a bit lot of time in stenciling the upper and lower walls with some of the new Moroccan stencil designs from Royal Design Studio (thank you Karen and Vicki!) the next area to tackle will be the ceiling. This is one of those projects that just seems to grow exponentially as it goes along. I’m a firm believer that once you start down a path of excess decoration you have to just keep letting that snowball grow as it rolls down the hill.
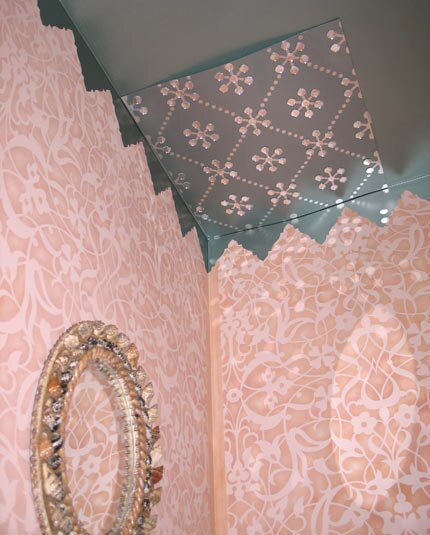
For example-rather than just paint the ceiling this lovely shade of metallic teal and leave it at that, I’ve decided that the only thing that will “do” is an allover treatment of silver leaf accented with small round mirrors. 2,128 mirrors to be exact. I did it first on a sample board to see if it was going to be worth all the work. I definitely think so-and will tackle it when I return from my painting trip to Italy. It will really pull in the silver leafed poem by Rumi that runs around the room just above the Moroccan zellij tile treatment.
In your light I learn how to love. In your beauty, how to make poems. You dance inside my chest, where no one sees you, but sometimes I do, and that site becomes this art. -Rumi
April 28th, 2009
Etchlook Window Film
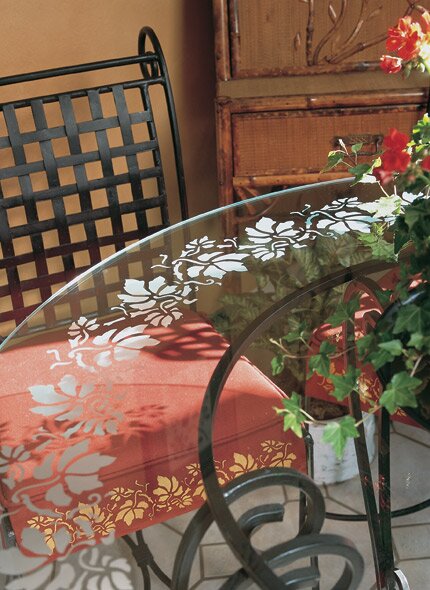
Years ago, about 8 to be exact, when I was creating the videos and projects for Royal Design Studio’s Extraordinary Stenciled Effects program I did some glass etching projects to include in the video series. For the round glass table above I applied contact paper to the glass and traced one of our stencil border patterns on it, adjusting it mightily so as to make it curved rather then straight. Then, each piece was hand cut with a swivel knife and I then etched it using the Etchall Creme that we sell creating an actual chemical frosting on the glass surface. Three years after THAT I started Modello Designs, where we actually DO ALL that on the computer and cut from rolls of vinyl. It’s SO much easier to use the precut vinyl, as you can imagine!! Well now, we have yet another option….
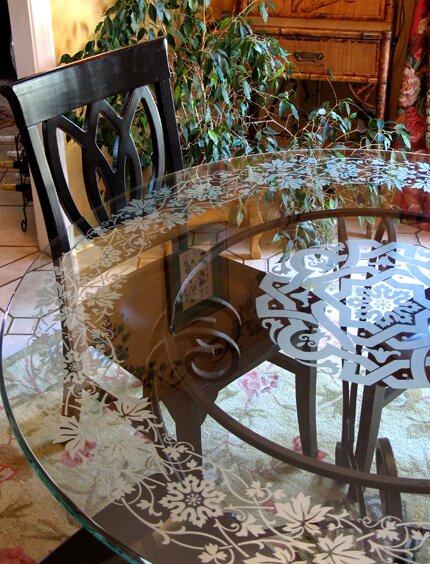
EtchLook vinyl is vinyl that very closely simulates the look of actual frosted glass. Not only do you not have to cut it by hand, you don’t actually even have to go through the etching process at all. You simply apply it and, Viola!, etched pattern on your glass or mirror surface.
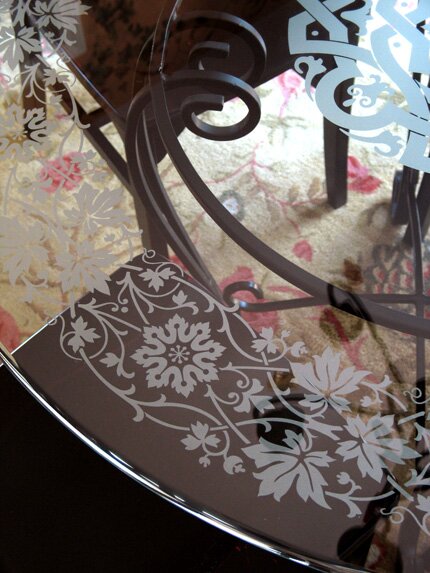
I actually had to replace the glass for the tabletop, because once you etch it chemically, it’s permanent. The EtchLook vinyl is semi-permanent, meaning that it is permanent-until you want to remove it. It’s very durable and holds up to cleaning and such. On the tabletop above I did apply it on the underside (you have that choice) for obvious reasons and it looks great and totally realistic.
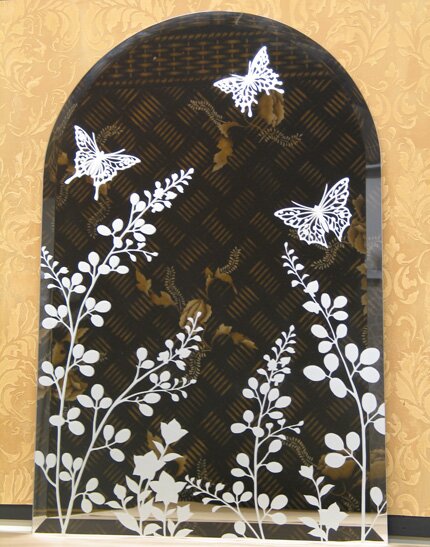
It also is ideal for mirrors. Wouldn’t this be a great way to dress up a boring bathroom mirror? You could do a Modello design as a frame all around, something random as shown, or even a pretty valance effect with a border going across the top.
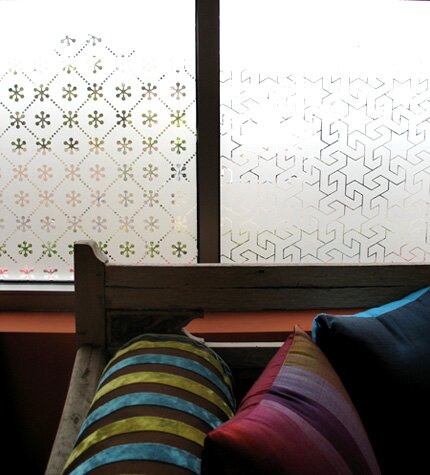
My favorite application that I’ve done so far, though, is the lower panes on my studio windows.
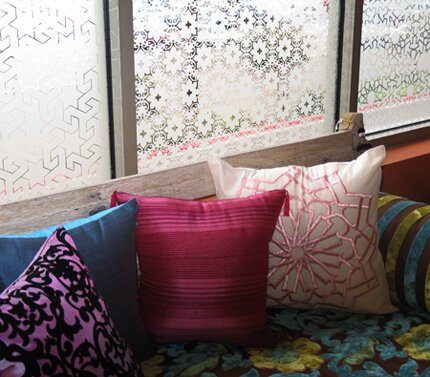
Not only does this add privacy, it filters out the “view” of the parking lot next door….
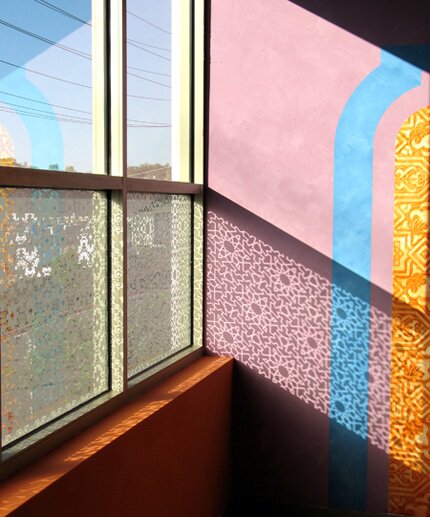
AND , my favorite part, it casts pretty patterned shadows on the wall in the afternoon. I have a couple more windows here that need a similar treatment. Now if I could just make up my mind about the designs…..more info on EtchLook vinyl patterns here!
April 24th, 2009
Lovely Lanterns
I have a fun and colorful project to share that we’ve just completed here in Lauren’s office. Lauren is my creative asistant and is responsible for all the lovely graphics on our websites and in our print material. She loves bright colors and she helped to create the lantern images shown below. I’ve been focusing on ways of combining our Modello Designs one-time-use vinyl masking patterns with the reusable mylar stencils from Royal Design Studio. There are different benefits to using both and this type of application combines the best of both worlds!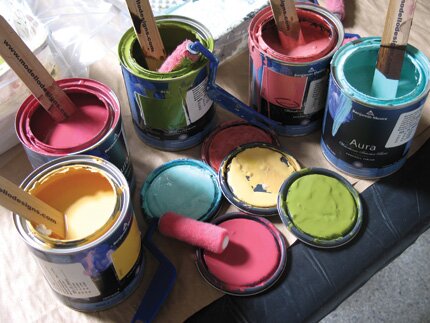
I started with a colorful pallette of paints from Benjamin Moore mixed in their Aura paint base. I LOVE this paint! It covers so well and dries very quickly, making it great for a project like this.
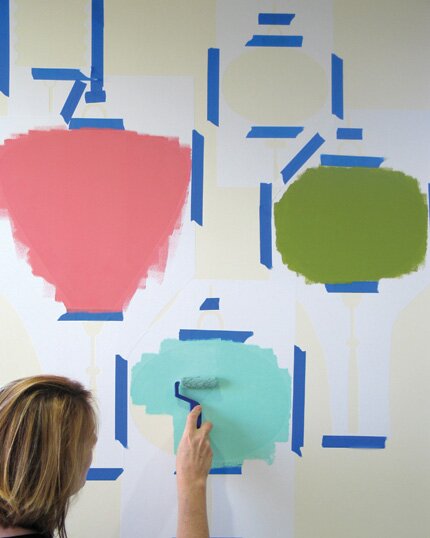
First, I put of the Modello Silhouette Japanese Lantern patterns and filled them in solidly with the different colors of paint.
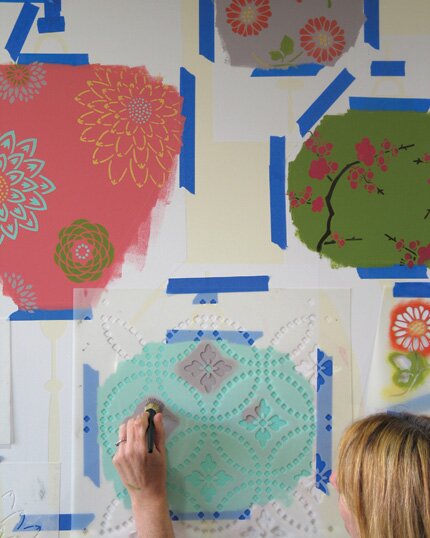
Then, with the masking patterns still in place, I added colorful design with a variety of stencils from our Kimono Collection at Royal Design Studio.
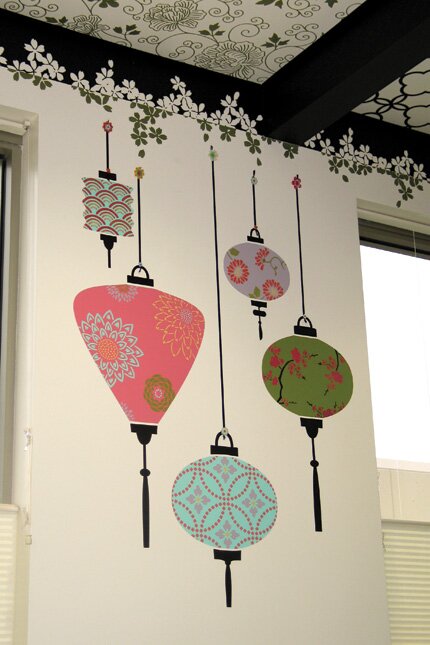
For the lantern strings, I used black ribbon and finished it off with some really cute little felt flowers at top and bottom that I found in the scrapbooking aisle at Michaels.
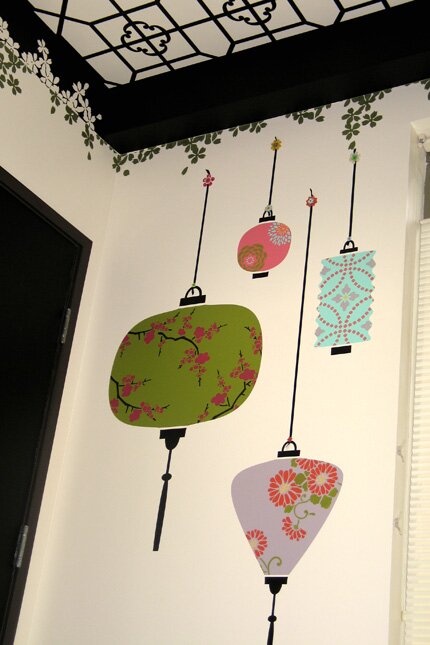
The ceiling has been done for some time, but the addition of the lanterns totally brightens up the room and pulls it all together. More detailed instructions can be found here. Our complete new Silhouettes and Stencils range at Modello Designs is here. I hope you enjoy these, they were so much fun to do!
March 30th, 2009
Art from Floor to Ceiling
We’ve recently completed a rather large project here in our long neglected lunch room: a decorated coffered ceiling. Actually, it’s NOT completed as now I want to add wood detailing and pattern to the beams, but that’s for another day, week, month. There are 15 different coffers, and naturally, I wanted a different pattern for each one, so scoured my design books for my favorite allover tile designs. We have now added these to the Modello line of decorative masking patterns and they come from historical patterns from Spain, Portugal and Cuba. I’ve mentioned before how much I LOVE tile patterns. Feeling rather lazy efficient about the whole thing, I decided to forego applying them directly to the ceiling and did them on the Roclon canvas that we sell instead. This way, they could be done easily and in a production style on our studio tabletops and installed with heavy duty wallpaper past on the ceiling when completed.
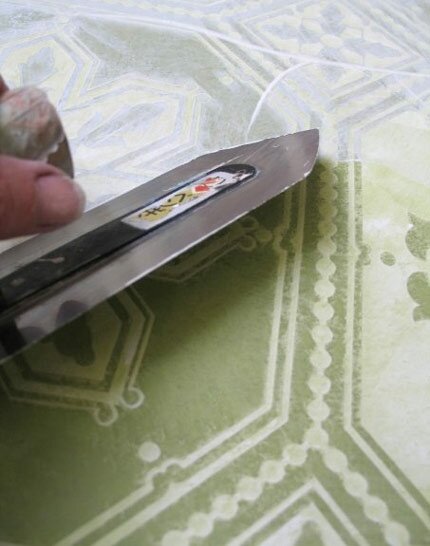
I used SkimStone for this project-a trowel-on product actually designed for resurfacing concrete floors, but that also works great on the Roclon for wall and ceiling panels. I love the color range and look of this product so much!
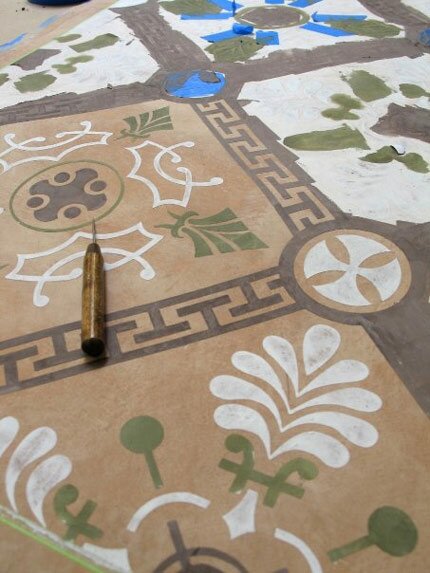
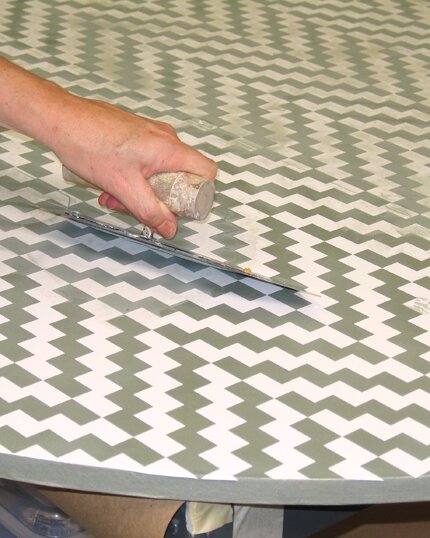
Here is a panel in progress with the pattern now being removed. As these patterns would be great for floors, countertops and tabletops I decided to photograph them as they might look when used for that application….
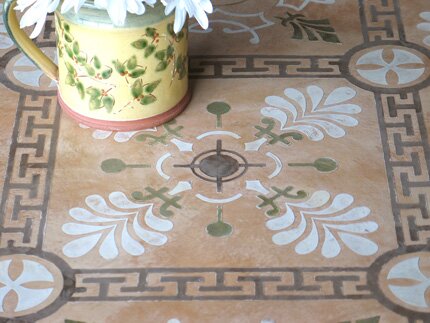
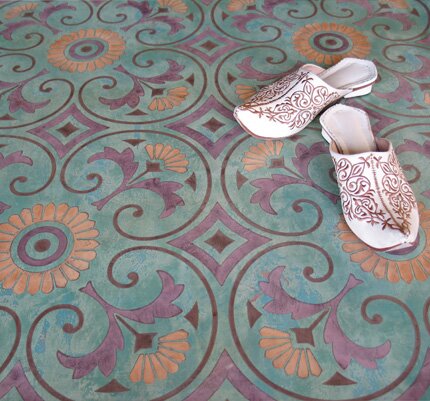
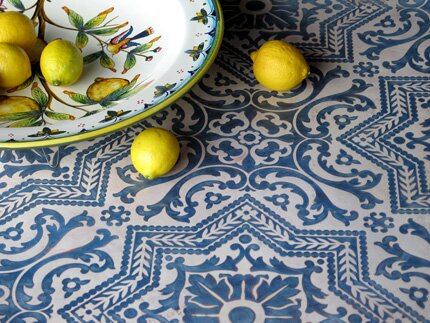
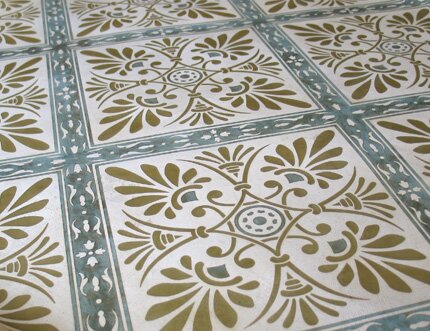
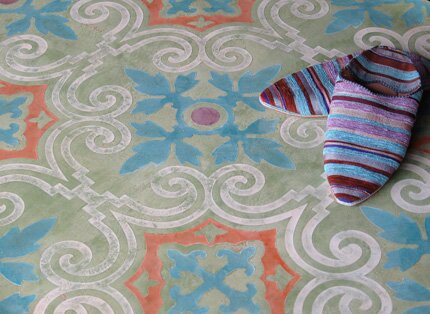
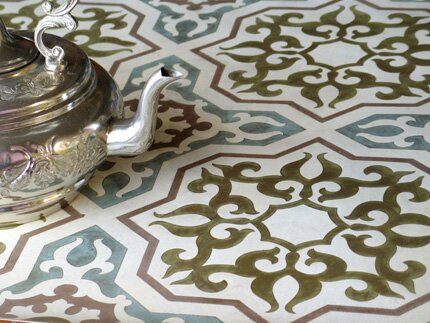
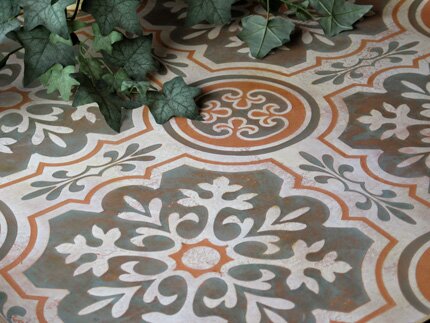
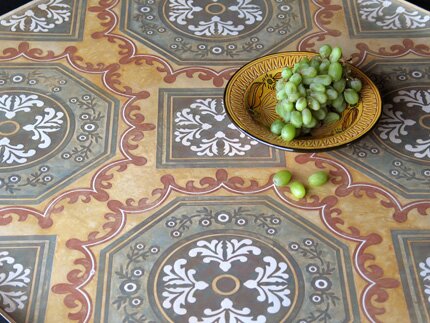
And here they are on the ceiling! Great thanks to the girls of the West Coast Artisans Guild for their help on this project.
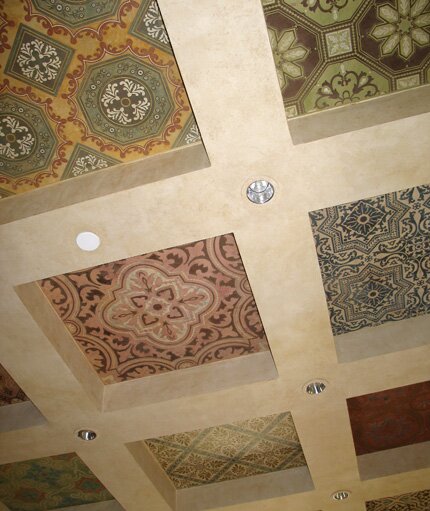
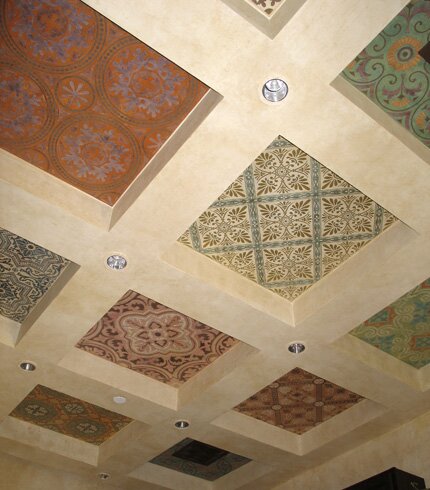
New allover tile Modello patterns here.
January 4th, 2009
Gardz: Gotta love it
One of the issues that crops up occasionally with people using our Modello Decorative Masking Patterns is that the adhesive vinyl can pull the underlaying paint or finish off with it if the surface underneath wasn’t properly prepared and primed. What often happens in new construction is that the whole place is a dust bin, drywall mud is inherently chalky, and the painters will not properly clean and prime the surface prior to painting. Obviously, a layer of paint is not going to stick very well to a layer of dust! Apply tape or another adhesive backed material to it and pull it off and, well, it’s NOT a pretty picture.
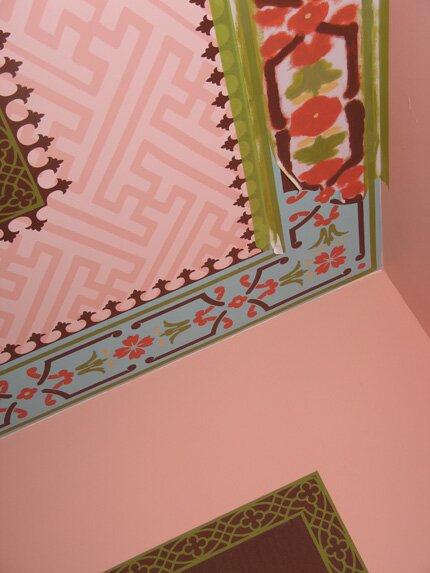
SO-when we were doing the build out on our new space here I needed some “insurance” for all those surfaces I knew I was going to be adding pattern with Modellos. Fortunately, I discovered Gardz-an amazing clear emulsion that virtually locks down the drywall and joint compound surfaces prior to painting. Using this makes your surface almost bulletproof. Case in point? My poor, neglected office that I sit in everyday and wish for a wish that would let me snap my fingers and make it done-like “poof”!
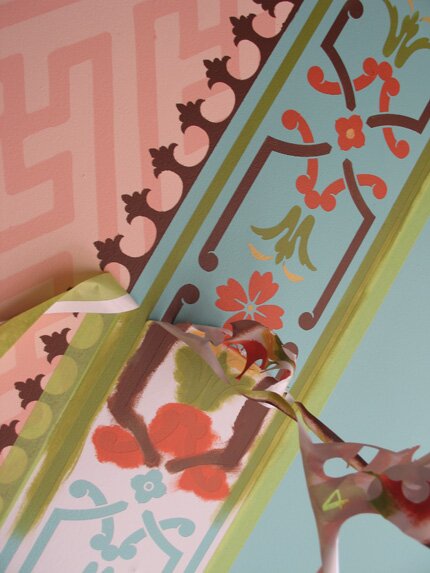
I put these Modello patterns up 9 month ago. Yes, it’s a very pathetic situation that I’ve been staring at this half-done ceiling for 9 mos., but also a great science experiment. You can see from these photos that the Modello pattern is pulling off NOTHING as it’s removed. Seriously, this is nothing short of amazing. The green tape has turned super sticky and the white vinyl is so old it’s almost cracking, but the paint surface underneath?? It’s perfect!
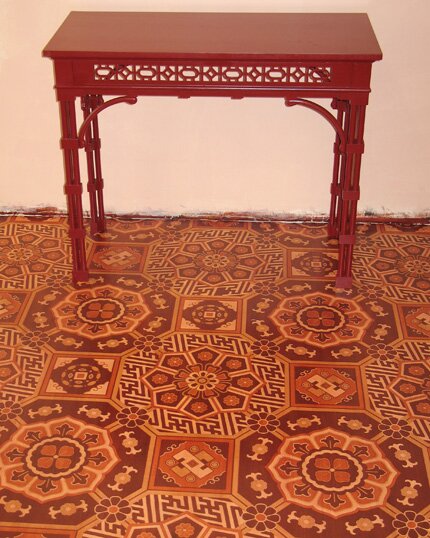
This is the room that has the above patterned floor I showed you here. I know what your thinking: All that pattern and all those bright colors must look Gawd awful. I swear it doesn’t-and I’ll prove it to you if and when I EVER finish this room.
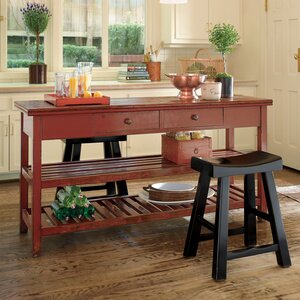
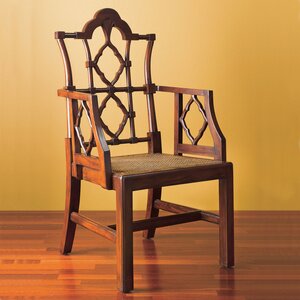
I have some added inspiration now that I’ve just ordered some additional furniture for it from my favorite catalog source-Gumps. This red kitchen island (for a storage piece) and two of these chairs (for important “executive” meetings)-both in the same red as the little accent table above, are all I need to kick by butt in gear to get this room done. I hope.
December 15th, 2008
Pattern as Texture
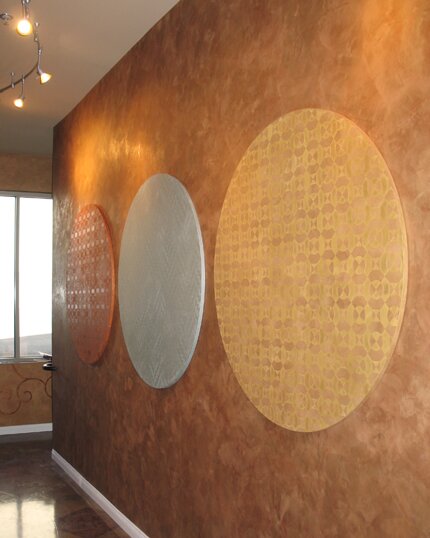
Or maybe it’s texture as pattern?? Regardless, I’m loving these subtle, tactile circles I created recently for our OTHER long hallway (see below)! I had Gatorfoam cut into 4′ circles. Gatorfoam is really dense styrofoam that has a heavy paper coating on both sides. It is used alot for signage and display as it doesn’t warp, can be easily cut, and is super lightweight. I wanted to bring some circular shapes into this very linear space while also maintaining our logo colors as this is right off our main lobby.
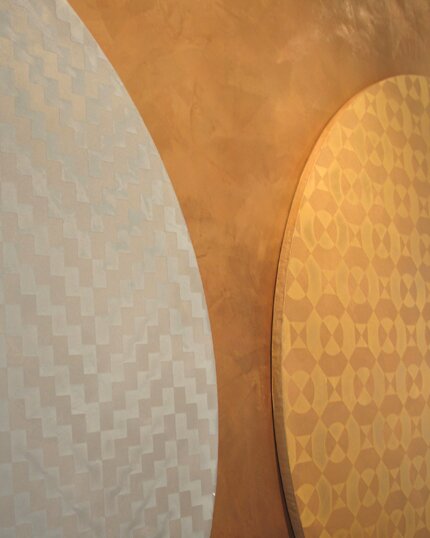
The patterns I chose are from our Modern Allover collection (ModAll 102, 103, 121), and to keep it subtle I used just slightly lighter/darker custom mixed shades of metallic plasters.
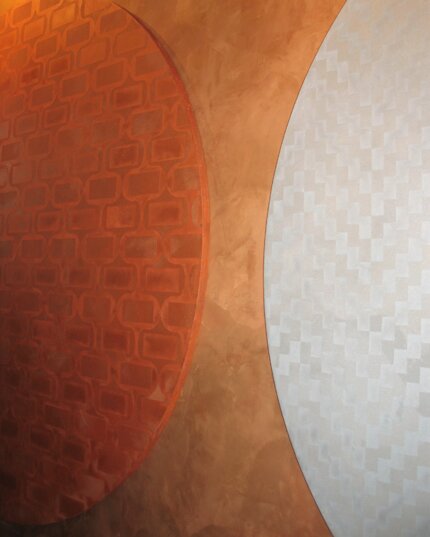
You could use a similar idea just directly on the wall as well by first laying down a Modello pattern in a large circular shape and applying the plaster directly to the wall through it. Leave that in place while you lay down the allover pattern over it and trowel in another color. Remove both patterns at once and, viola, subtle patterned circles-or diamonds, or flowers, or butterflies, or whatever silhouette shape you choose.
This photo shows that second color being applied through the pattern over the first basecoat. This could also be a cool idea done in stripes but would be most awesome done over a whole focal point wall, don’t you think?
December 3rd, 2008
Pattern and More Pattern and…
We have a looooong hallway that connects the two businesses, Royal Design Studio and Modello Designs in our new building. Well, actually it is NOT THAT new. We’ve been here a year already. It just SEEMS new because there are still quite a few unfinished areas. My primary decorating goals for the spaces here are 1) to experiment and introduce new ideas for painting and applying pattern, and 2) to showcase as many different of our patterns as possible without driving everyone crazy! So far, I think it’s working. One trick to using a lot of different patterns together is to stick to a very limited color palette. I DO love incorporating black-and combining it with off white creates a nice, clean graphic look. When I originally designed the hallway space, I had the contractor install drywall beams so that I could feature multiple patterns in the separate spaces.
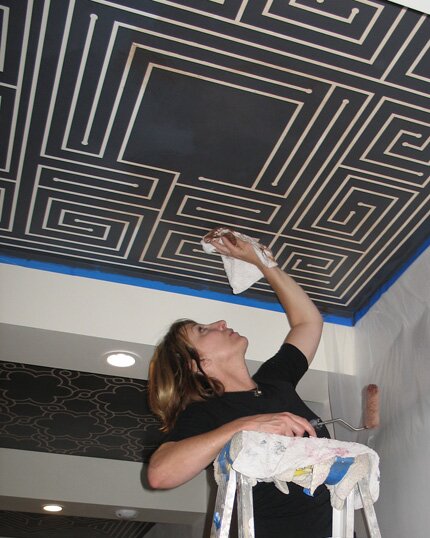
I decided to use some of our new labyrinth designs in every other space. I love the graphic quality of these designs and the way they just draw you in to them. The Modello patterns were painted in a soft black over an off white background. Then, to tie the colors together and soften the look they were treated to a toning glaze of soft brown.
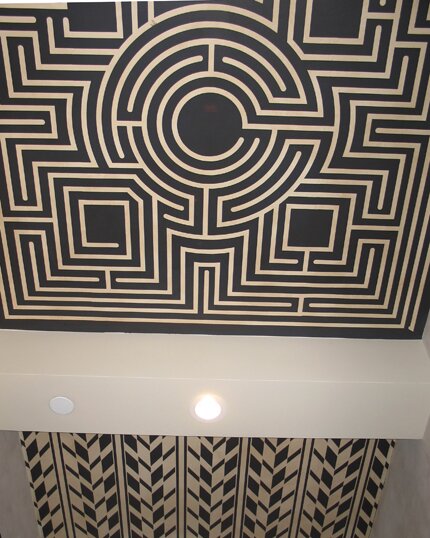
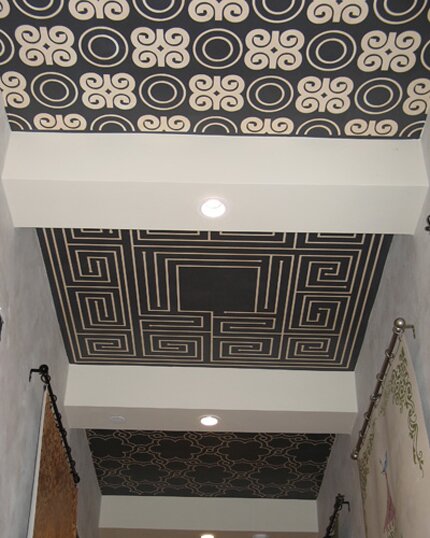
I also incorporated some African and Islamic patterns (IndAll 100 and OrnAll 110), which also have a lovely simple graphic quality that looks very clean and modern in this color scheme.
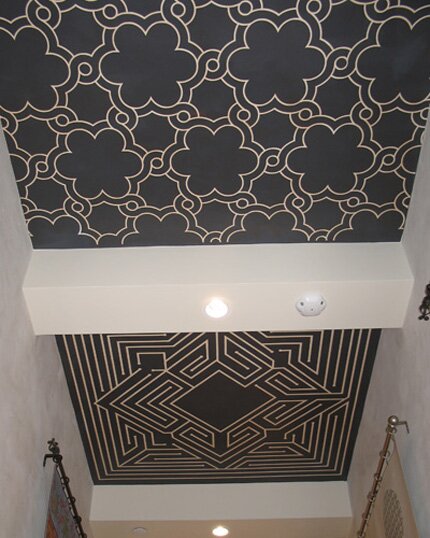
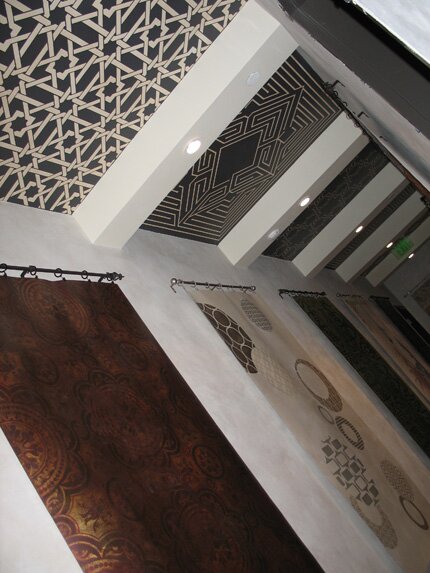
I wanted to keep the ceiling neutral because I have hung a series of canvases that feature some recent decorative finishes that I have created. These were previously featured in posts here, here and here. You may also recognize that gorgeous camel bone weave pattern from the ceiling we did on our last trip to Peacock Pavilions with Maryam in Marrakech. I just HAD to have a little slice of that here. I will be taking a second group of merry painters back there next month. Next month?!
November 17th, 2008
Oak Cabinet Upgrade
When I first moved into my new studio I had the very cheapest, in-the-box, oak cabinets from Lowe’s installed for our “kitchen” (basically where we make coffee and occasionally microwave). The reasons for going el cheapo were twofold: lack of money (the main reason) and knowledge that I could also turn the ugly ducklings into a swans when time and desire came together. They finally did! I forgot to take a “before” shot, but just imagine plain, nondescript oak cabinets over which I stria’d 2 layers of Van Dyke Brown Stain and Seal .I wanted to do something more decorative on them with mirrors-my new favorite medium.
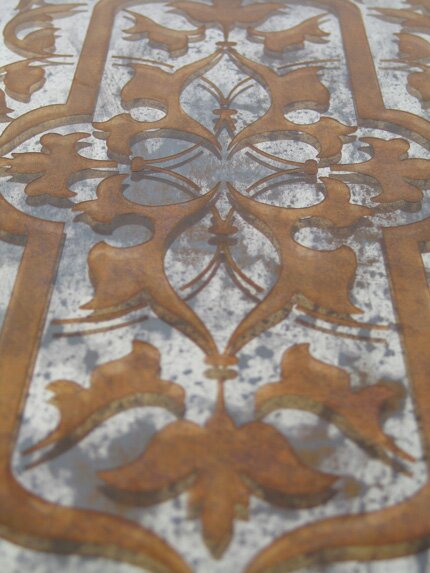
I had 1/4″ mirrors with beveled edges made to the exact size of the raised panels in the centers of the upper cabinets. The silvering on these was distressed using the Antique Mirror Patina Solution.
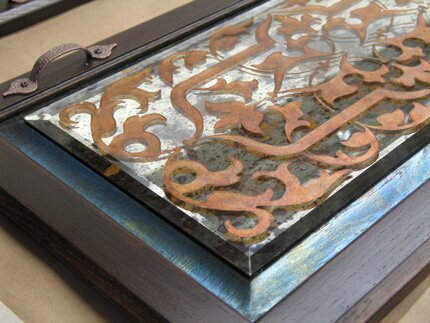
On the front, I decided to use Metallic Foils (another new fav!), and subtly applied 4 different colors, followed by a layer of antiquing stain. I love how the design reflects off the back of the mirror, adding a lot more depth and dimension.
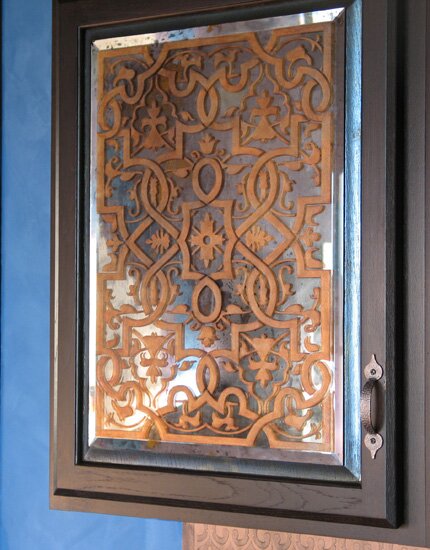
The mirrors were attached using a combo of double-sided foam tape and lots of mastic. So far it seems to be holding…..Notice how the blue Metallic Foil around the edge picks up the wall color!
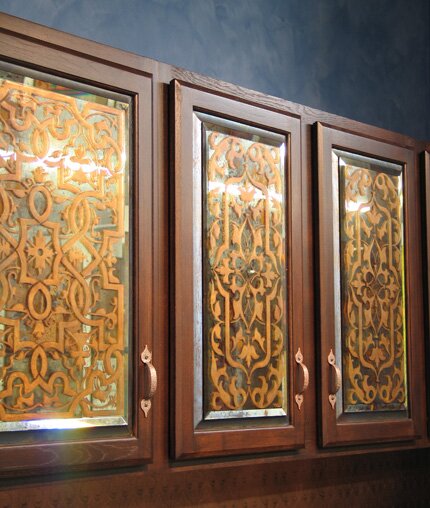
Another view (these are HARD to photograph well). The handles were a Home Depot score at $1.06 each!
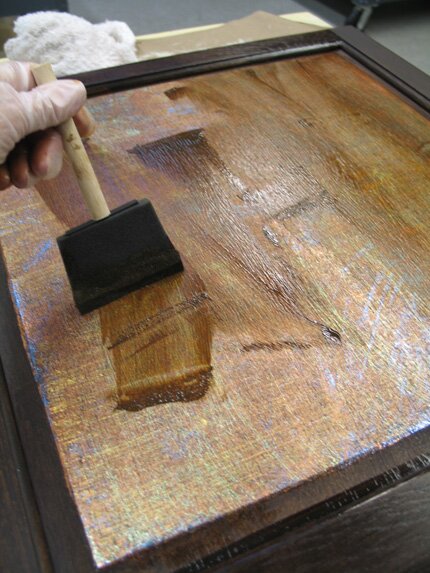
The lower cabinet doors were treated to the same Metallic Foil colors as the mirror finish and stained as well. I transferred the foil colors using a scrub brush with varying horizontal and vertical strokes to get the woven fabric look.
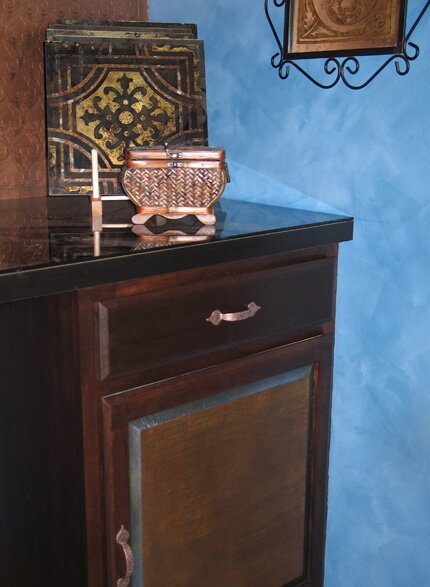
You can’t see the countertop from this view, but it is beautiful reverse gilded glass with a Moroccan zelij pattenr and I showed it in this post. If you are interested, there are lots more mirror posts here. For my next magic mirror trick I’ll be attempting to conjure up an amazing look for a 54″ round mirror table top on a rustic iron base. Keep your fingers crossed! I don’t NEED any bad luck.
August 25th, 2008
Luscious Lime
You know how when you first move into a new place that needs work you go great guns with the decorating and getting things done? Well I did that last winter when we first took over in our new building, getting some office spaces and common areas designed and artfully painted, and then hit a big fat wall! There are just SO many surfaces and spaces to do-and so many other things that needed attended too, I had to take a break. Fortunately, I have local painting friends that are so sick of coming by and seeing things half done that they’ve taken matters into their own hands-literally. My friend Karen Jorgenson has been orgainizing people to come down and trowel, stencil, glaze-you name it. I’m SO grateful for being forced to make some design decisions and very happy with the outcomes so far.
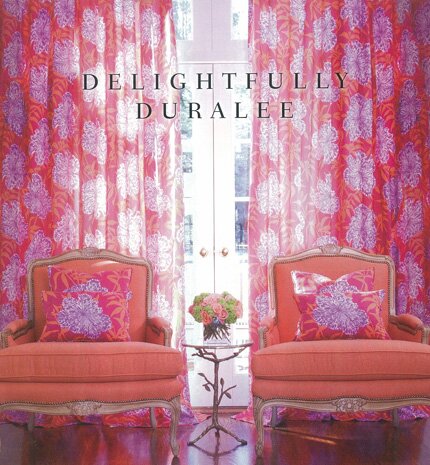
I actually saw this magazing ad AFTER I picked the color scheme for the “meeting room” end of the studio, but it just reinforced for me how absolutely wonderful these colors are together. A couple of trips to Marrakech helped too! Hmmm. Wish I could afford those drapes and chairs….
I picked a super easy finish for these walls of of azure, lavender, hot pink and orange from the Sydney Harbour color deck.
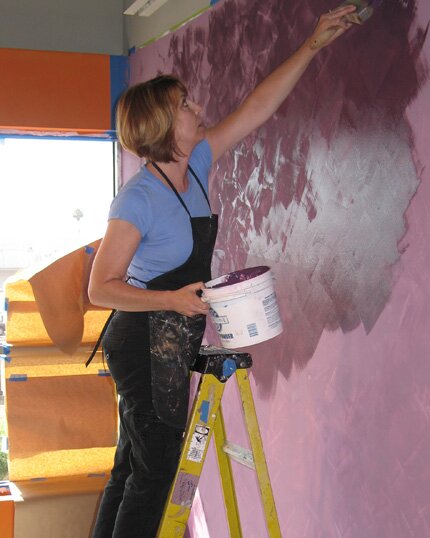
Their Interno Lime Wash is a wonderful lime paint that simply get cross-hatched on in two or three layers over an easy-to-apply primer. We had two people working this large wall expanse, because you DO need to be concerned about keeping a wet edge to avoid “lap lines”.
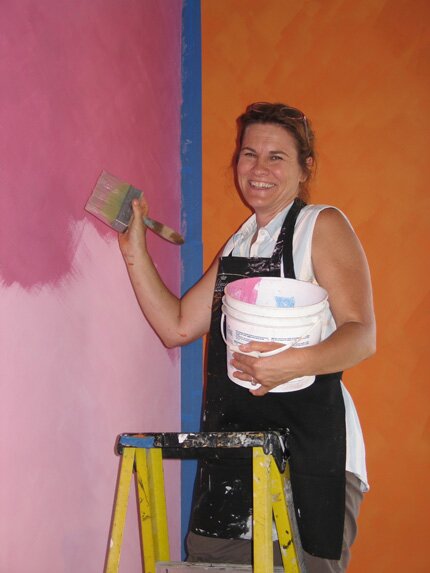
The lime paint dries much lighter, as you can see here where Julie is adding a second coat of pink. Left unsealed (which they recommend) it will continue to “bloom” and change over time. It’s very soft and gorgeous. On the blue wall, though, I sealed it with a water-soluable Bee’s Wax (troweled on) which gives it some added protection and also made the color deeper and richer.

This week, we will be interpreting this arch shape (is this not gorgeous?!) on the lavender wall, using the blue and orange colors to tie it all together. More to come….


 Copyright © Designamour