April 15th, 2011
The Art of Procrastination
Today being “tax day”, April 15th, they ran a story on the news last night pointing out that a full 25% of Americans put off filing until the last two weeks before the deadline. I’m guessing THOSE are the people who aren’t expecting refunds?! Anyhoo, it prompted me to come clean on a character trait I have that I am none to proud of: I am a serial procrastinator. This fact is all to evident in my own house (and lack of regular blog posts), where the wheels of decorating grind slowly and projects get get pushed off for years. As in, MANY years. Gulp.
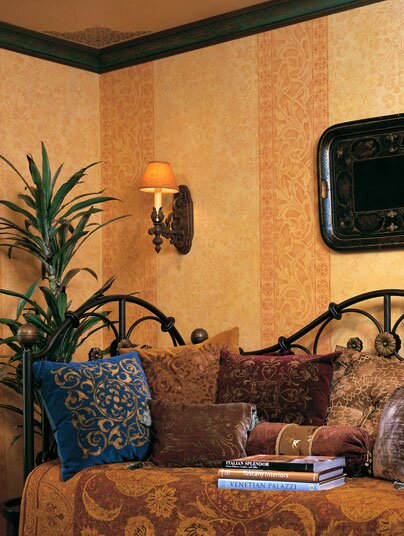
It’s been 4 years now (she writes incredulously-where DID that time go??), since I wrote this post about redoing my home office. I actually dismantled the room shortly after writing that post, and it’s been living in “no man’s land” ever since.
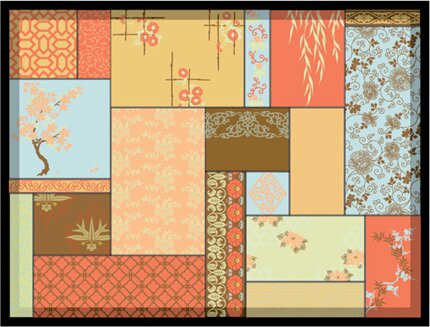
Back then, I was SERIOUSLY into Japanese decoration. Actually I still am, but the problem is, I am seriously into lots of OTHER decorating themes as well. That seems to be the problem. I have been back and forth, up and down, and even sideways trying to settle my mind on something that I will want to live with-and so, I’ve done nothing. Brilliant, huh? Until now…
I have loosely settled on a boho/contempo/Moroccan/upcycled/glam theme. Actually, that’s not a theme at all and obviously my brain is still crankin. But while my brain takes its time getting it’s thoughts together, I have at least started something. I am decidedly NOT a linear thinker, and take an “organic” approach to design. What that really means is that I figure it out as I go along. The main thing is to GET STARTED, and I am starting with the floor.
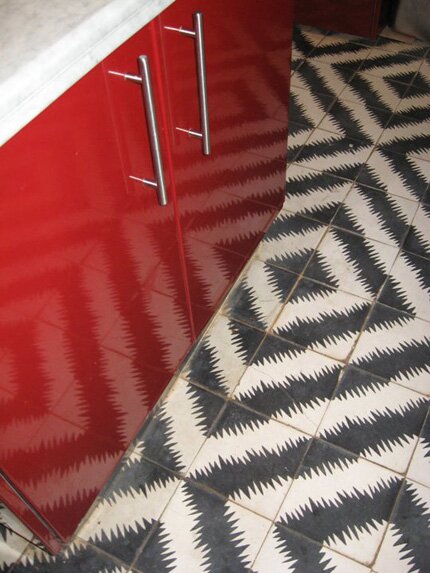
On my trips to Morocco, I have always been drawn to the zigzag zellij tile patterns on the floors-usually done in black in white or green and white. I was also inspired by Maryam’s kitchen floor tiles. I love the dusty look of concrete tiles and SkimStone is the perfect medium to give me that.
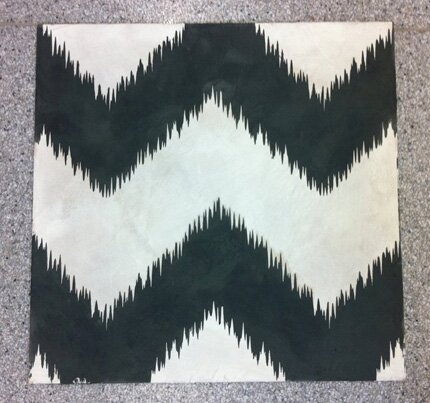
So, I came up with this sample, and havc the floor all ready prepped with the creamy white layer of SkimStone. Note: to get here, I removed the existing carpet from the concrete slab and spent some time removing the excess glue and scrubbing the heck out of it to get it super clean.
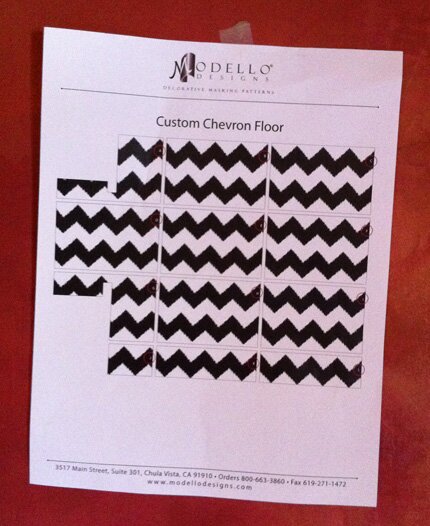
It’s going “down” this weekend, with the help of a custom-fit, Modello masking stencil, and here how it all lays out. It’s a smallish room (11′ square, more or less) and the stripes will definitely help to enlarge is visually. I will be adding an area rug at some point, but I really wanted a “neutral” but zingy (or should I say ziggy?) floor as a starting point.
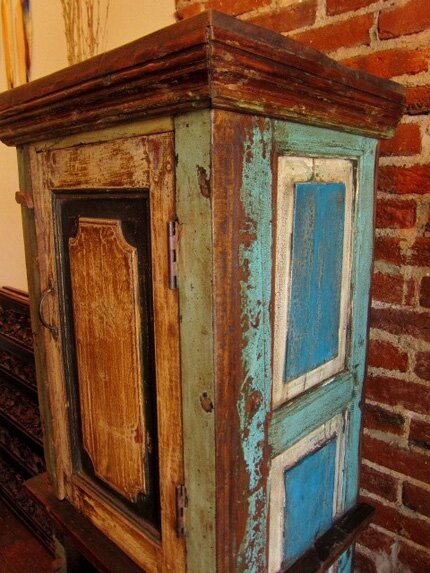
So then what? Well, after considering about 183 different options, I think I am going to do a dado, made from upcycled cabinet door parts. I am quite partial to the look of this furniture piece I saw on this “Get the Look” post on the Etsy blog. Again, it reminds me of Morocco, where they reuse EVERYthing. I will need to cobble together a mix of old pieces and new pieces that I just make “look” old. I have been dying to check out Annie Sloan’s Chalk Paint, and think this will be the perfect opportunity to do just that AND utilize a bunch of unfinished cabinet doors that I’ve had sitting around for years now ;).
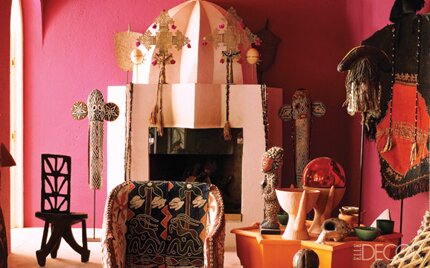
And what else?? Well I currently plan to cover the rest of the walls with an off-white organic plaster, and am DYING to do the ceiling with this pink color as seen in the May issue of Elle Decor (it’s in Marrakech-where else?!). This will probably be done with Sydney Harbour’s Interno Lime Wash.
This is unsurprisingly turning into quite a project….let’s just get the floor done first…BTW, if you were one of those who put off doing your taxes till the last day, you’re in luck! The IRS is giving you till the end of the day Monday! So….you can put it off till after the weekend….
January 5th, 2010
Off the Shelf
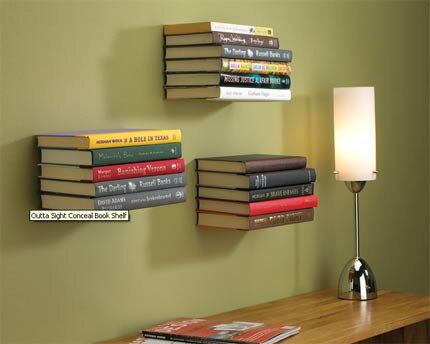
I have been on another MAJOR book buying bender lately. I have talked about my book collection here before…..well, in the last two years it’s grown considerably. As I write, I am literally surrounded by stacks of beautiful books that are not going to fit on my already groaning bookshelves. Luckily, today I got an email from Delight.com featuring these inexpensive and super cool book shelf hanger concealer thingies. I think it would be so cool to do a whole wall with books this way…..though I’ve just ordered two to start….
May 20th, 2007
Ta Da!
The final finish coats are on an it’s officially d.o.n.e! A few days worth of thigh strengthening work went into this, but I am really excited to be walking (actually skating with socks) around on my new hardwood floor.
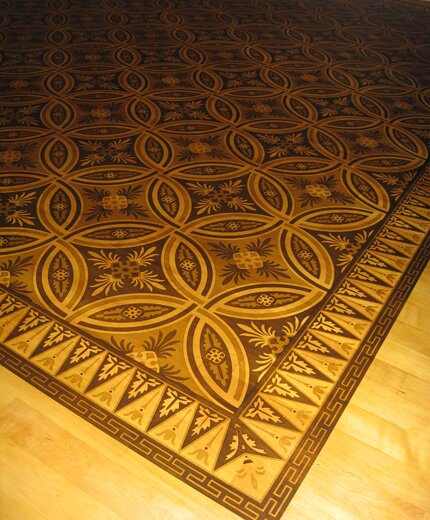
Now I am busy looking through all my design books for more patterns that would be appropriate for our new Modello Marquetry Masking System ™, coming soon to a website near you!
May 9th, 2007
Marquetry Mayhem
I have written previously on the Marquetry Masking Pattern ™ technique I’ve developed using Modellos in the Wood You, Could You post. With my new bedroom maple floor going down tomorrow and the house in complete disarray, Lauren and I have been frantically working on getting the design down so I can have it cut and ready for my “weekend with wood”. I found this design in a book of historical patterns. The source listed is floor tiles from Poland. I am always drawn to the rythm of interlacing circle designs. Once the design is vectored, it’s easy to start playing around with coloration options. Here’s the process.
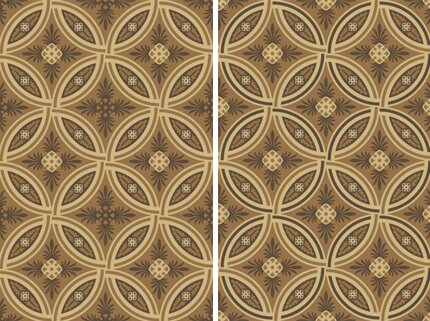
You can see the subtle difference between the left and the right. The additional contrast of the alternating darker rings adds a more interesting dynamic to the design. I thought this was the winner, until….

Bingo! More contrast and variety and I am ready go! Each circle will be 18″ diameter. If it doesn’t look as fabulous as I think it will, well, that’s what they make area rugs for.
May 4th, 2007
Project Wood Floor: Part 1
It’s project time! I have been searching for a long while for some new bedroom furniture that would fit my decorating vision as well as my small space. Trips all over the web and to local furniture stores proved frustrating as they are making everything either really BIG or really modern these days and I want something that will go with the delicate and romantic Chinoiserie murals that I will be adding.

I finally settled on this Victoria Collection from the William Sonoma Home catalog. Unfortunately, all I can squeeze in is the bed and a couple of dressers, but I think (hope) it will be really pretty!
Before that gets delivered there is a new unfinished maple floor going down next week. The wood is sitting behind me “adjusting to the environment” as I speak. It smells good. Now to design the finish! I want it to be formal but not uptight, classic, space expanding, decorative but not competitive.

I’ve been pouring over intricate patterns and through my library and found some great marquetry examples in two books that I think are “must haves” for any design library. The first is Molyneux, shown above and below/left.

The second is Roomscapes: The Decorative Architecture of Renzo Mongiardino, photo shown above right. His style was so over the top and so dead-on gorgeous, I will have to scan some more pages to show you here tomorrow! I, however, have decided to keep it more simple and safe and am playing with some classic octagon and dot patterns with ornament like the one shown above/left. I’ll be using a Modello pattern to make it fast and easy, along with water-based gel stains. Stay tuned!
March 30th, 2007
The walls they are a changin

About 7 or 8 years ago I redid this tiny little bedroom in my home into my home office. It had to be really nice as it was going to be photographed for a book by BHG along with other rooms in the house. See Enriching the Ranch. I’ve loved it immensely but it’s time for a change!
My idea is to make the walls look as if they were created from a patchwork of Japanese Kimonos and I REALLY need to get this done before I completely tire of this theme. I’ve gotten so far as to get the furniture out of the room and have laid out one wall treatment.
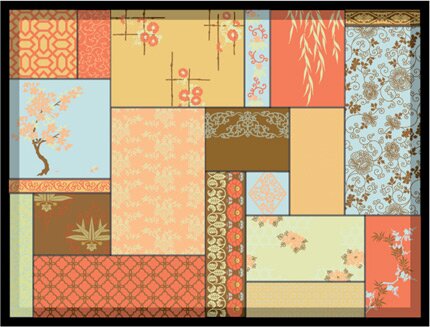
Each “patch” in the room will be totally unique and a little artwork unto itself. I will be using metallic leaf, paints and plasters to give it all a nice soft shimmer. The Lights and Lovely post on the Art of Living blog shows some possible light fixtures to hang from the ceiling I may make look like a shoji screen. I am still debating if I want to put the art directly on the walls or apply it to canvas or paper and wallpaper paste it up there. Either way, it will be quite the little project! I think that I will create a little book to sell detailing how to do the finishes. Stay tuned!
March 24th, 2007
Floral Carpet Steps

Here is a collection of photos to show the steps involved for the gazebo project. It actually only took 2.5 days. As much as I hate to cover any of it up, I’m off this weekend to shop for patio furniture!
March 22nd, 2007
Another Weekend, Another Project
This past weekend I tackled another patch of concrete with SkimStone and Modellos and I am simply THRILLED with the results. It was two long days of hard work up and down off the ground, but one of the most satisfying things I think I have done. About a year ago I purchased this really unique gazebo from Lane Venture.

THIS will be the summer we engage in some romatic alfresco dining. Now that the “floor” is done all that is left is to pick the colors for the cushions and drapes! Oh-and I really want to paint something on the panels now. Might as well just take it over the top! Here is a detail. I LOVE the colors in the flowers.

March 12th, 2007
All in a days work
Welll OK, slightly more than a day. I did the first two skim coats on Saturday, but the remainder of the project was done on a beautful, sunny Sunday. With the radio and suncreen on, I was able to use my trusty color guide to complete this round pad on my back patio, using a Modello design, OrnCen155 in three pieces. I am really enjoying the new, expanded color collection that they have come out with, particularly the Sante Fe Pottery color that wend down first. This photo collection roughly shows the steps.

After a long day spent troweling on one’s hands and knees I highly recommend enjoying a refreshing beverage as you pick out the last pieces of the masking pattern.
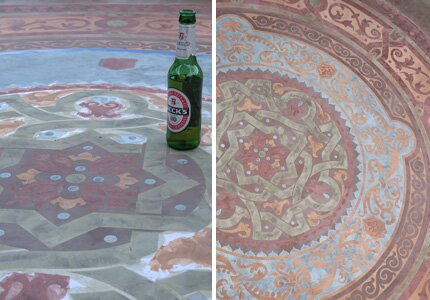
Tonight, I’ll be applying a toning layer, using our Modello Dye Stains in Fawn to calm it all down and bring all the colors together. I’ll post the final “beauty shot” later!
March 9th, 2007
Project Fire Ring
It’s going to be a beautiful weekend here in San Diego. That is NOT highly unusual. Just ask any San Diegan what the number 1 reason they choose to live here is. What IS unusual is that I will be tearing myself away from the keyboards and getting down to some serious troweling on my back patio. There is a project awaiting: An eight foot diameter circle of plain concrete inside stamped flagstone. I can’t wait to improve the view from my living room with this-

This is a rough color setup I did in Illustrator to give myself a guide for the application which will be done with SkimStone and one of our Modello masking patterns.. I’m sure I’ll end up winging it anyway! We’ll find out how well it turned out next week. BTW if you never hear of this again, you can come to your own conclusions.




 Copyright © Designamour