June 1st, 2013
Stencil Showcase Showoff!

It’s Showcase season! That time of year when local houses of interest all over the country are transformed by teams of designers and talented artisans for a brief run of walkthroughs by local interior design enthusiasts. Showcase Houses are always so fun to tour, not only because the designers pull out all the stops to impress you, but there is generally a deserving charity involved, and often the chosen homes feature fabulous architecture and features that have seen better days. Artist Crista Maree Bartholomew, based in Minneapolis, MN, recently became involved in a Showcase project near and dear to her own heart. A historic building in her hometown, the Frank P. and Anna Shepard House, was in danger of being destroyed. The home is located in the Historic Hill Heritage Preservation District, which is characterized by the largest concentration of nineteenth-century architectural examples in St. Paul, Minnesota. At the last minute, the home was rescued by a couple who planned to convert it into both a private residence and a warm and comforting destination, The Saint Paul Bed & Breakfast.
The home has now been thankfully transformed by various designers for a premier interior design event, the ASID Showcase Home. This historic 15,000 square foot brick Queen Anne Victorian mansion boasts 22 spaces, including four public suites. Prior to the renovations, the home included 13 bedrooms, 14 baths and 6 fireplaces! This building has been an icon in St. Paul and Crista was honored to be chosen to work with designers in two separate projects and we are SO THRILLED that in both areas, she incorporated stencil patterns from both Royal Design Studio and Modello® Designs. Let’s take a little tour of our own through Crista’s painted spaces….

CRAFT ROOM & LAUNDRY FLOOR
Interior designer Kristen Sheikh of Bruit de la Mode, envisioned a fresh, youthful space with a little bit of quirkiness to help inspire creativity. She designed separate “zones”: the Laundry Room, Craft and Sewing space and a special area with access to the roof. Challenged by the small room with three angled walls, Sheikh embraced the uniqueness of the space and its fantastic window feature. Crista was able to connect the spaces visually (and dramatically!) by stenciling the floor with a bold black and white chevron pattern.

She used the large Modern Chevron Wall Stencil from the Allover Modern Stencils Collection in a two-tone finish. The floor is original to the home and was very uneven with wavy boards so when so after completing the bulk of the pattern with the stencil, she cut in to the edges using tape, and finished the work by hand. Now, who wouldn’t love to have a craft room like this?!

PARLOR
The Parlor is a comfortable space where guests of the Bed & Breakfast can relax in multiple seating areas near the fireplace. The designer, Karen Soojian of KSID Studio, LLC, selected a fresh, modern palette of white and off-whites with splashes of aqua to infuse the room with light, while warm cognac and sienna tones retain the elegance and honor the storied history of the home.

The parlor walls are treated with Crista’s hand-tied Linen Plaster finish, which creates a subtle yet stunning backdrop for the Contempo Trellis Stencil from Royal Design Studio which she stenciled over the plaster in a subtle two-color palette.

The gorgeous paneled ceiling becomes even MORE gorgeous with the addition of a large-scale decorative pattern. This is a Modello® Designs masking stencil, designed especially for this special space. It features five colors with metallic influences that coordinate beautifully with the wall stenciling, drapery and up0holstery fabrics.

The seemingly effortless mix of old, historic architecture and contemporary stencil patterns and design details works so beautifully here, it makes me long to see the rest of the house! This ASID Showcase Home will be open to the public in St. Paul, Minnesota, through June 9th, 2013 with The Saint Paul Bed & Breakfast officially opening on August 1, 2013.
You can find more of Crista’s beautiful work on her company website, Crista Maree, as well as her Facebook fan page. We hope you’ve been inspired by her incredible use of stencils, finishes and color combinations! If you’d like even more inspiration, be sure to stop by our Royal Design Studio/Modello Designs Facebook fan page, Pinterest boards and Twitter stream for daily doses of pattern and design ideas!
December 26th, 2012
Contemporary Columns
When I created Modello® Designs back in 2003, my goal was to offer an alternate to our Royal Design Studio traditional mylar stencils for applying customized pattern for both the decorative finishing and design communities. The introduction of these one-time-use vinyl stencils would allow for projects to become more time effective and yet deliver an extraordinary amount of design detail, and offer pattern application to almost any surface. Since then, I’ve enjoyed seeing gorgeous artistry from artists around the world, but I do have to say that I really pleased to see this stenciled columns project by Suzanne Pratt of Toronto’s Venetian Studios. It got rave reviews when we posted it on our Facebook Page, so thought it would be great to share more pics and go into a little more detail here~

Suzanne worked closely with James in our graphic design department to design a pattern that nicely wrapped the large concrete columns to create an uninterrupted design. Of course, the flexibility and adhesive quality of the Modello® vinyl made for a super easy pattern installation!

The pattern was a custom-made design for Suzanne’s commercial client, Spot Coffee. Suzanne used a coffee-colored plaster finish to enhance the pattern on the concrete columns. Hmmm, wonder where they got their color idea from??


Isn’t this a fantastic and inspired idea for a unique column finish? Suzanne did a beautiful job of creating an eye-catching and unforgettable surface that warms up this space like a cup of coffee warms my tummy. Please be sure to visit her Venetian Studios website and check out her Facebook business page. Don’t forget to pin and share Suzanne’s lovely work as well! Like I said above, it was one of the most popular shares EVER in our Royal Design Studio Facebook fan page.
Even if you don’t have columns to decorate, you can get TONS of ideas for how to use our Modello® masking stencils on all sorts of surfaces. We published 2 volumes of books of our customer images called Modello by Design. Volume 1 is now almost sold out (so, yeah, you should hurry), Modello by Design,Volume 2 is equally awesome (so, yeah, get both ![]() ).
).
If you’d like more visual inspiration for more traditional stencil designs and decorating, please visit our Pinterest boards and consider becoming a part of our artistic community boards where tons of great visuals are shared daily! We also have creative project features in our Stencil Ideas blog which showcase our stencil collections and designs. Happy painting!
September 23rd, 2010
Ancient+Modernista
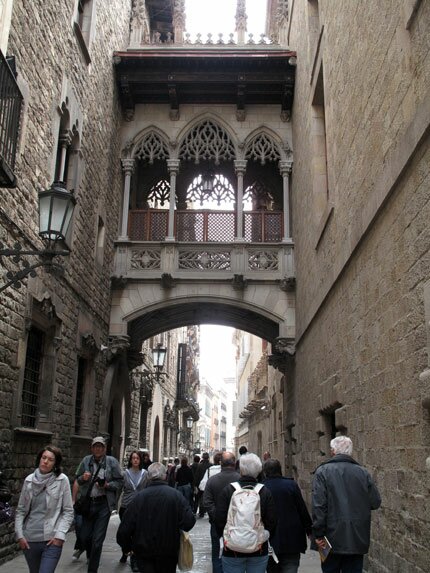
I love going to Europe! My favorite European city so far HAS to be Barcelona, the capital city of Catalonia, Spain. Barcelona has it ALL you see: the sea, the mountains, cava (champagne!), tapas, shopping and people watching along La Rambla, the Bari Gotic (old Gothic Quarter). It was not exactly PAINFUL to get “stuck” there for 5 additional days at the end of our honeymoon last April!
Our wonderful local friend, Paul Deprez picked us up from the apartment we needed to vacate in the moody, Medeival, Bari Gotic area and got us settled in to a lovely modern hotel in the Eixample (phonetically eye-sham-pla) district.
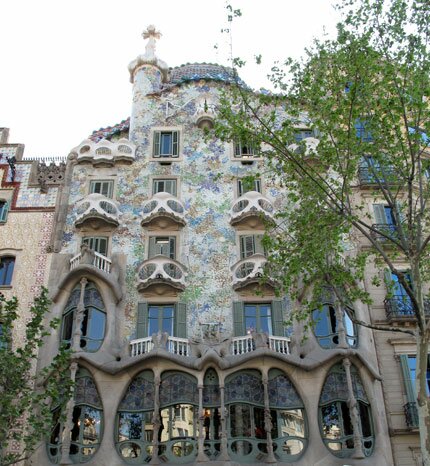
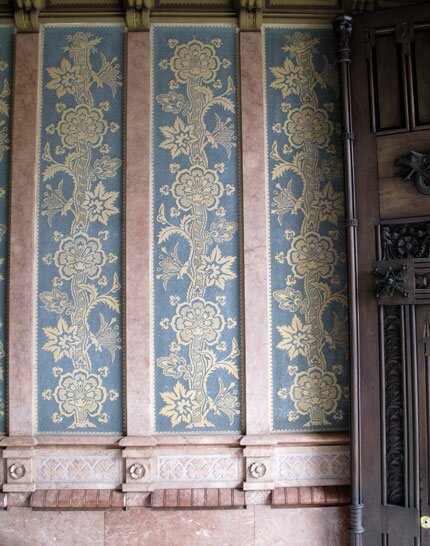
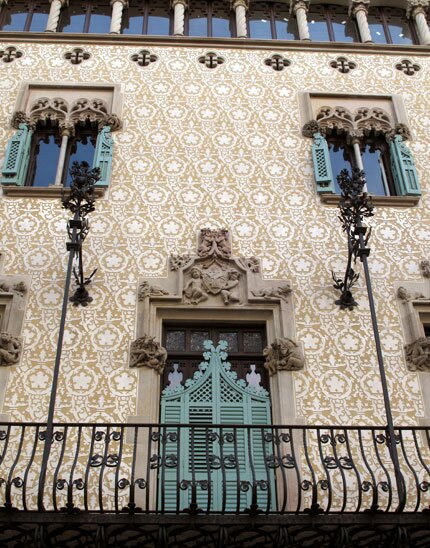
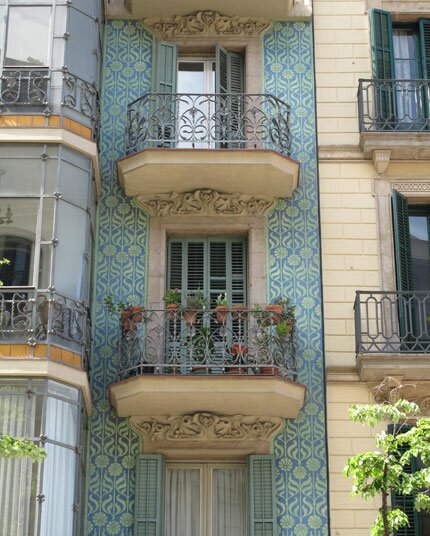
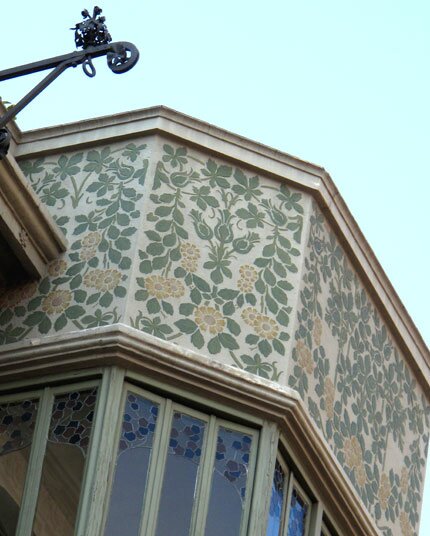
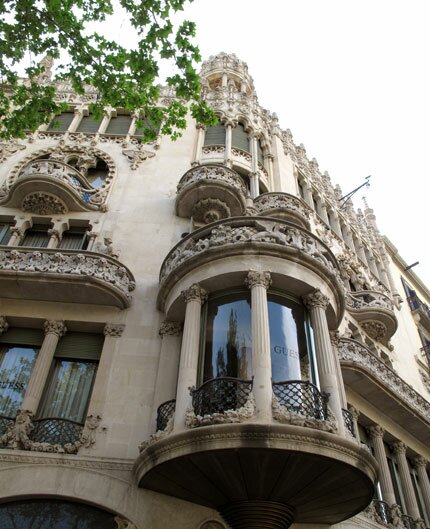
Developed mainly in the first part of the 20th century, the Eixample district is famous for its unique Modernista architecture and the amazing buildings of Antoni Gaudi, such as Casa Batlló shown above. While I truly love the old, historic streets and buildings of the Bari Gotic, the Eixample district for me is an inspiring source of jaw-dropping visual delights. In fact, there are so many fine examples of fine craftsmanship and insanely beautiful decorative details that could be easy for many to completely miss them because THEY ARE EVERYWHERE!
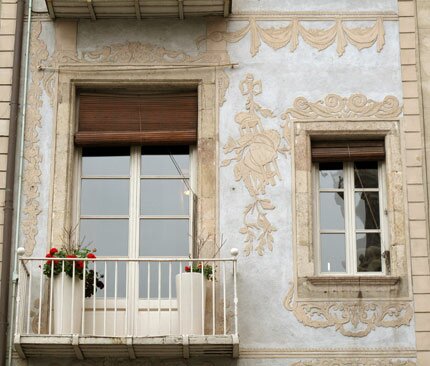
Of course, some of the most striking architectural details, for me, are in the abundant sgraffito walls and facades.
Sgraffito is a process of scraping and scratching through a top layer of colored plaster to reveal a different color layer below.
I have written before about the sgraffito in Florence, Italy, but in Barcelona the look is uniquely light and colorful.
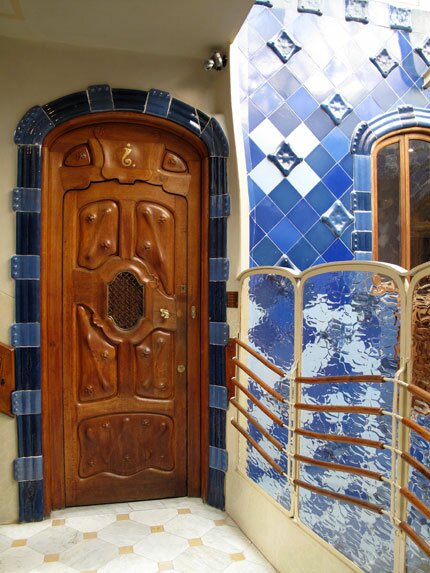
In addition to the amazing sgraffito, there is ornate plasterwork, exquisitely detailed metalwork, and unusual stained glass.
I will be traveling BACK to Barcelona for a few days next week, on my way to our painting trip in Umbria, Italy, to visit with Paul and finalize the details on ANOTHER painting adventure-to Barcelona in June 2011!! This trip will feature the best of many worlds, as it will include a 5-day stay in a serene, historically significant monestary in the rolling hills just outside of Barcelona where we will conduct a class and complete a painting project on site. After the project is complete,we will move to apartments in the city for a week to experience this amazing city up close, in between side trips to taste cava and explore the surrounding area.
More details to follow, but please let me know if you are interested in travelling to Barcelona with me, because the group will be limited to just 8….
Pssst! There are some fantastic flickr sets of photos of Barcelona and the Eixample district if you want to see more!
July 8th, 2010
Master of Plaster
Would you like to become a patterned plaster master of easy to execute, cost-effective Venetian plaster-type finishes? It’s easier than you think! I will be teaching a class at the 25th annual Decorative Artisans League Convention in beautiful Portland, OR on July 24 that features the versatile Vella Venetian Plaster system. This widely available plaster trowels “like butta”, can be applied directly over level 3 drywall, bridges ugly sprayed on wall textures in one pass, and costs a mere .30-.50 cents a square foot. It’s the ultimate solution for ugly white walls. What more could you ask for?
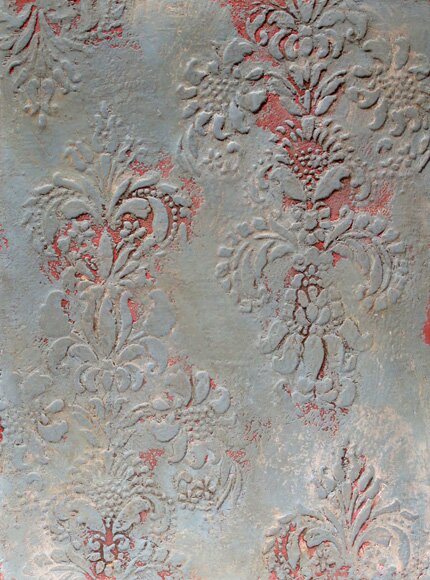
How about the addition of a fine marble aggregate that allows you to create the look of an expensive Marmorino or Travertino finish at a fraction of the cost? The breakaway look of the Provence Plaster finish above is done in three simple layers with a random stencil pattern, plus wax.
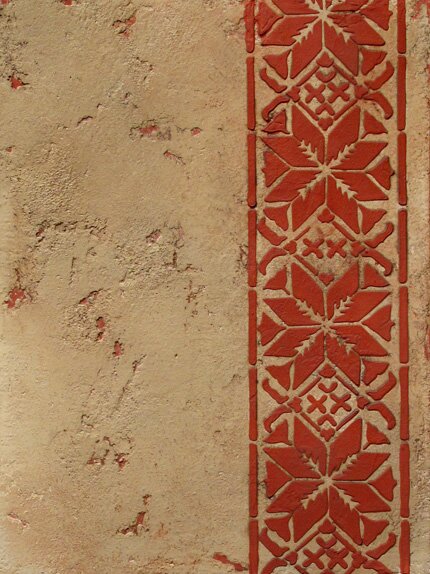
Another cracked Marmorino look brings the background color forward with the addition of a simple, embossed stencil border.
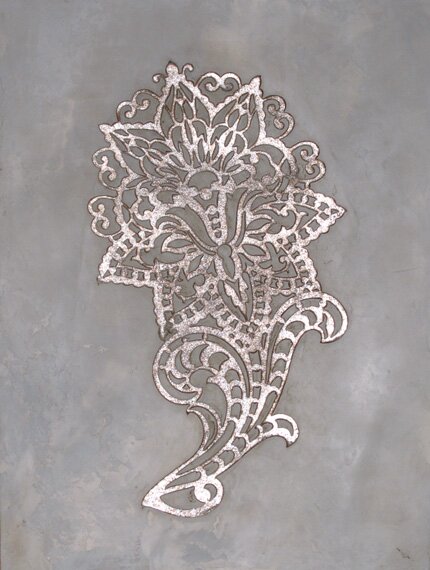
Need a little more glitz? Simple layer a smooth plaster with metallic foils and one of our exclusive Stencil Impressions designs.
This ornate allover stencil pattern only “looks” complicated. Stenciling with mica-laden wax provides instant depth and speedy coverage.
We will also create a sample that features inlaid motifs using one of our one-time-use Modello Pronto patterns.
I will be assisted in this class by one of the fine men from Vella Venetian Plasters, so you will get all the ins and outs of this user-friendly system from THE source. In addtion to leaving with newfound knowledge and 5 gorgeous 15″ x 20″ samples, you will also take home 4 quality stencils from Royal Design Studio.
More class details available here and general convention information available here
Online registration ends today, July 8, but don’t fret! You can still fax in your registration with this handy form.
June 19th, 2009
Bella Vella
Earlier this week, I had a great day with “the girls”. You know the drill; lunch and shopping plastering! I had organized a little day trip for myself and Karen, Kari and Julie up the I-5 to the Vella Venetian Plaster Systems studio in Orange, CA.
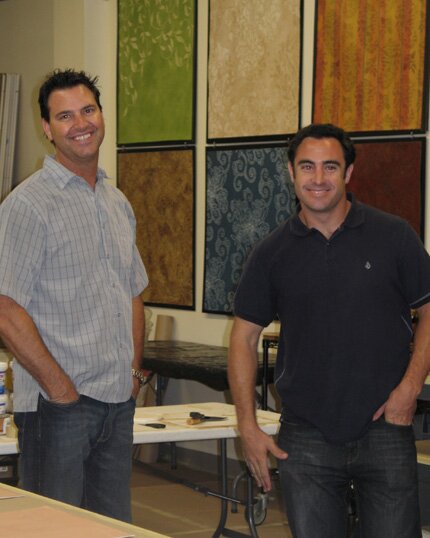
The guys from Vella (that’s Ken (VP) and Brett), had been down to my studio in San Diego a couple months ago to demo the product to our local IDAL chapter. I was impressed by a lot of the aspects of the Vella product (inexpensive, ease of use, gorgeous color range, etc) and wanted to see more!
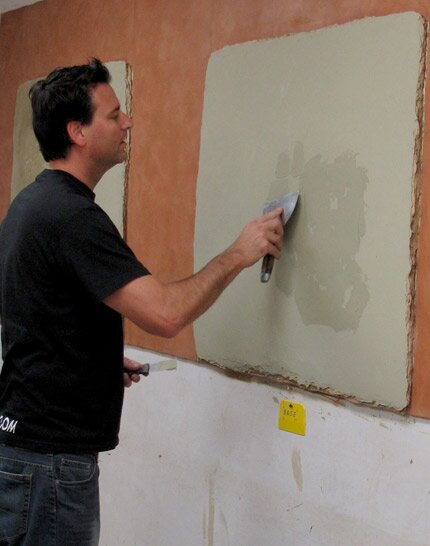
They generously (and wisely) offer free hands on training at their facility, where you can see the products applied on numerous walls and ceilings, get the run down on application, and try your hand at a few quick samples. Apparently, they do this a LOT because if you notice how the plaster is built out on the wall where Ken is demoing-that’s the build up of layers plaster where they keep going over with new coats to demonstrate the various steps in the process.
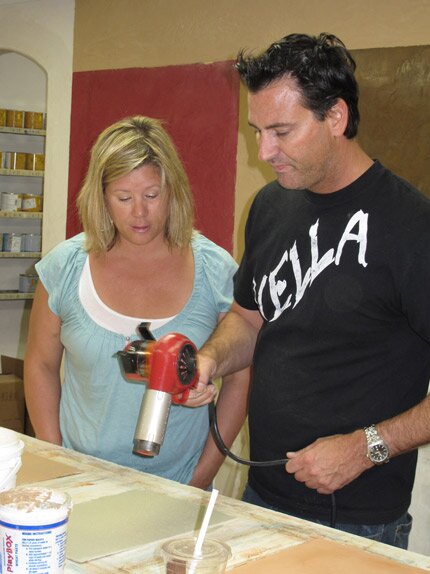
And a simple process it is! The Vella plaster requires no special primer and can go over anything from unprimed level 3 drywall to enamel paint. It starts with a quick allover basecoat followed by an “interest” layer to create subtle highs and lows and color variations. There are just two main products, the Vella Premium Plaster (some lime) and the Liscio Plaster (all resin) and they can be used separately, layered, or even combined to make the plaster crack.
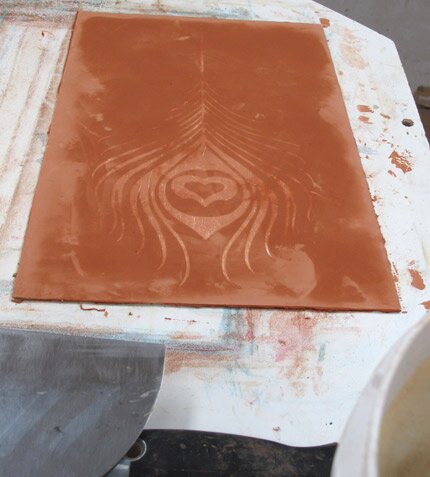
Of course, I wanted to see how it worked with our Modello Decorative Masking stencils and Royal Design Studio mylar stencils. The answer is: fabulous! The viscosity of the product makes it ideal for raised, embossed stencil effects and the strength and elasticity of it makes it great for Modellos.
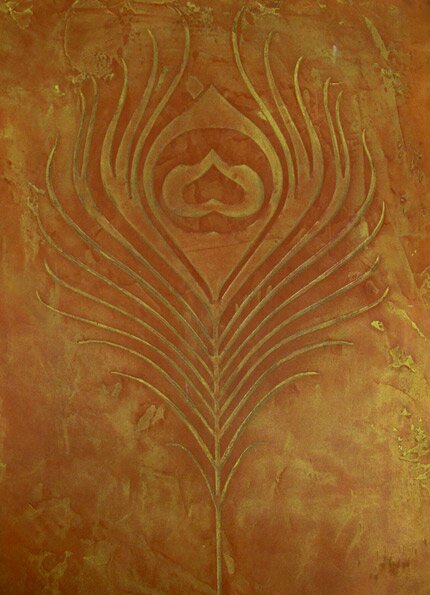
The Vella plaster does need to be sealed with carnauba wax and that is where the real fun begins. They have clear and pretinted wax colors and easy mixing formulas for also adding mica powders in. You can layer the waxes, buff, not buff, blend while still wet with buffing to create a color wash effect…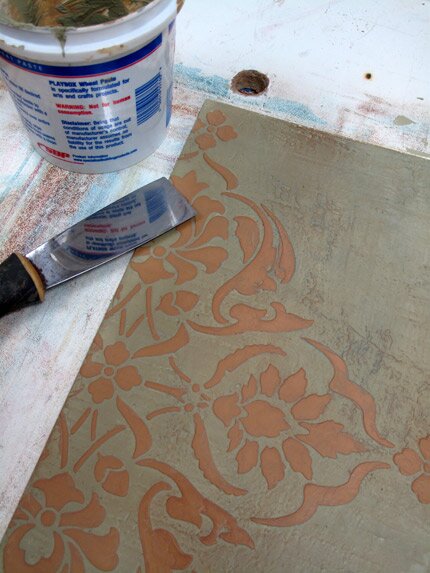
Another easy way to alter the look is to throw some crushed marble or clean sandbox sand (30 mesh) into the Vella for the first layer. Adding the aggregate allow for a look that resembles travertino and give you a nice textured look.
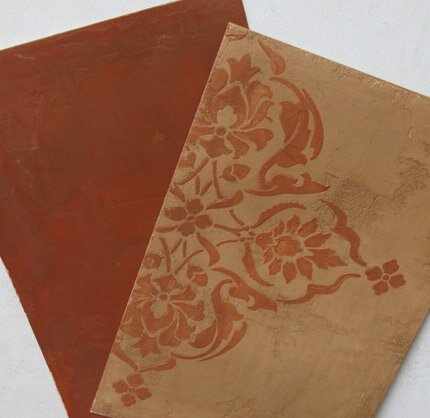
Here are Kari’s samples, showing a coordinating smooth and textured finish.
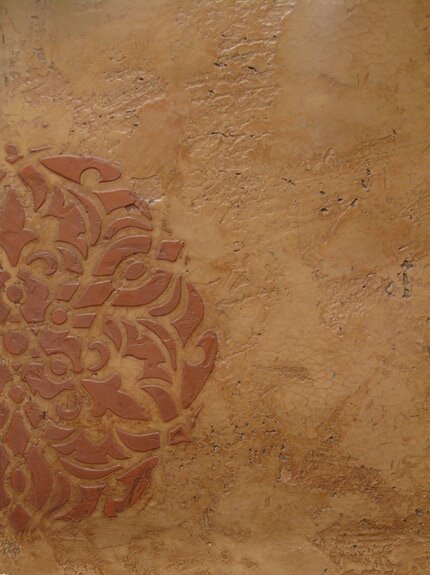
Apparently, they don’t generally add the sand to the Liscio (all resin) product, just the Vella. Julie unknowingly added the sand to the Liscio and it’s awesome! This is just two plaster layers, plus wax. Love the texture, love the crackle! We were literally in and out of there in two hours and nailed down a bunch of great finish ideas and some beautiful samples. Kari even sold a job the next day…
Want more bennies? The first layer of Vella will bridge orange peel and knockdown textures so you can do a two layer finish over those hideous walls and be done, OR just use the Vella as a filler for something else. The carnauba wax can be rolled over with Kilz primer down the road when it’s time for a change, and this product runs 30-50 cents a square foot from start to finish. It is available in or through Sherwin Williams stores around the country as well as other local suppliers. Vella Venetian Plaster System.
May 21st, 2009
Painting at Casigliano
Wow! What a great group of people showed up in the Rome airport to participate in our little painting adventure at the Castello di Casigliano. I’ll share them with you in the next post but first wanted to show you what we DID. Here’s the thing: Modern day Italians seem to like to keep things on the clean and simple side with their decorating. Maybe growing up surrounded by all the extreme art and decoration of the Renaissance leaves them wanting something a little less “in your face’. No matter, it’s all good. Additionally, the space we were working in is used extensively for large wedding parties and what should be the focus in the room in that case? The bride, of course. So-our goal, as laid out by the man in charge, Romano, was to create an elegant, understated atmosphere that tied into the history of the building and the land surrounding it. The space is called The Granaio, and it was restored from a part of the Castello complex that used to house grain.
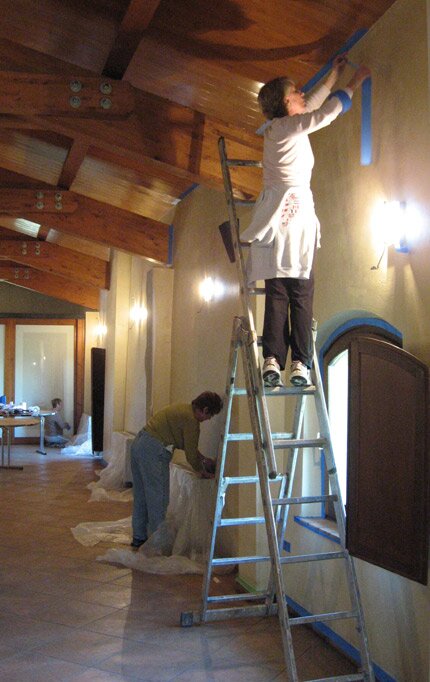
We did a soft stone-texture finish on all the walls using the standard production method of rolling it on in high and low areas and then knocking it down slightly. This finish worked out really wall with the many different hands we had working on it (16). You really can’t see a difference from section to section.
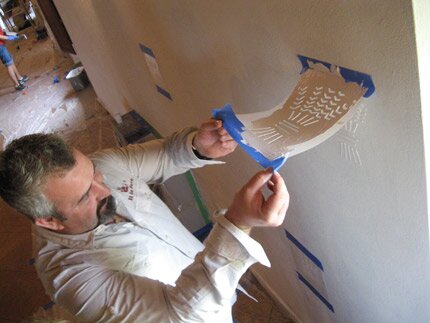
We then did a random embossed stencil that was cut from the Granaio logo. Nancy Jones from our group gave Romano a quick lesson. This was his “first time”….see the smile?!
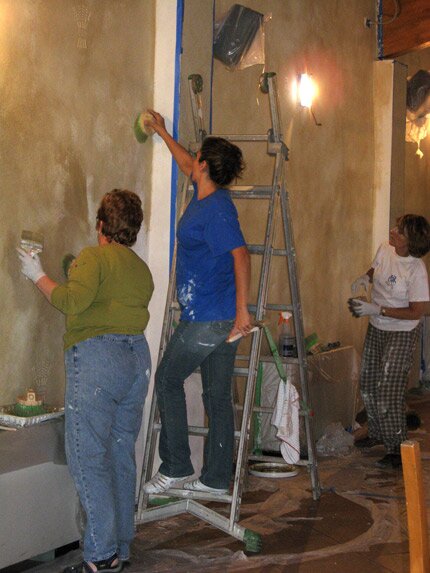
We did a soft, allover glaze and then lightly sanded back the tops of the wheat motif when dry to make it “pop” a little more.
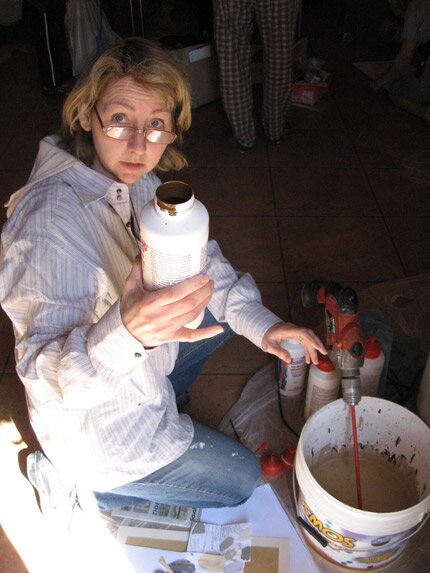
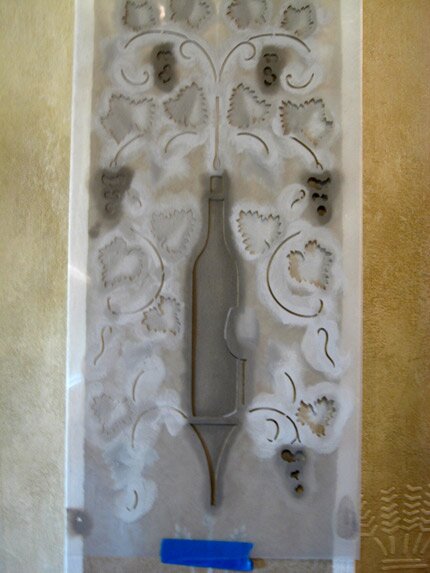
Alison Wooley created a lovely original design for the pilasters that incorporates grain and bread, grapes and wine, and an olive trimmed cartouche to hold the painted family crests of the four families whose history is tied to the Castello, which dates back to the 16th century.
I created a stencil from Alison’s drawing and had it cut by my company Royal Design Studio so that we could more quickly block in the main shapes and shading. Alison custom-mixed a range of 5 values for the grisaille painting.
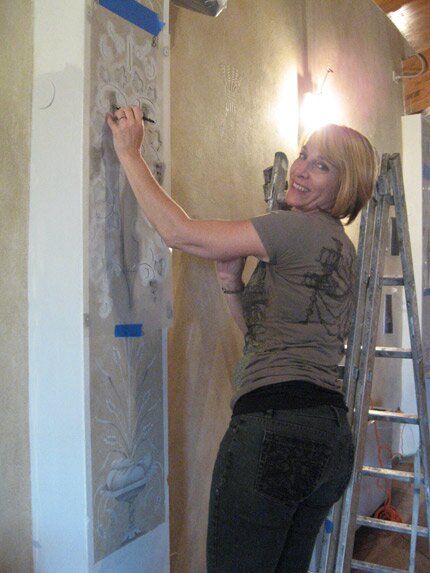
We did the stencil pattern on a series of 8 pilasters that ring the room.
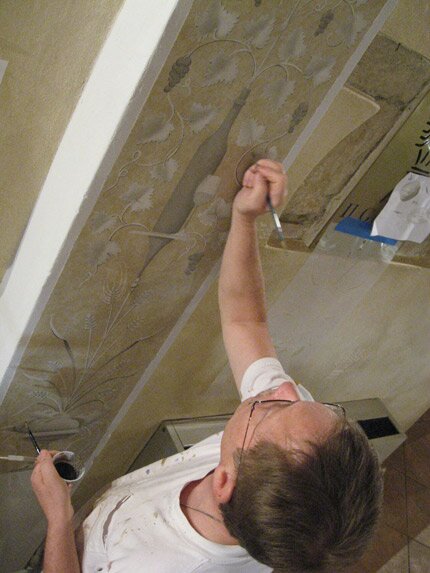
Gary Lord helped to add some of the final hand painted touches.
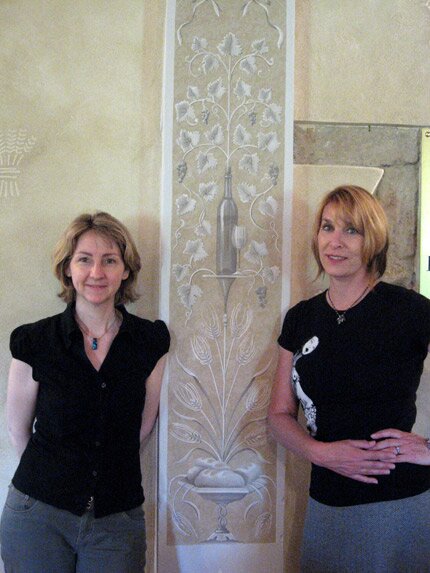
Alison and me in front of one of the finished pilasters. One thing that was really cool was getting the chance to introduce Alison to using stenciling as a possible tool for laying in the groundwork for some of her beautiful handpainted pieces.
All in all, it was a very successful project. Everyone worked very hard and very well together, we finished, it looks beautiful, the client was happy-and we are now a part of the long, rich history of this beautiful Castello. Una molto buona esperienza!
All of my photos from this trip are now up on my Flickr photostream.
December 15th, 2008
Pattern as Texture
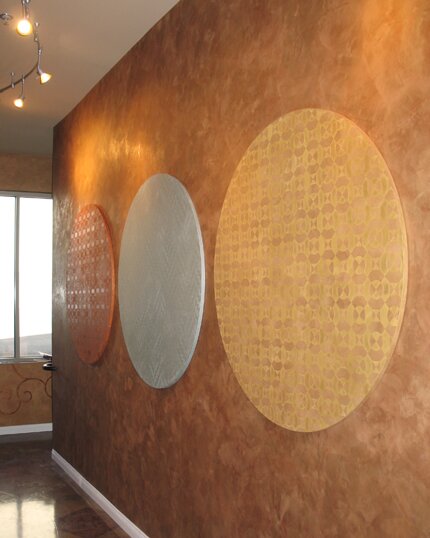
Or maybe it’s texture as pattern?? Regardless, I’m loving these subtle, tactile circles I created recently for our OTHER long hallway (see below)! I had Gatorfoam cut into 4′ circles. Gatorfoam is really dense styrofoam that has a heavy paper coating on both sides. It is used alot for signage and display as it doesn’t warp, can be easily cut, and is super lightweight. I wanted to bring some circular shapes into this very linear space while also maintaining our logo colors as this is right off our main lobby.
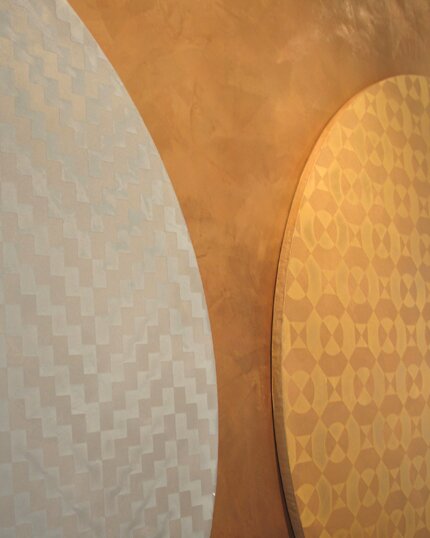
The patterns I chose are from our Modern Allover collection (ModAll 102, 103, 121), and to keep it subtle I used just slightly lighter/darker custom mixed shades of metallic plasters.
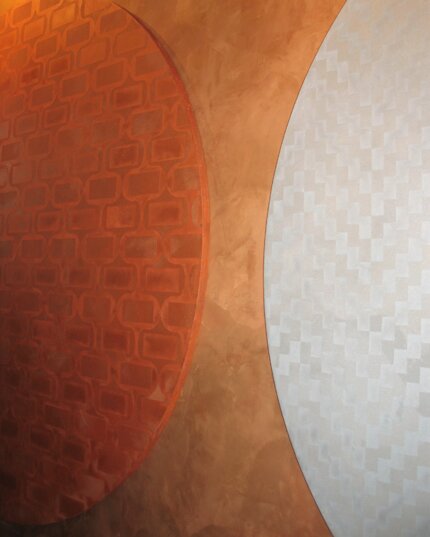
You could use a similar idea just directly on the wall as well by first laying down a Modello pattern in a large circular shape and applying the plaster directly to the wall through it. Leave that in place while you lay down the allover pattern over it and trowel in another color. Remove both patterns at once and, viola, subtle patterned circles-or diamonds, or flowers, or butterflies, or whatever silhouette shape you choose.
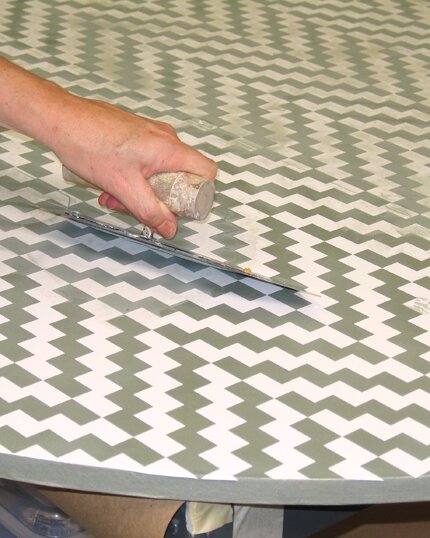
This photo shows that second color being applied through the pattern over the first basecoat. This could also be a cool idea done in stripes but would be most awesome done over a whole focal point wall, don’t you think?


 Copyright © Designamour