May 21st, 2012
Artisan Studio Design
Today begins a new weekly series on Stencil Stars™ where we showcase our customer’s use of our mylar wall stencils and Modello™ masking stencils on walls, ceilings, floors, and more. Each week we will feature a different decorative artist (or decorative studio!) whose work with our stencils excites and inspires us, with the hope that YOU will be inspired too! Look forward to interesting pattern combos and color palettes, pro painting tips and ideas, and even the stories behind the stenciling. I’ll be co-writing this series with a BIG assist from my friend Regina Garay of Fauxology and SociaComm fame. Regina is officially helping us with our creative outreach to artists and bloggers and is a great asset and ambassador!
Our inagural Stencil Stars are…. paint buds and business partners Brooke Johnson and Jann Krone of Artisan Studio Design

Brooke Johnson and Jann Krone
A Bit about Artisan Studio Design
A true passion for beautiful spaces led Texas-based Brooke and Jann out of *yawn* jobs in the corporate world into a creative one where both could fulfill their dreams and passion. They met at a seminar and became fast friends, then business partners, finding that by combining their respective talents they are able to offer their clients a much more comprehensive portfolio to choose from. Each has been extensively trained by Texturline of Canada, Safra from Italy, Faux Effects products, Modello Designs Stencils and Tattoowall, to name a few. Their passion, dreams and creativity can be seen in private residences, commercial buildings, corporate offices, design showcase events and numerous parade/dream homes. Collectively they have won various awards and have been interviewed both for radio, newspaper, magazines and books. Today we have a chance to delve into the details of their work and get some insights on their creative process.
![]()
The stunning, dramatic black & white bath above is created by using Modello Transitional Border Stencil 110
Brooke and Jann are accomplished using traditional stencils, like those we sell through Royal Design Studio. Most of the work featured here, however, focuses on their use of Modello Decorative Masking Stencils. These are one-time-use, adhesive backed vinyl stencils that allow for easy custom design and intricate, large-scale patterns. They have become the “go-to tool” for professional decorative finishers when pattern becomes a priority. Masking stencils offer many advantages. One of which is that the pattern can be worked using either the positive or negative image. We have capitalized on this by creating a collection of Transitional Border patterns, that allow you to “transition” from one color to another with the help of the pattern itself. Here are three prime examples of these in use by Artisan Studio Design.

An alternate use of this same Modello™ stencil pattern where Brooke and Jann provided perfect measurements so that our custom design department could fit the pattern to a tee by manipulating the design elements slightly so that each corner is beautifully finished.

A different Transitional border stencil, 113, was used to create a two-tone stencil effect in a bathroom higher up on the wall.
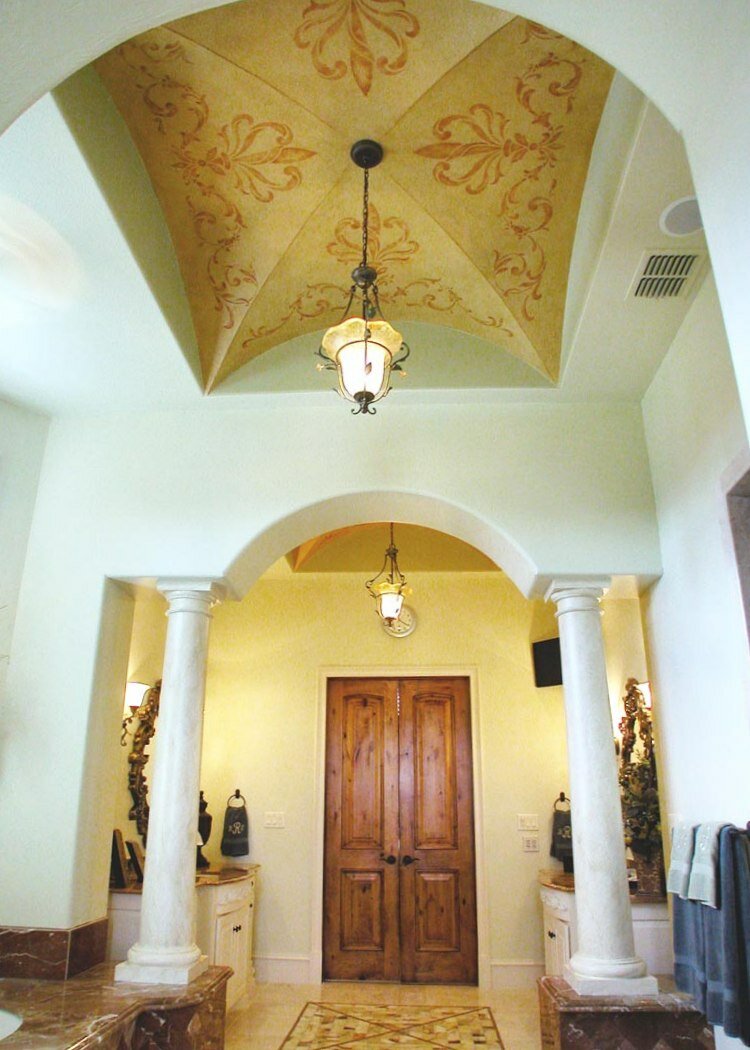
The beautiful groin ceiling above was done with a Royal Design Studio custom stencil to Artisan Studio Design’s specifications. It really enhances and accentuates the area while balancing out the color scheme.
Now, some questions for Artisan Design Studio…..
What draws you to Stenciling?
The ability to create without limitations. Using traditional mylar stencils and Modello custom masking stencils allow us the ability to enhance ANY surface. We have used them on concrete floors, walls, furniture, niches, cabinets, crown moldings, ceilings and mirrors. Our mediums have included paint, plaster, glass beads and concrete. The impact even using a small stencil image can make the difference between a nice finish and an extraordinary finish.
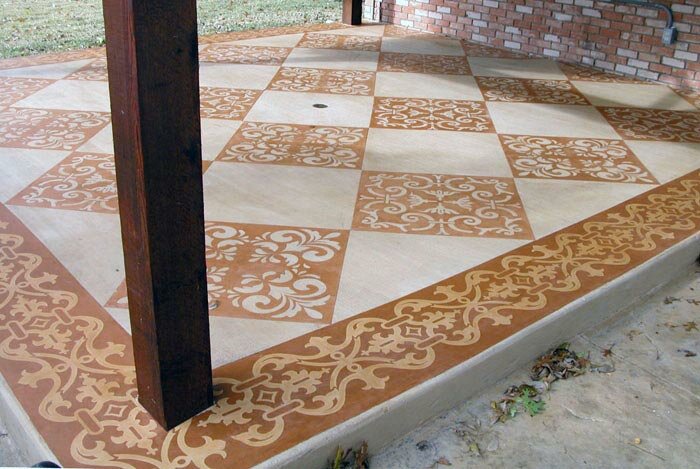
A patio floor is transformed from blah to wow! using a well-designed pattern and warm colors.
How do you determine which pattern will work for your project?
We love this question! One of our requirements in designing for any client is that we must visit the space where we will be creating a design. We feel the areas that we create should evoke a feeling of well-being and reflect our client’s personality and wishes. To achieve that goal we spend time with our clients, asking questions, reviewing the architecture and discussing the purpose of the space so we have a clear picture of what needs to be accomplished. To do that, you have to come to know your client well. Every client is different, so we approach every project with an open mind taking into account the clients requests and desires.
In getting to know our client, we have found that certain personalities such as accountants, architects, doctors and professional athletes tend to go for a more of a grid format, whether they realize it or not. Professions that aren’t as structured tend to prefer a looser, more free-flowing pattern such as more random placement and more eclectic. It is the ability to read people and their spaces that has given us an advantage in picking patterns and how they are laid out and the client isn’t any wiser. They just like the fact that it “works” and is perfect for them.
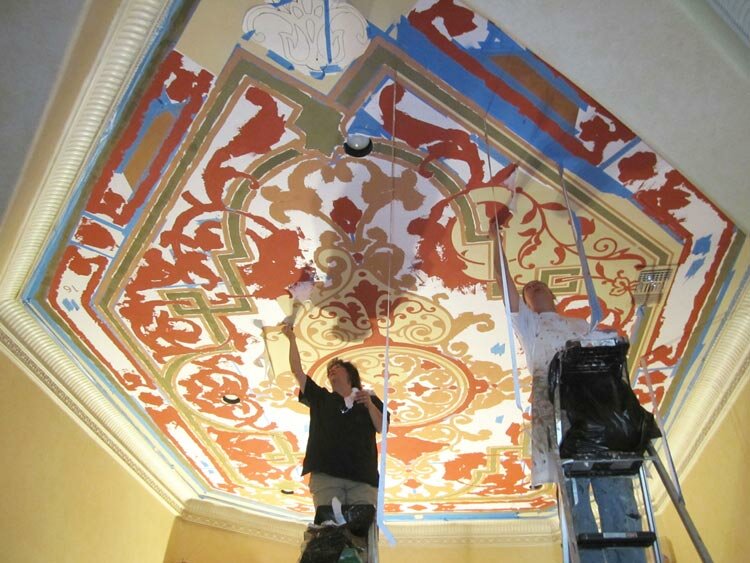
Jann and Brooke at work on a very large ceiling stencil project that required some serious custom designing to fit the “boat” shaped recessed area. The end result (below) showcases the finished customized Modello Chateau Carpet Panel — which translates beautifully to ceilings as well as floors!

Please share your top stenciling tips with us.
When working on a light or white background, we use the low-tack gray Modello™ masking material. This is especially useful when you are hand-painting your design. When using Modello™ stencil patterns or mylar stencils, you can never measure too many times, especially on groin vaults. We have found that there is NO such thing as a perfectly straight or square room and no two sides are ever exactly the same measurement. Measure, measure and measure again.
We had a situation in a powder bath that had an arched wall that separated the sink from the toilet area. The pattern the designer requested was a trellis pattern. The challenge for us was to have the pattern on the forward wall of the arch MATCH the pattern on the back wall when you walked in, so there was no break in the visual effect. This was a prime example of measuring the area and matching it to the size of the stencil we needed.
Another tip is to always buy more then one stencil or purchase a small stencil that matches the production size stencil. We have found these extra stencils come in handy especially if you have to cut them up to make your design work. Last, we always have a large pad of newsprint when we are stenciling. It is an inexpensive pad from any hobby store that we can quickly wipe down, clean our stencils on and throw away the used paper. The newsprint also comes in handy when we need to spray adhesive on the stencils. We always keep a spray bottle of Simple Green with us to wipe down the stencils, too.
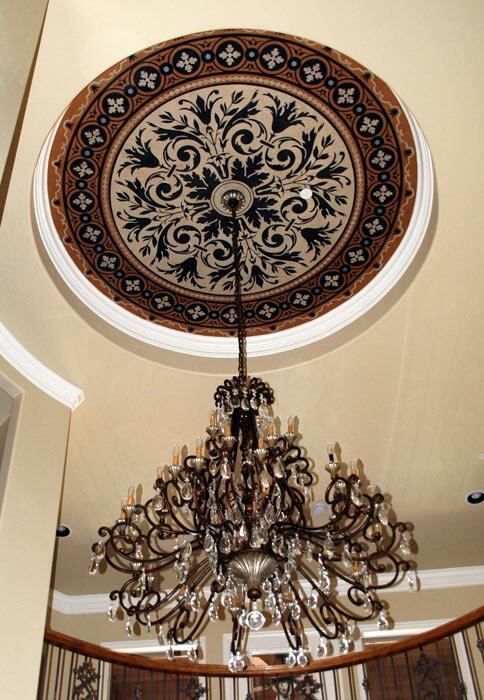
Architectural elements such as inset niches and ceilings can become wonderful focal points. This ceiling features Modello Ornamental Center 128.
We hope you’ve enjoyed seeing the work of our first Stencil Stars! We’re so happy that Brooke and Jann have found the perfect partnership in each other and incorporating pattern into their many projects. We have SO MANY fabulously talented customers, you can rest assured that we have many more posts on the way. Special note: You can see a preview of each week’s Stencil Star each Saturday on our Royal Design Studio/Modello Designs Facebook Page. You can find more of Brooke and Jann’s work on their website, Artisan Design Studio and their Facebook page.


 Copyright © Designamour
May 22nd, 2012 at 10:39 am
absolutely stunning work! I am constantly inspired by the creative use and possibilities and creations achieved with my favorite “tool”, MODELLOS!
keep posting more pics, just jaw dropping
ly gorgeous!