January 22nd, 2011
Martha and Me

It’s always Martha, Martha, Martha!! She’s a purveyor of gracious living that has helped to shape the psyche of multiple generations of woman, a cultural icon, an accomplished, creative woman with business nerves of steel. She’s served time (very graciously, I might add), and served perfect desserts. Oh, and she also has this magazine…..Martha Stewart Living…and the February 2011 issue features a lovely furniture application of my original Ribbon Damask Stencil, available in two sizes through Royal Design Studio. How cool is that?!
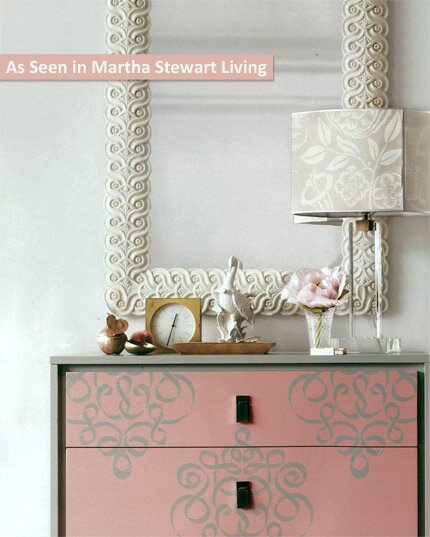
The Small Ribbon Damask stencil was used very “smartly” on the furniture piece above for the magazine shoot.
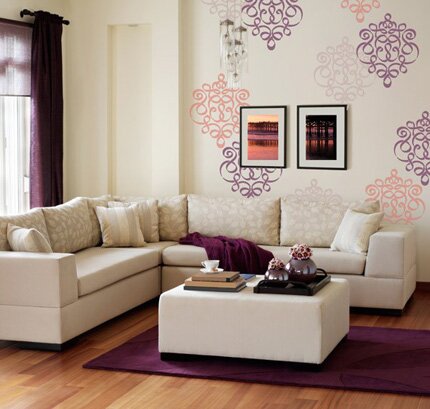
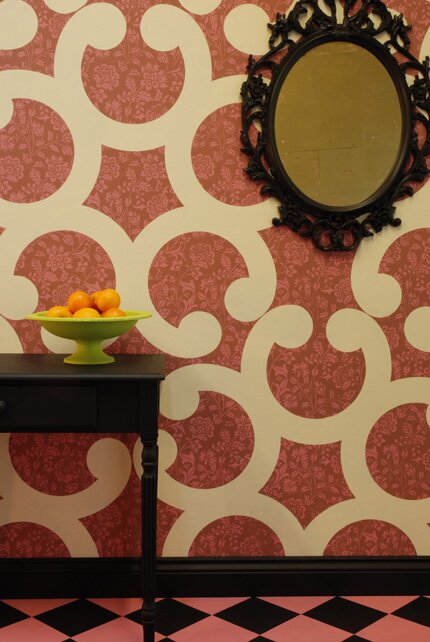
This easy, breezy stencil pattern looks good repeated formally, as on the chest of drawers, or just scattered in creative random abandon across a wall. Mix in some different colors for fun layered effects, as shown here with our version of the Large Ribbon Damask stencil .
So, what do you think of the vignette the stylist created above? I like it. It’s different, but I feel like I want to change something about it. Maybe the drawer knobs?? Not sure….either way, thank you Martha Stewart Living!!
January 16th, 2011
Royal Stencil Cremes
So….What’s this mess? A new stenciling concept gone awry?
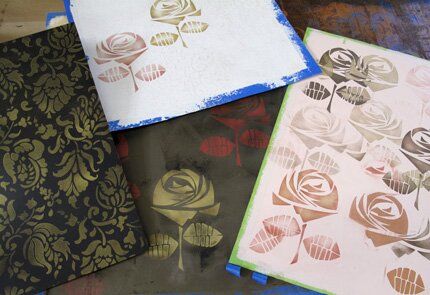
Actually, it’s something I’m quite excited about! This, while not so pretty, is the result of a series of application tests of Royal Stencil Cream!
When I first began stenciling 27 years ago, I routinely used oil-based Japan Paints, as recommended by the 70′s and 80′ stencil revival pioneer Adele Bishop who provided my desire to learn to stencil back in 1984. These paints provide a beautiful effect, but require tedious cleanup with mineral spirits, and I doubt that anyone uses them these days. From there I switched to using primarlily Folk Art Acrylic paints for stenciling. These craft acrylic paints are readily available (Michael’s) and come in a vast array of colors. The acrylic paint binds up on the stencil and brush however, and takes a bit of practice. In order to get softer effects and more “flow” off the stencil brush, I’ve alway recommended adding a few drop of Folk Art Extender to acrylic paints, and we still sell and recommend this product. From there I started using Faux Creme Colors for stenciling, which are quality pigments in resin. These give beautiful shaded effects easily, but require a lot of building up of layers (with drying time in between) to achieve opaque effects.
The stencil paint medium I’ve always dreamed about:
- Could be applied for a very opaque effect in ONE layer.
- Could just as easily be used for soft, translucent effects.
- Could be stenciled just as easily with a stencil brush or foam roller.
- Would flow off the stencil brush or roller effortlessly and require minimal reloading of paint.
- Would dry quickly enough that you could layer colors, if desired.
- Would resist causing stencil “rununders”, making it easy to use for both beginners AND pros.
- Would not build up and dry out easily on stencils and stencil brushes.
- Would clean up like a dream off stencil brushes and stencils with soap and water.
- Would work equally well over a variety of surfaces, including flat to satin paints, metallic paints, and metallic AND stone texture plasters.
- Come in a range of gorgeous metallic colors and artist’s colors, including a opaque black, white, and off-white.
And guess what? I’ve GOT it, and YOU will be able to get it too because it will be available soon….
January 13th, 2011
Corsini Damask Stencil Art
One of the more recent additions to the Royal Design Studio stencil collection is the Corsini Damask Stencil. This stencil pattern was developed especially for the Italy painting trip that I hosted last October with my good buds Gary Lord and Alison Wooley. It was a special trip, filled with lots of fun and good painting friends. The Corsini Damask Stencil gets it’s name from the Corsini family-a blessed and noble Italian family with a long and rich history who also happen to own villas, palazzos, and castles througout Italy, including the Castello di Casigliano where we were fortunate to work, stay, and play for a second time in the last three years.
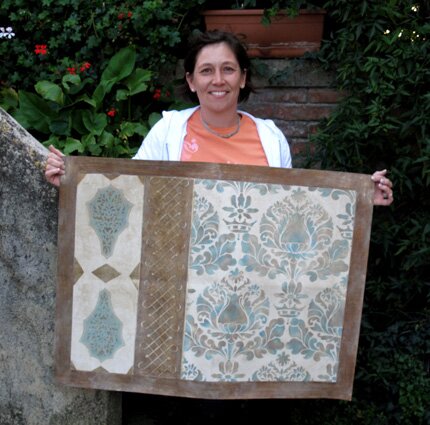
For my class project, I decided to give the students a limited range of stencils, Modello Masking Stencil Patterns, some interesting paint techniques, a limited color palette, and a large piece of canvas. Basically, I turned them loose to exercise their creativity and the results were fantabulous!
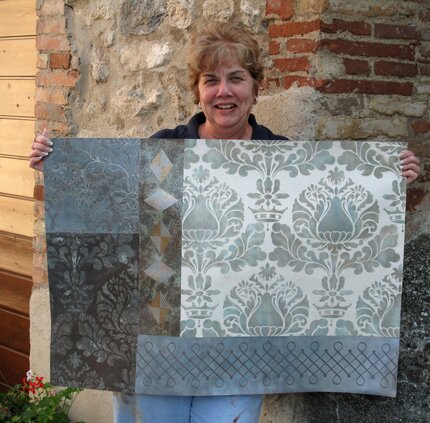
Each canvas became a unique work of art and it was so inspiring to see how each person interpreted the patterns and colors in a special way.
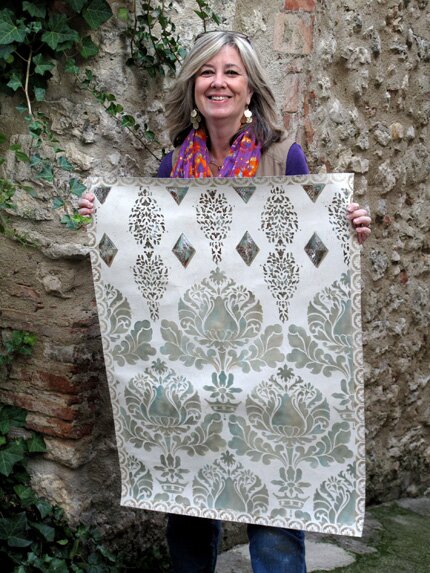
Applying stencil patterns as canvas art frees you to really explore color, texture, shape, and scale in a different way from wall stenciling. You can be bolder and more creative with your color combinations, and easily introduce mediums other than paint, such as gilding, plasters, and waxes. Basically, anything goes!
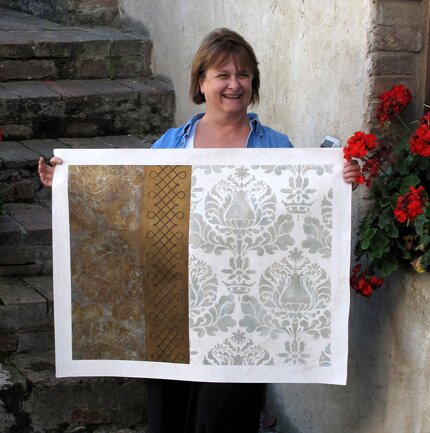
This canvas art was done on Roclon, an amazing material that is actually canvas laminated to both sides of a thin plastic core. It is very flexible, wrinkle resistant, doesn’t shrink, and comes ready to apply paint, plaster, metallics, or whatever medium you want to work in. Alternatively, you can do stenciled canvas art on stretched canvas that will be ready to hang. The type of canvas art shown here is ideal for hanging from a decorative curtain rod, as you would a tapestry. Artwork done on the Roclon cloth can also be permanently affixed to a wall with wallpaper paste. My fabulous artist friends shown here are (top to bottom) Lauren Gaines, Nancy Jones, Debbie Hayes, and Barb Skivington. Of course, you can use the Corsini Damask Stencil very nicely on a wall too!
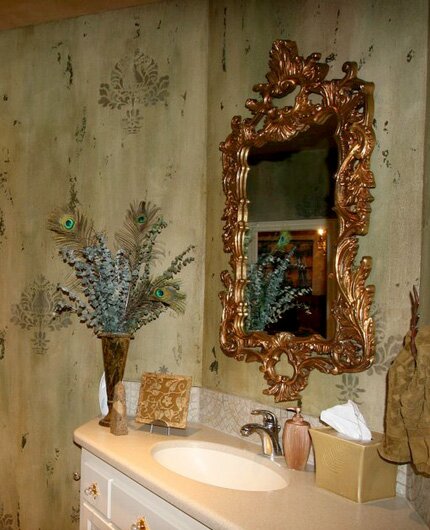
This room above was done by Sass Lassly, another great addition to our Italy painting adventure, in her own bathroom. Note the random application of the stenciling. This is a great way to add pattern quickly and artistically.
I hope this post inspired you! Hint: Stenciled canvas art is also a great way to use up those little bits of paint and plaster you have lying around, as well as maybe revisiting some stencil patterns you may not have used in awhile. The 3074 Corsini Damask Stencil is available in both a large and small version. The small version is shown in all photos above.
January 11th, 2011
Damask Stencil Desire
Have you noticed? There is a pattern renaissance going on. Damask stencil patterns, an enduring classic design staple in decorative art are hot, hot, HOT! Now, for me, damask stencils have always been at the top of MY list for creating elegant, allover wall treatments with paint and plaster. Damask allover stencil patterns allow you to wrap a room up with customized pattern in the colors and style of your own choosing. You can use high contrast colors to create drama, OR choose a tone-on-tone color palette, or stencil with glazes for a softer, more textural treatment. If you wish, you can use damask stencil patterns to simply create a stunning focal point on an accent wall, or limit the pattern (and save time!) by just stenciling them in panels, under chairrails, as headboards, or simply on a large canvas to hang as wall art or a tapestry.
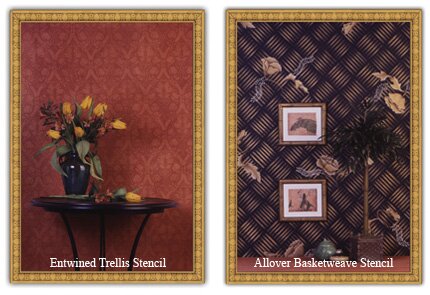
About 10 years ago, Royal Design Studio first introduced the concept of Allover Production Stencils: larger stencils containing multiple repeats for faster stencil application. They have been a consistent hit with professional decorative artisans and DIY decorators ever since. Recently, we’ve been able to renegotiate better pricing with our vendors and bring more of our stencil cutting “in house”, allowing us to reevaluate our pricing on this stencil collection. AND, ta da! We have just LOWERED the prices on these stencil classics CONSIDERABLY, from 20% all the way up to 45% on some of our most popular Allover Production Stencils.
Soooooo….I thought this might be a good time to revisit some old “friends”!
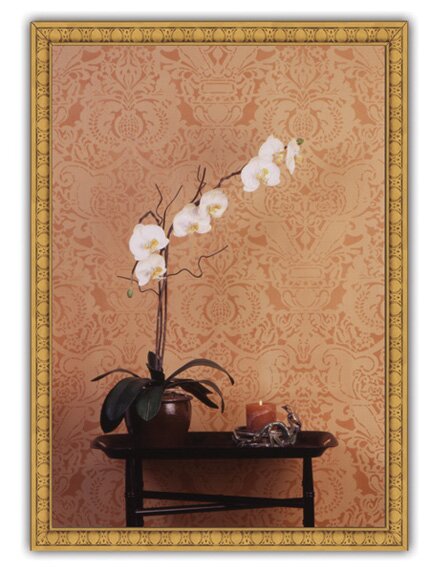
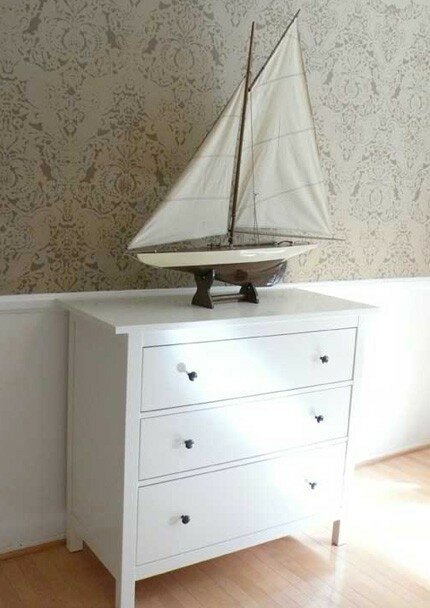
The Fortuny stencil has always been a personal favorite of mine. In fact, I have this stencil on my own living room walls and I never get tired of it!
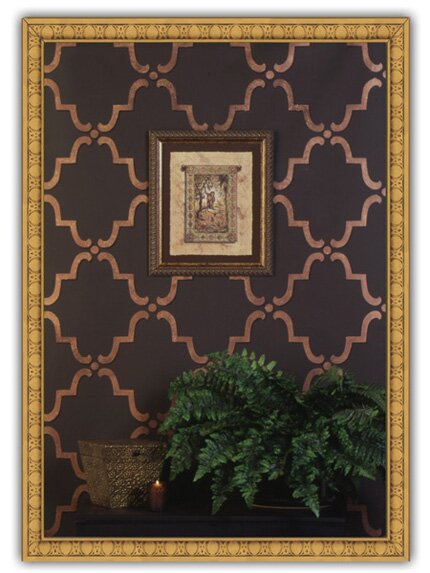
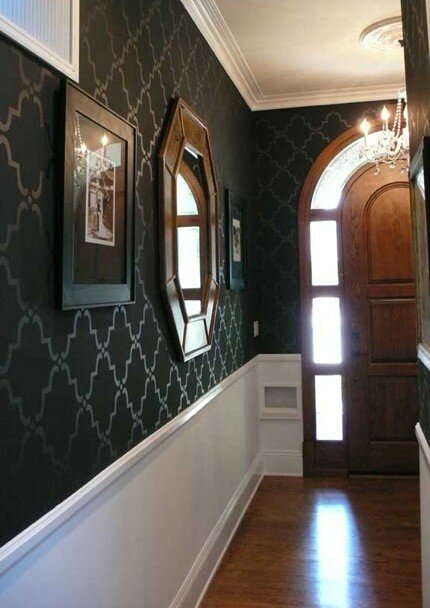
The Moorish Trellis Stencil is well-loved for it’s simplicity and graphic quality. This stencil pattern is like a chameleon, in that it blends in well with many types of decor including classic, ethnic, and contemporary interiors.
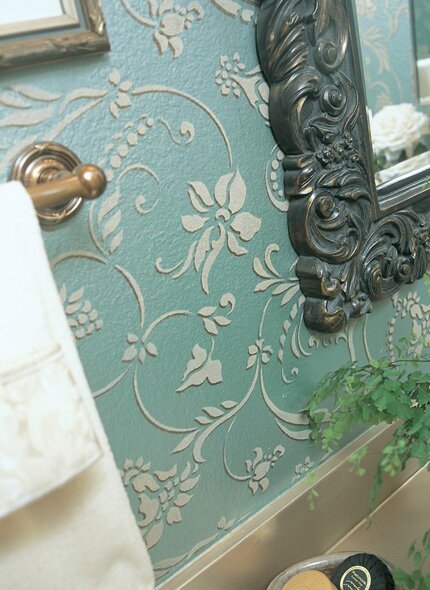
The Allover Flourish Stencil never seems to go out of style. This elegant, curvilinear pattern is also used quite often on ceilings as its soft curves don’t have a specific top or bottom, and it flows effortlessly across the surface.
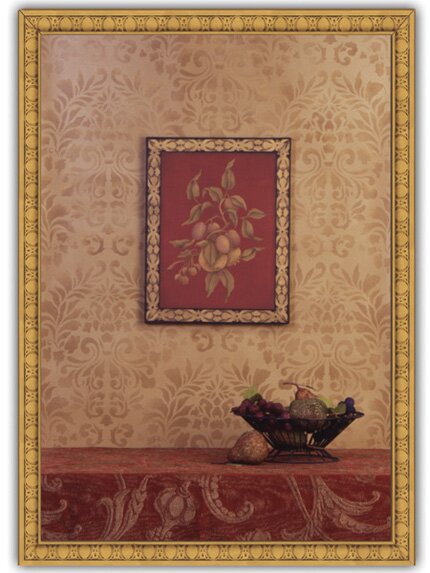
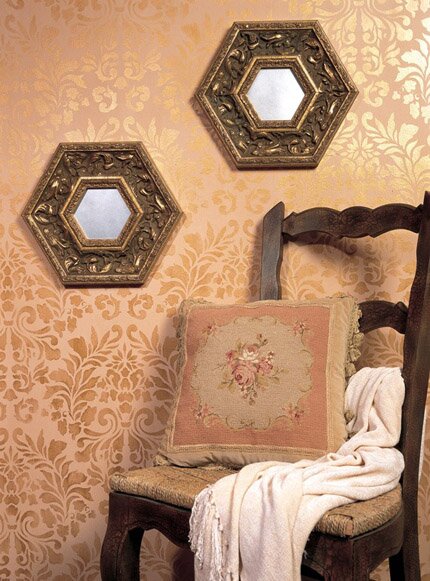
The Fabric Damask stencil is easily our most popular stencil pattern EVER. This stencil pattern seems to just “connect” with people, and the great thing about the Fabric Damask stencil is that you can repeat it as shown to create an allover pattern or simply this design as a stand alone “motif” that you can repeat randomly, and quickly.
Looking for more inspiration and a little direction on how you can incorporate these ”now more affordable” beautiful allover stencils? We have tons of additional stencil inspiration here, and free stencil tips and how-tos here! Now, let’s get painting…..
November 28th, 2010
Hearst Castle, Part 1
For 28 years, from 1919 to 1947, William Randolph Hearst and architect Julia Morgan worked collaboratively to turn a former remote Hearst family camping site near San Simeon, CA into one of the most lavish and famous private residences in the country. Hearst dubbed it La Cuesta Encantada (the Enchanted Hill), and referred to it as “the ranch”. We now call it Hearst Castle, and it is an invaluable treasure of art, architecture, and design. It is absolutely one of my favorite, most inspiring places on earth.
The Hearst Castle Collection is the registered brand name encompassing artisan quality, licensed home furnishings, decorative accessories, and art objects inspired by the architecture, antiques and antiquities at Hearst Castle. The mission of the Hearst Castle Collection is to educate and enlighten the community on the importance of preserving the history of design and craftsmanship through in spired contemporary design. Hearst Castle Collection licensees directly support the preservation and restoration of Hearst Castle by producing contemporary reproductions and design interpretations that bring the museum’s collections to the attention of the public worldwide. Additionally, a percentage of all items sold under the Hearst Castle Collection brand go directly back to funding the ongoing maintenance and preservation of this national historic landmark and treasure.
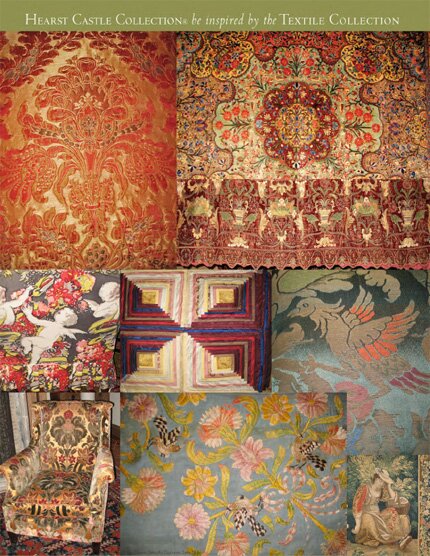
Licensees have access to an extensive and well documented collection of patterns, designs, decorative elements, architectural features, fabrics, and on and on…..
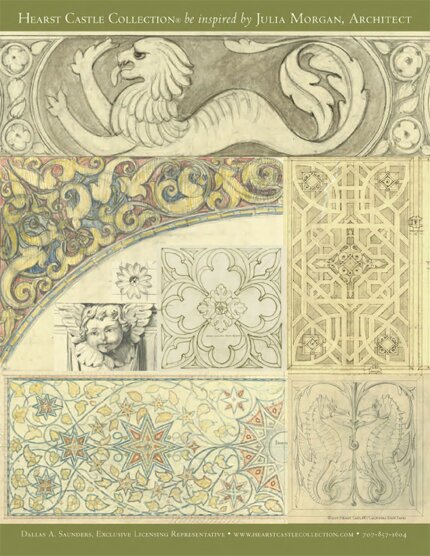
…including the architectural drawings by the architect Julia Morgan, who with Hearst, designed all of the architectural features that were created on-site down to the smallest detail. Much of what you see when you visit Hearst Castle was actually dismantled and shipped from villas, palaces, monestaries, etc in Spain and Italy. Julia designed some of the main rooms around whole ceilings that Hearst “picked up” on his many trips abroad.
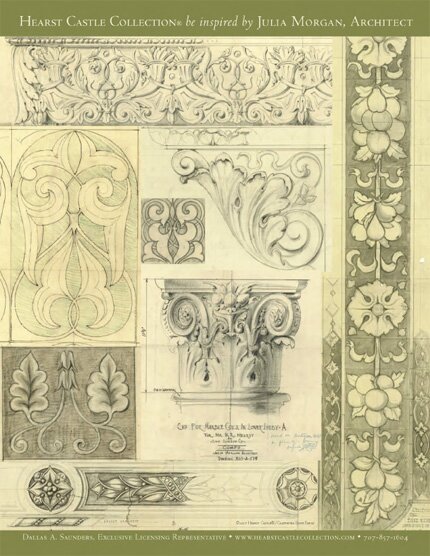
Morgan was the first independently practicing female architect in California. She was also the first woman to graduate with a degree in civil engineering from the University of California, Berkeley, and the first woman to graduate with a degree in architecture from the famous École des Beaux-Arts in Paris. Impressive?!?!? Indeed!!!! Julia was one A-mazing woman.
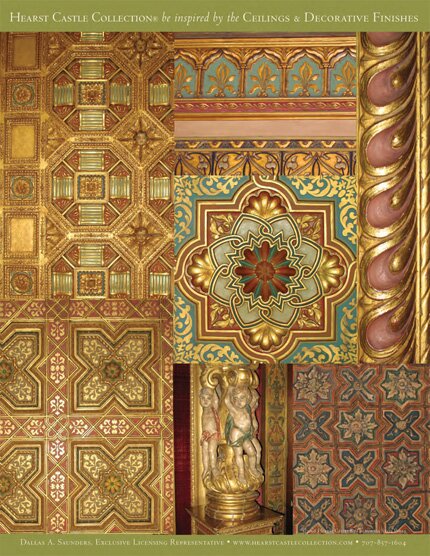
So knowing all this, and knowing how much of my life revolves around all things having to do with pattern, design and decoration, you can imagine how HONORED and EXCITED I am to announce that both Royal Design Studio and Modello Designs will be producing and offering patterns based on the Hearst Castle Collection. We will be joining a well-respected and merry group of licensees including Pindler & Pindler, Habersham, Barclay Butera, Tilevera, and more.
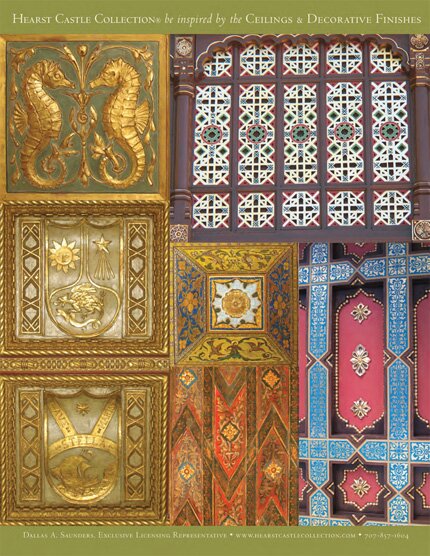
In addition to stencil designs and decorative masking stencils, we are looking at developing a line of decorative art accessories, including mirror, floor screens……AND an architectural ceiling series. OH MY! My head is swimming and I can hardly wait to get started……waiting now for my books and cds containing over 5,ooo documented designs to work from. This pattern junkie is beyond thrilled and looking forward to the ultimate “fix”! to be continued.
August 13th, 2010
Sparkling Susan Bickford
I have blogged here before about Susan Bickford and her decorative finishing business, Singing Walls. Susan is a wonderful, regular customer of Modello Designs whose work has been featured extensively in our inspirational “idea” books, Modello by Design-Inspiring Interiors from Artists’ Portfolios. Susan recently sent me photos of a fabulous ceiling project that, unfortunately, came too late to make it into the most recent book. Fortunately though, it’s NEVER too late for a blog post!
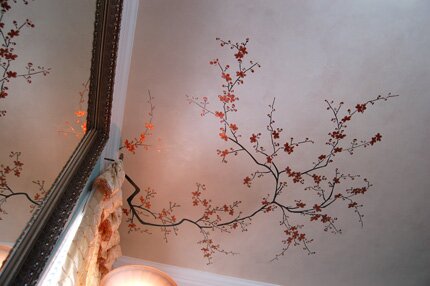
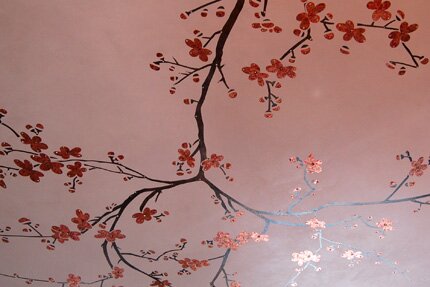
Susan worked with one of our talented graphic designers, Michelle, to customize our popular EasPan114 pattern, which features classic Japanese plum blossom branches, for a bedroom ceiling. You can see how well she coordinated to the colors to the drapery material in the room in the shot above.
As an added touch, Susan and her friend Elaine Castronova added 100′s of sparkling, Swarovski crystal to accent the flower petals.
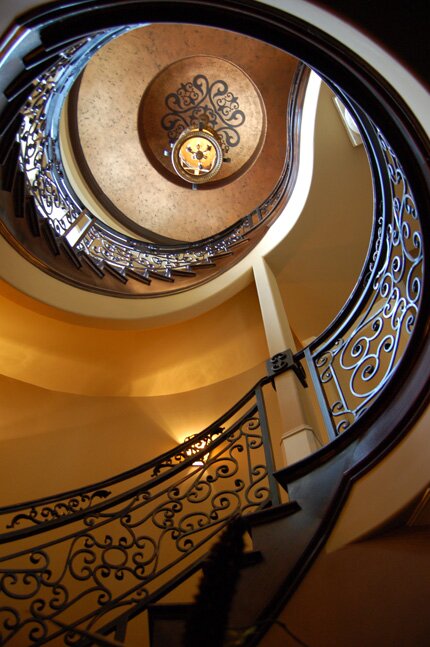
Some of the photos of Susan’s work which DID make it into the recent book show the heights that she will go to in order to add a pattern that will compliment an architectural feature! Shown here, OrnCen164 in a dome-topped stairwell.
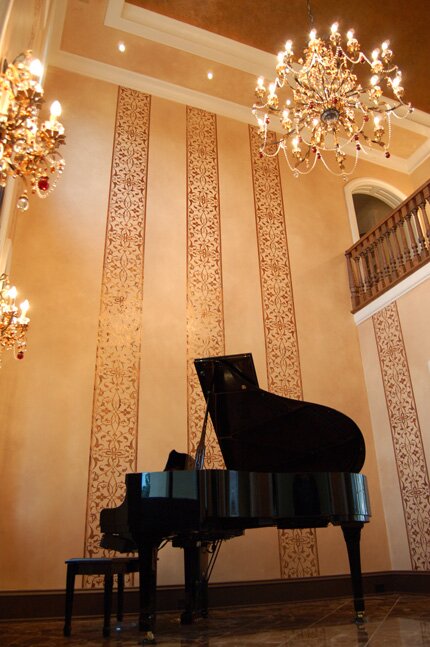
EasPan102 used for a fabulous striped treatment by Susan, along with another decorative artist, Lorna Soble.
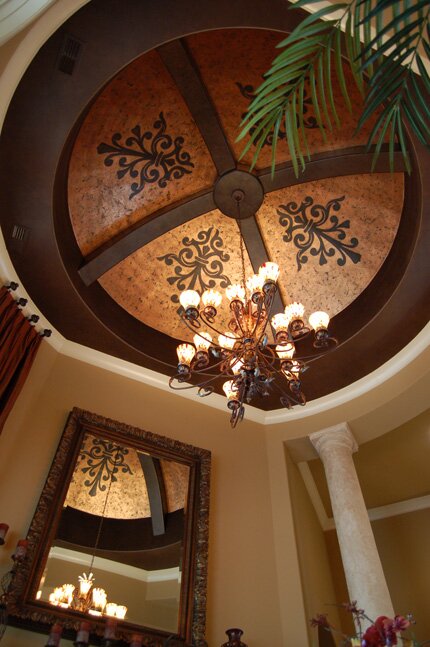
Above, a motif pulled from our Ornamental Panel Collection was used in pie shaped dome. I particularly love this photo because it represents how much impact you can get just by using a fairly simple and enexpensive Modello pattern. It’s hard to imagine that this space would have even a fraction of the visual interest it does without the bold contrast of colors and design.
Click here for more information about Modello by Design-Inspiring Interiors from Artists’ Portfolios, Volume 2
PS It just so happens that today, August 13, is Susan’s birthday. Happy Birthday Susan!!
August 2nd, 2010
Marrakech Redux
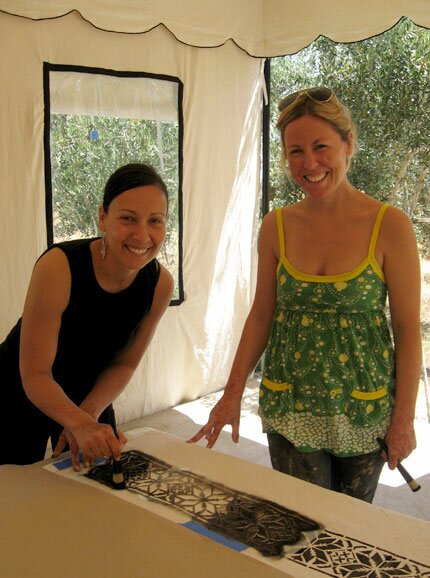
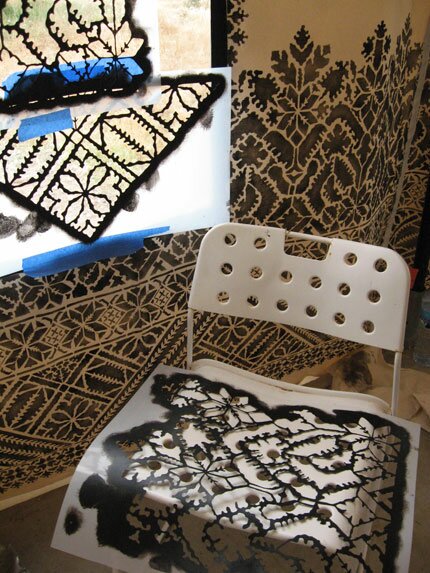
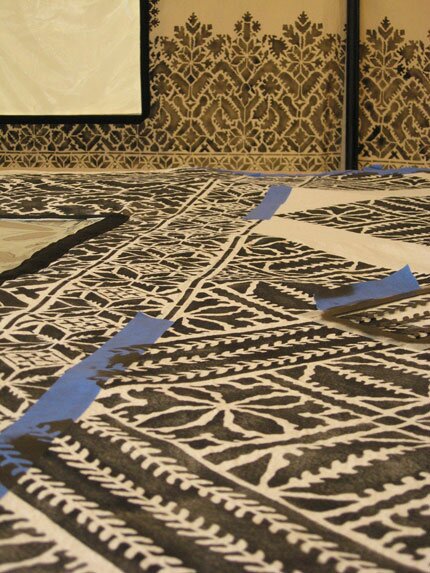
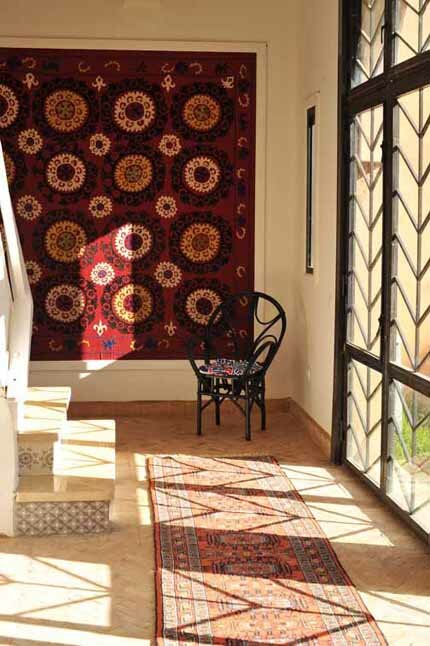
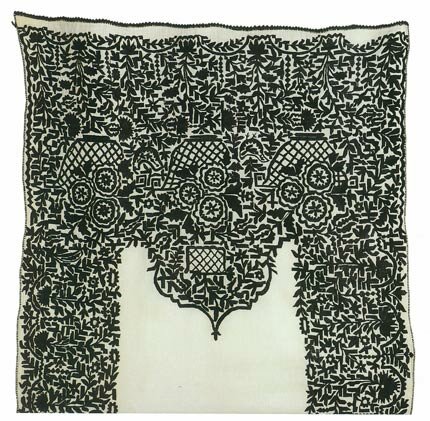
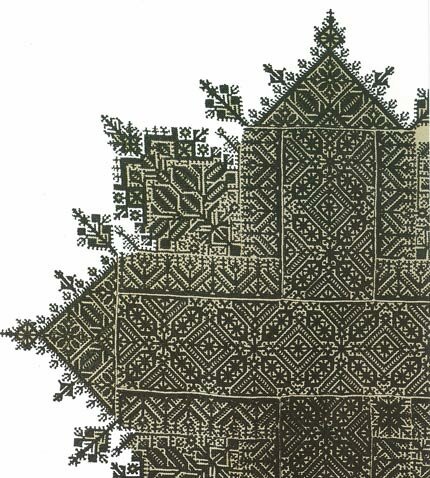
As I told you in this blog post, our most recent Peacock Painting trip project in Marrakech was themed around Moroccan embroidery designs from Fez. This style of embroidery is characterized by a singular color of thread, usually black, on a cream-colored background.
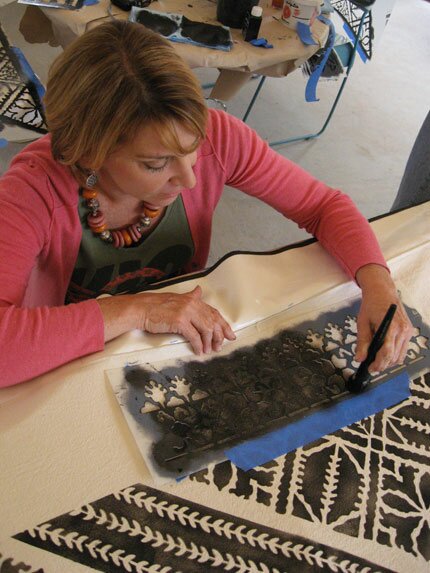
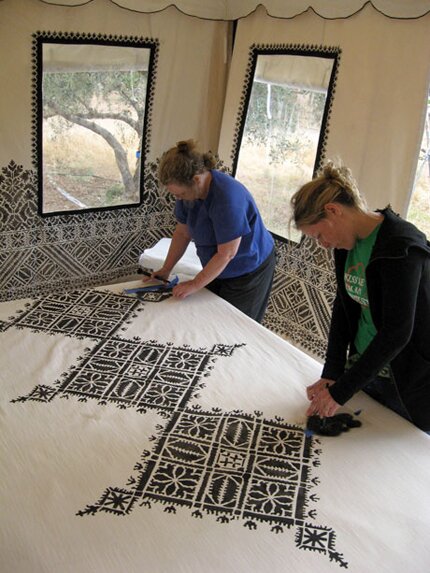
The project was fairly simple and straightforward: stenciling the patterns in black on the interior walls of a canvas tent built especially for entertaining. The stencils were designed to coordinate and combine in various ways to create a unique, overall scheme.
We started with a border. Then added a diamond pattern banded by a different border set on the diagonal.
Then we added a more complex lacy border to complete the dado area.
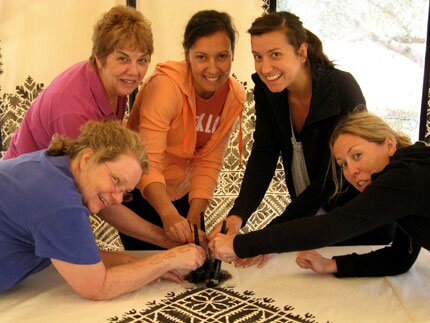
It probably sounds tedious, but it was actually a LOT of fun. We felt like we were doing an old-fashioned quilting bee. The six of us worked really well together and Maggies’ music mix and nice l-o-n-g lunch breaks kept us humming along.
It WAS nice to near the end though, and as each subsequent “wall” was finished and rehung, we enjoyed being enveloped by our handiwork.
The cat provided a temporary distraction, but other than that was no help at all….
So we continued on to stencil the door panels (that convert to awnings) in a coordinating pattern…
until we got down to the last brush stroke….and then it was Moroccan Mint Tea time! My awesome little flock of Peacock Painters this time were Lisa Wilson, Nancy Jones, Angela Perrone, Alicia “LuLu” Danzig, and Miss Maggie O’Neill.
All of these stencil patterns have now been newly added to the Royal Design Studio website here. There are lots of ways to mix and match them and they will be equally fabulous in both bright and pastel colors!
July 17th, 2010
Double Vision
I have spoken here before about the lovely Helen Morris of The Stencil Library. The Stencil Library company is a collaboration of Helen (the stenciler extraordinaire), her husband Chips (the artist/designer) and Helen’s cousin Rachel (the business mind with a creative bent). Speaking of collaboration (which I conveniently just was)….Helen and I will be teaming up for a lecture/demo on all things “stencil” called Double Vision at the upcoming 25th annual Decorative Artisans League Convention in Portland, OR. Our presentation will be on Sunday morning from 8am to 12pm. Not exactly prime time, but if you are there and awake we don’t mind if you bring your latte with you! The cost is $150, and includes a CD with hundreds of inspirational photos from multiple stencil companies, printable PDF’s detailing the many stenciling techniques we will be demoing, and$50 worth of vouchers for future stencil purchases from our respective companies, Royal Design Studio , Modello Designs, and The Stencil Library.
While compiling the CD images, I have been appreciating Helen’s uniquely witty and whimsical approach to utilizing color and pattern combinations and thought it would be nice to preview some of those here.
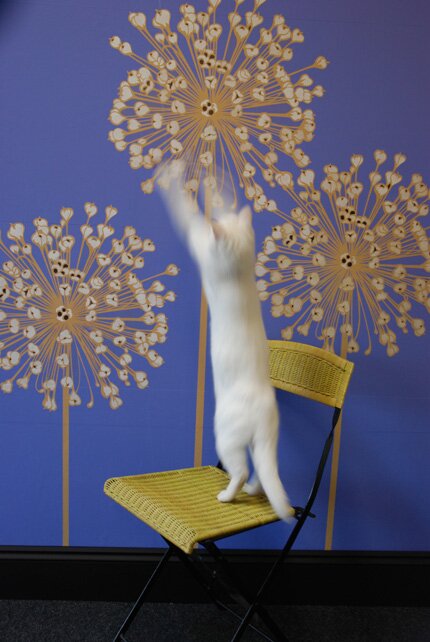
This shot is TOO classic! The cat is obviouslya “natural” when it comes to modelling.
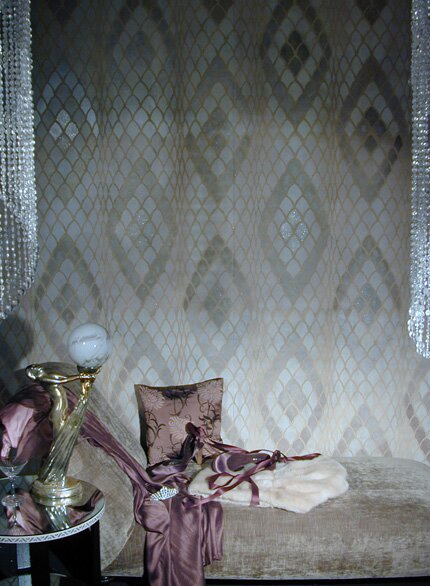
I believe that this allover snakeskin design was actually done by Rachel for the last iteration of her bedroom…
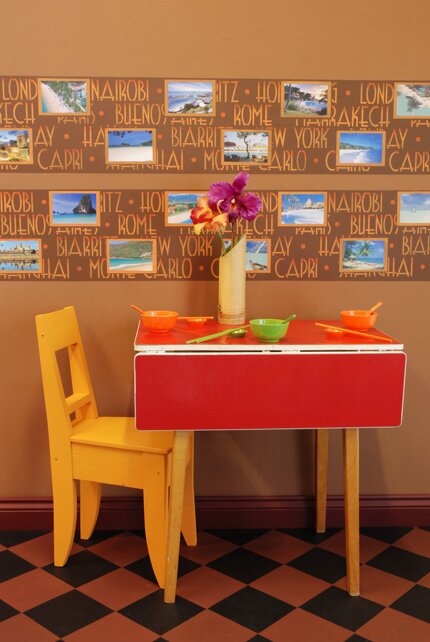
Helen has done a lot of things that are a take-off from the classic British print room concept; of course, with a twist! This postcard arrangement is so much fun…
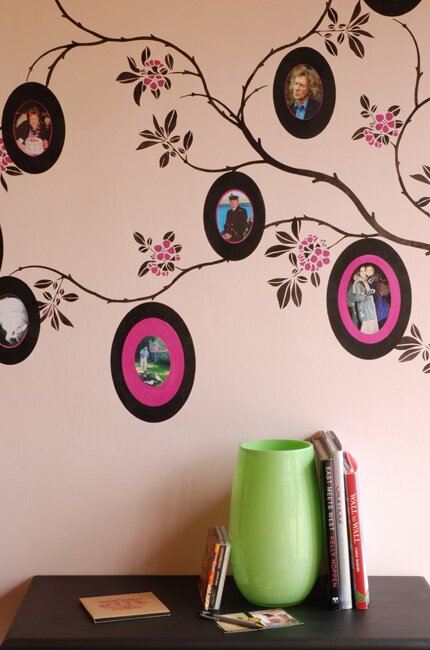
…as is this free form floral tree that serves as a one-of-a-kind gallery for family photos.
I have done some similar pattern in pattern looks with Modello Silhouettes and Stencils, but I think that the photo above shows the perfects juxtaposition of design, scale, color and composition!
You can find MUCH more at Helen and Rachel’s Design Inspiration blog! More info on our Double Vision presentation here!
MORE EXCITING Collaboration! Through an exclusive arrangement between Modello Designs, and The Stencil Library, we now have the possibility and opportunity to offer Modello patterns to be cut here in the U.S.from the many thousands of unique and elegant designs from The Stencil Library collection of stencils.
January 10th, 2010
Peacock Painters Fly Again
The Marrakesh Express is leaving once again this May for a fabulous painting adventure to Peacock Pavilions in exotic Morocco. This will be the third trip to this intoxicating country where we will enjoy the warm hospitality of our lovely hostess Maryam of My Marrakesh as we paint, dine, tour, shop and partake of the many incredible sights, sounds, tastes and treats that this city has to offer.
This will be the first trip where we have the opportunity to stay at the soon-to-open Peacock Pavilions during our painting days,
as well as the ever-enchanting Hotel du Tresor, which is located in the heart of the Medina and its famous souks.
On past trips we have painted dramatic ceilings,
done zellij patterns on some stairs….
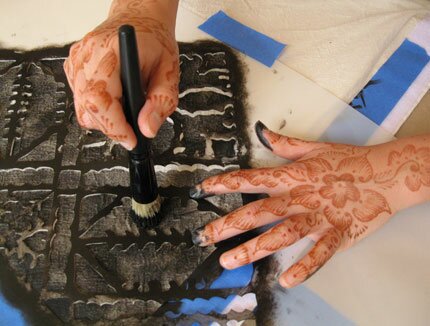
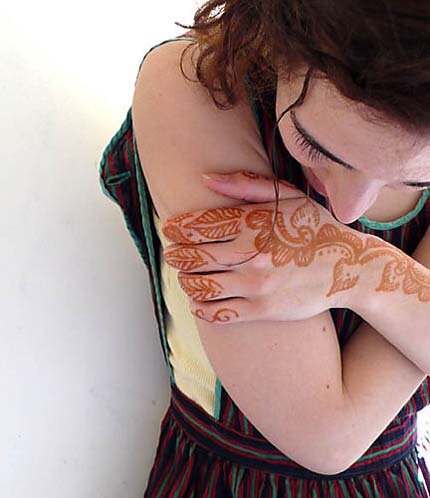
and henna patterns on others-
as well as ourselves!
We’ve done Art Deco murals
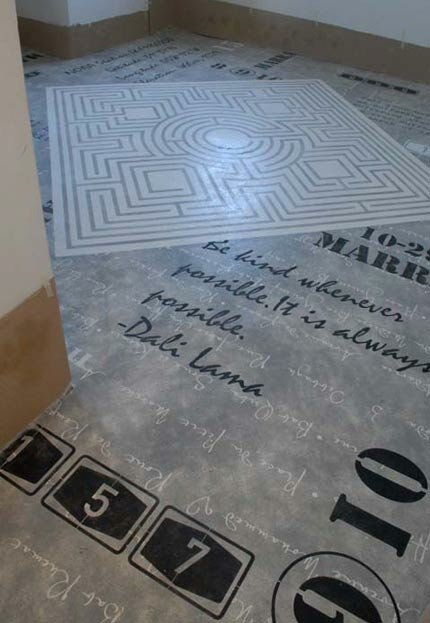
and graphic floors.
Our next trip will focus on the decoration of an entertainment and separate bar tent, which will be used for parties, wedding, and other special occasions at Peacock Pavilions. We will also do some smaller projects in the guest houses.
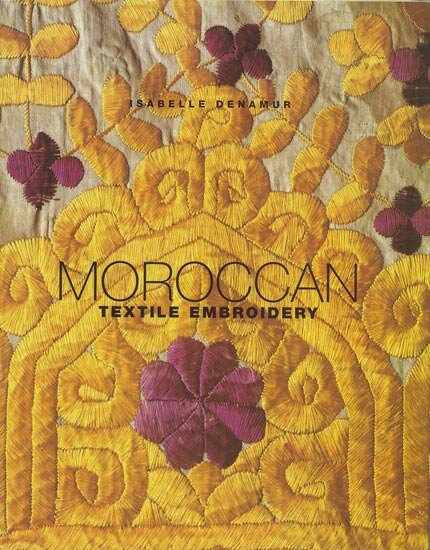
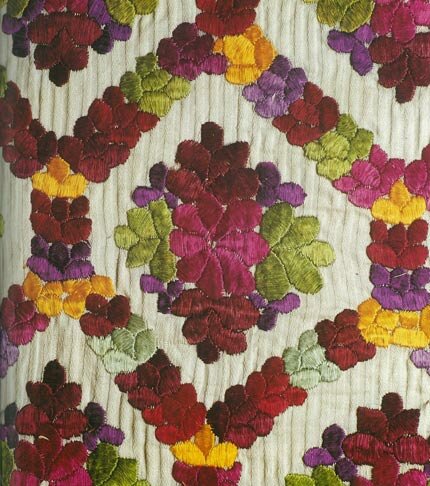
For inspiration, we are turning to classic Moroccan textile embroidery patterns
in classic shades of black and cream
as well a bold and bright colors.
Would you like to join us?? We have a few spots still open….and for the first time, I am offering a savings of $300 dollars off the trip if you pay in full. But you have to hurry! All the details are here.
August 4th, 2009
Fresh Stencil Project: Flower Patch
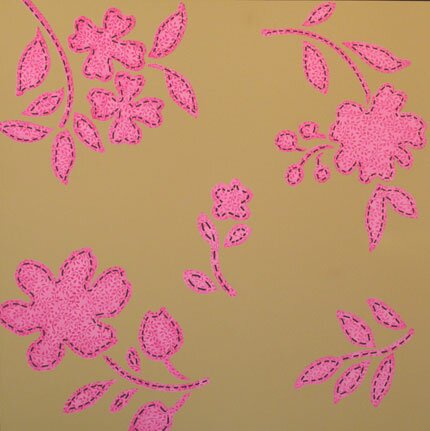
I thought I’d share a fun and easy stencil project that I worked up with one of our latest stencil designs, the Large Flower Patch, from Royal Design Studio. It combines both roller stenciling and brush stenciling, and features my favorite wall paint-Aura from Benjamin Moore. I like to use the Aura Paint for stenciling in projects where I am looking for 100% opaque coverage. Not only does it cover beautifully, it dries FAST so you can do additional layers if need be very quickly. You need to get it mixed up in a minimum quart size, so it doesn’t make sense for small projects, obviously, but if you are doing some color blocking in your room, you can use the extra for stenciling. For instance, the pink color could go below a chairrail, in stripes, or even on the ceiling if you’re THAT daring! The basecoat here is Tumeric and the pink color is Springtime Bloom. Aura paints come in their own special color range but you can have any color mixed in the Aura base from the Benjamin Moore color deck.
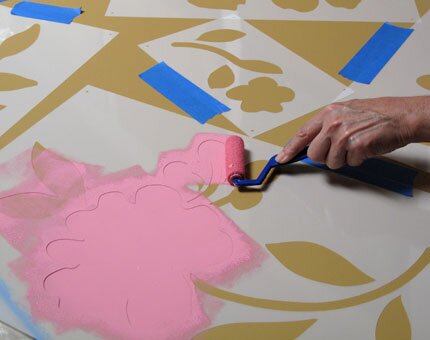
The Flower Patch stencil set consists of 5 different motifs. Each one comes in two layers: the large silhouette shape and the stitching detail. I started by laying out the silhouettes randomly in a pleasing arrangement. Note that this was done for a sample display board. On an actually wall or furniture project I would generally have them space further apart! I used a small, short-nap roller to roll on two coats of the Springtime Bloom. The paint dries very quickly, as I said, and I was able to do all five motifs, wait a few minutes and then go back to cover more fully with a second coat. In order to keep the paint from running under the stencil, I “offloaded” the roller a bit by rolling it over some paper towels before hitting the stencil. I also took care not to presss REALLY hard with the roller.
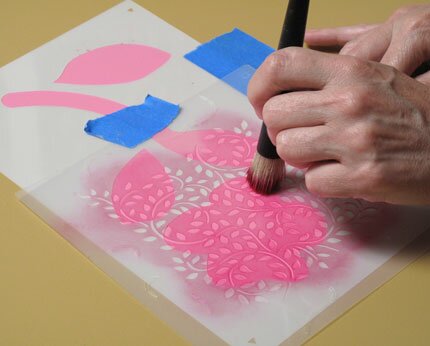
I cleaned this paint off the silhouettes and replaced them in their original position before continuing. I detest using dirty stencils and cleaning them up right away makes the job SO MUCH easier. Click here for stencil cleaning tips from our Facebook page. With the silhouettes back in place I used our darling little Lacy Leaves stencil to stencil an allover pattern through the motifs, creating the look of fabric “patches”. For this, I used a dry brush stencil method with magenta colored acrylic paint.
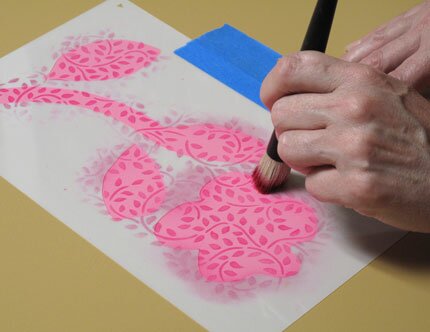
I then used the same magenta paint to swirl a little color just at the edges of the silhouette shapes to give them some more definition. I didn’t try to shade these too much though, as I didn’t want them to look “puffy”!
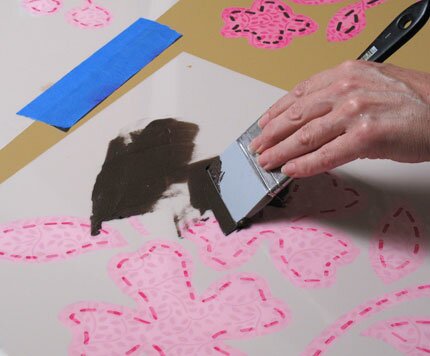
For the stitching detail, you could use a dark brown or black paint to stencil, but I wanted to give the stitches a little dimension so used a dark brown plaster (Espresso Lusterstone) applied with a Colour Shaper tool. You could alternatively use a synthetic Venetian-type plaster for an embossed effect.
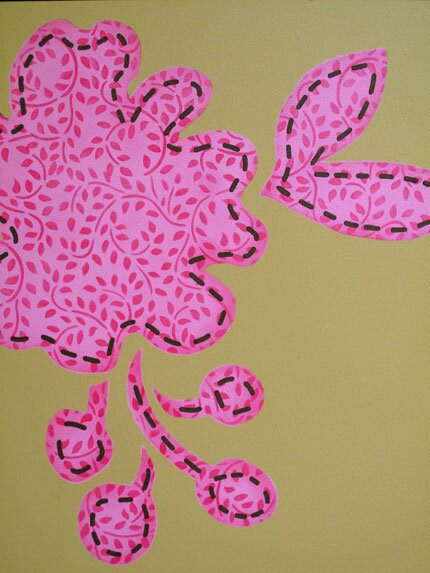
Here’s a detail. I think that this would be so adorable in a nursery or little girl’s room, and can imagine all sorts of fun color and pattern combinations with this Flower Patch design!






 Copyright © Designamour