March 28th, 2012
New Stencil Site Has Arrived!
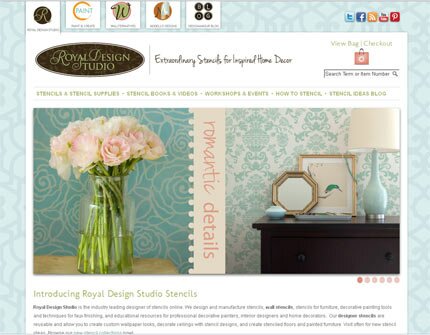
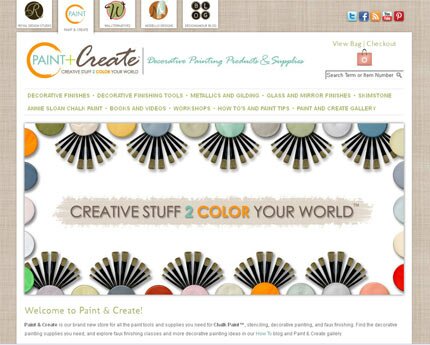
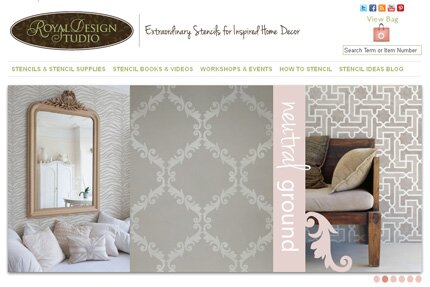
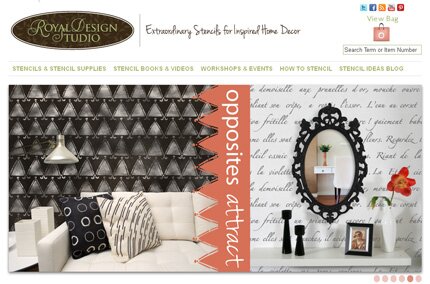
It’s HERE! After months, years really, we have our new Royal Design Studio stencil website to unveil. Actually, it’s a Royal Design Studio stencil website 2.0, because we’ve taken the leap to putting multiple sites within a site. There is still a lot of work to do and much to add (isn’t there always???) but we have started off with our stencil site, seen below, and a new site called Paint and Create (more on that later)!
Leading off is Royal Design Studio-the original stencil business I founded in 1994. It still looks pretty fresh, doesn’t it? Kind of like me. *cough*. The primary feature of this site is our stencil collection, of course, and we have done some fluffing up by adding cool, new graphics and reorganizing our stencils into new, more logical categories.
For instance, we broken down our Allover Damask Stencils into subcategories like Allover Floral Stencils, Allover Moroccan Stencils, Allover Modern Stencils, etc. so it’s easier to pinpoint that perfect stencil for your feature wall!
Furniture painting is uber-hot right now. Actually, it’s been popular 4ever and we’ve always had a wide range of stencil patterns for furniture painting. Difference is-now they are easy to find all in one place.

Want to create a global vibe with wall stencils? In addition to our popular moroccan stencils, we have categories for Japanese Stencils, African Stencils, Indian Stencils and more.
Another new category on the site is Children’s and Nursery Stencils. My very first attempt at stenciling was back in 1984 when I stenciled my son’s nursery with a border of my own design of ducks, hearts, and rocking horses. Alas, you won’t find THAT design here, but there are lots of cute floral stencils and lots more fun designs in the works.
Your notice that there are now tabs at the top of the site that lead to different areas. Some of these are still in progress, but we have finished up our new decorative painting site Paint and Create. This is where you will find all the cool tools and decorative painting products that you can use alone or combine with our stencil and Modello Designs masking patterns.
Of course, we are super happy to be carrying the full line of the amazing Annie Sloan Chalk Paint. This is the ORIGINAL Chalk Paint™, developed by Annie Sloan 20 years ago in England as the ultimate furniture paint.
Almost from the beginning of my stencil career, I have used stencils in combination with decorative and faux finishes. I find it so much more interesting to combine pattern with glazes, crackles, metallics and textures and you can look for lots of information on how you can too now and in the future in our Paint How-tos and Tips area.
Speaking of metallics, we have a whole section devoted just to Metallic Paint, Metal Leaf and Metallic Foil. Here’s a way to indulge in all of your gilty pleasures without an ounce of guilt! Who doesn’t want and need a little more sparkle in their life?
OK, that’s just a little peek into the new site. It’s still a bit of a work in progress and I will be sharing more in the coming days, but please check it out and browse around for yourself and let me know what you think and what more you’d like to see!
March 4th, 2012
Yummy Stencil Makeover
I have a rather large book case wall unit in my living room. It’s…OK. Just OK. It’s functional. It’s “there”. I often look at it and think a) needs dusting AGAIN!, b) I need to give some of those books to Goodwill, and c) It would be so cool to paint it, stencil the back, and rid it of some clutter while upping it’s “cool” quotient.
I have a very simple but VERY gorgeous furniture stencil project by blogger Sarah Gunn to share, which is a perfect illustration of my thought process. It was recently featured on the Canadian blog Yummy Mummy Club.
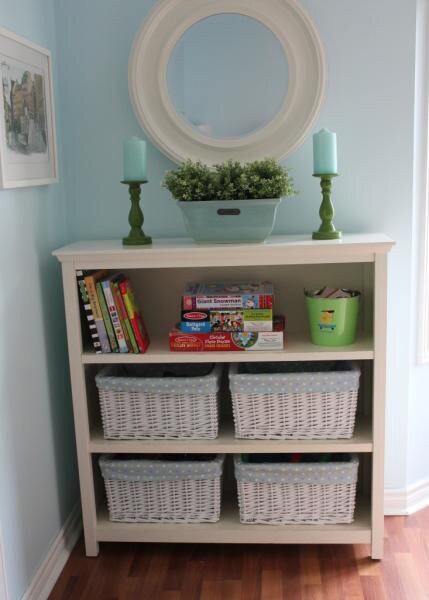
Bookcase Before: nice, functional, stores stuff adequately but no great shakes.
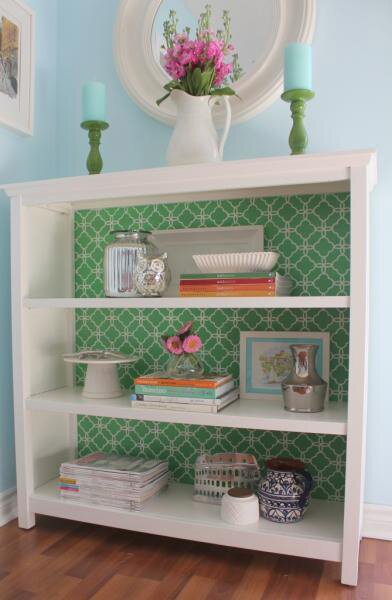
Bookcase After: it’s like someone blew a breath of fresh air into the room! Sarah used one of my fav stencil patterns from Royal Design Studio-the Small Eastern Lattice. The green color is so, so pretty with the blue walls and it makes the white and silver accessories just pop. Instead of blending into the background, this simple furniture piece now has “presence”.
Stenciling on the back of a bookcase or wall unit is actually pretty easy as you can generally just pop that thin piece of wood off the back, paint it, and then reinstall it with finishing nails of a staple gun. How about you? Do you have a similar stencil project calling your name?
PS Sarah also shared some stenciling tips on a recent airing of City Line, a fun morning show out of Canada. AND, besides writing for the Yummy Mummy Club and TV appearances, Sarah also has her own business, Polka Dot Grove, which offers adorable custom canvas art for children’s rooms!
February 19th, 2012
All in the Family (Circle)
Growing up, we always had Family Circle magazines around the house. In fact, my Mom still has a subscription. Now, I’ll admit, it is no longer a “must read” magazine for me the way that Elle Decor, Veranda, and House Beautiful are, but this month’s issue is one I HAD to pick up!
You see, there is a lovely little furniture stencil project in there written by the talented (and welcome NEW discovery for me) Suzonne Sterling of the wonderful Urban Comfort blog.
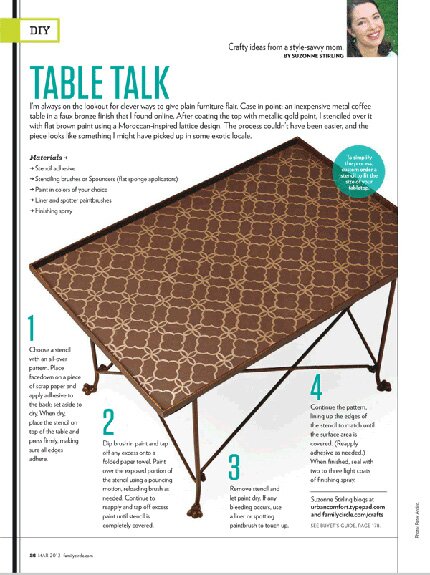
Suzonne used our Small Eastern Lattice stencil on a metal coffee table. Because this particular stencil requires you to paint in the negative spaces around the trellis pattern, Suzonne basecoated the table in a gold metallic paint first. She then did the stenciling in the brown color, so that the actual trellis pattern shines through. Suzonne posted about this project on her own blog here and you can find more detailed instructions also on the Family Circle website.
You will probably want to set aside some time to peruse Urban Comfort. It’s full of inspiring DIY ideas. I particularly liked this idea of creating a Winter Butterfly Garden and think this would be so, so pretty on a mantle of as a dining table centerpiece!
She also recently did a wonderful post on the upcoming Annie Sloan U.S. tour. As a stockist for Annie Sloan Chalk Paint, I gotta love that one too!!
February 1st, 2012
Pier One Does Stencils!
One of my favorite stores to drop in for color and current trend inspiration is Pier One. And I’ll also admit to an occasional purchase or two.
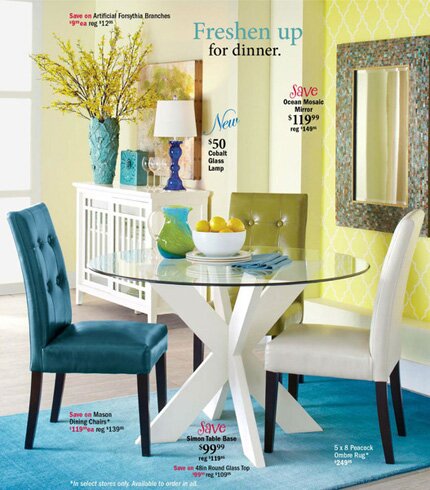
So exciting then when blogging friend Beth Hunter from Home Stories A to Z pointed out that our Casablanca Trellis wall stencil was used in one of the room beauty shots in their latest catalog! Beth spotted it right away because she had used the same design on her stenciled curtain project. You can see it there on the yellow/green accent wall. Nice choice!
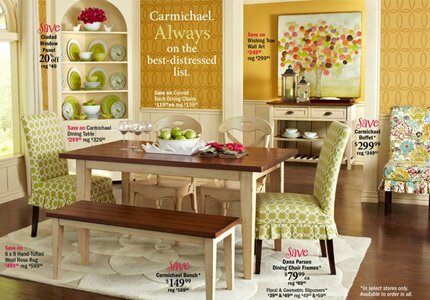
And then a few more pages in I spied our Chain Link modern wall stencil used in yet another shot. The tone-on-tone gold treatment is one of my long time favorite classic colorways to use with stencils and I love how fresh and updated it looks with the brighter blue and green! Pier One-you rock! I am now an even BIGger fan! You can see the catalog online here.
January 29th, 2012
Stencil Giveaway Winner!
And we have a winner!! First and foremost I would like to thank each and every ALL of you who entered our lastest stencil giveaway for taking the time to visit our stencil website, comment, tweet, share on Facebook, and even pin on Pinterest for the chance to win our $75 stencil shopping spree from Royal Design Studio!! I was thrilled to see those lovely comments keep coming-all the way up to 486.
Second, I would like to thank The Nester for hosting this amazing sponsored giveway on her blog and allowing Royal Design Studio to participate. I feel honored to be included with the other wonderful companies and their yummy products.
Alas, we can only pick one winner an that is
Kalyana left comment number 289, which was randomly chosen from all 486 entries by random.org.
I can’t wait to see which one of our Moroccan stencils that Kalyana picks for her bathroom wall. Let’s hope she shares a picture with us!
SUPER BIG Thank you again going out to The Nester and all of you who entered!
January 20th, 2012
Sneak Peek: New Stencil Site
I have something to share with you.
This something has me feeling excited, stressed, creative, anxious, thrilled.
This something keeps me focused, overwhelmed, engaged, up at night.
This something can’t happen soon enough. This something seems like a project without end.
This something is something that I hope will thrill you. This something is something that I hope doesn’t kill me.
Website (and blog!) redesigns. Coming soon. Fingers crossed.
January 10th, 2012
Floorcloth Fancy
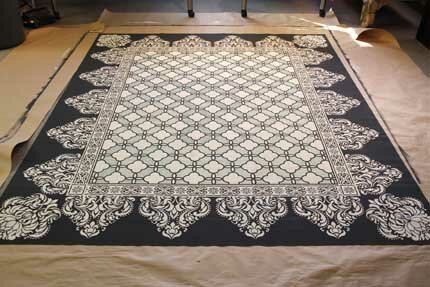
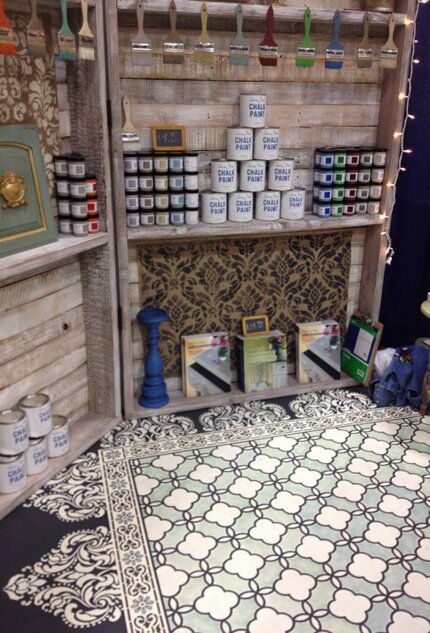
I created a stenciled vinyl floorcloth using Annie Sloan Chalk Paint recently for a booth display that got rave reviews so thought it would make a good step-by-step tutorial to share!
Stenciled floorcloths (sometimes referred to as oil cloths or floor canvases) have a long history of use in both England and the United States. Often made from recycled canvas ship sails, painted and stenciled floorcloths offered a less expensive and more hygienic alternative to carpeting and were used extensively in homes both grand and common prior to the invention of linoleum. Most modern day floorcloths are still made from heavy canvas, which requires priming, stretching, and hemming. As I was looking for a quick and easy alternative-fast-I turned to another modern option: flooring sheet vinyl!
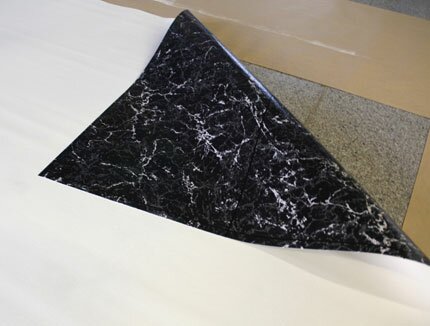
Now, as you know, sheet vinyl comes in many different colors and patterns including brick, tile, and more. Because I wanted a nice smooth surface and blank canvas for my floorcloth, I chose a roll of sheet vinyl that had a smooth, felt-type backing and painted on THE BACK side. NOTE! I just purchased a very inexpensive, thin vinyl that was pre-cut and prepackaged for my trade show floor, but if you are doing this for yourself I highly recommend that you go with a much thicker, harder, and better quality vinyl.
After applying a coat of white primer and allowing that to dry, I rolled on two coats of Graphite Chalk Paint. Now, you could use any latex and/or acrylic paint for a floorcloth. I happened to choose Chalk Paint because
- I love it, and
- I was showcasing Chalk Paint in my booth!
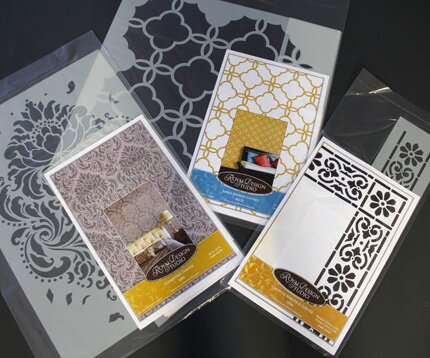
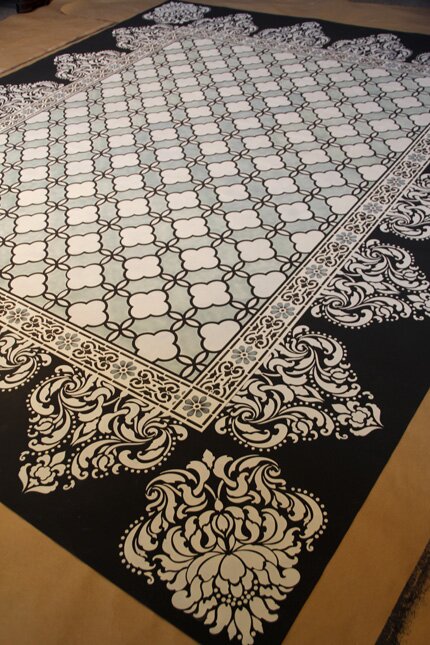
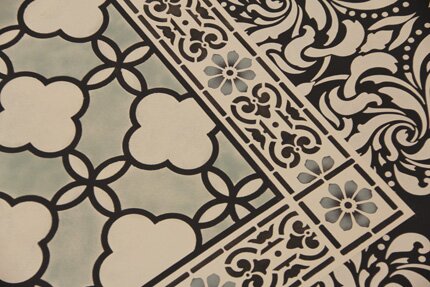
I found it super easy to use on this large scale and quite ideal for stenciling! I LOVE combining complimentary stencil patterns on a project and this large 8′ x 10′ surface provided lots of space to be creative! I decided that I would use our Large Eastern Lattice stencil as the centerpiece and frame it with the Classical Border and Corner stencil. For a lacy scalloped edge, I chose the Florentine Damask stencil, with plans to just have the bottom portion of it coming off the linear border. When picking patterns to go together, I generally look for ones that offer a variety of scale but also contain unifying elements. To my eye, the lattice pattern has a petal effect that is echoed in the border pattern. The border pattern has some small dots in it which are echoed in the damask pattern. Works for me!
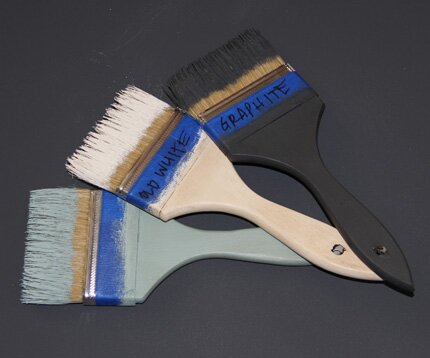
For a color palette, I chose Old White and Duck Egg Blue over the Graphite. I think that the addition of the Graphite with these soft, classic colors adds a little big of a fresh modern edge.
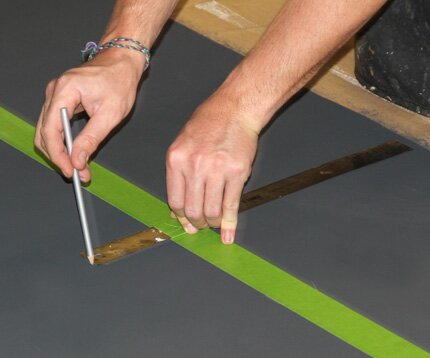
The first step was to determine where to place the Classical Border and Corner “frame”. Since the Eastern Lattice stencil is a symmetrical allover pattern, I knew that that could be repeated as much or as little as needed, but I HAD to determine how much space to leave at the edge for my Florentine Damask “lace edge” on my 8′ by 10′ floorcloth. We then measured 14.5″ in from the edge, made tick marks with a chalk pencil and ran tape on the outside of those marks. Then we measured in 4″ from there (enough to accomodate the border design and ran tape on the inside of those marks to leave a 4″ opening between the strips of tape.
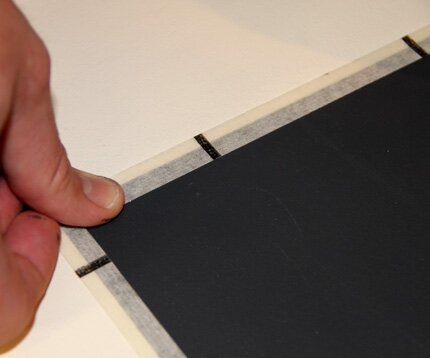
We burnished the tape well and rolled on two coats of Old White Chalk Paint with a short-nap 4″ roller (not shown). When dry, we used a translucent tape to overlap just inside the frame. This was placed at roughly the width of the lines of the lattice stencil to preserve a nice black outline there. If you don’t have a similar tape you could mark lines and use blue or green painter’s tape.
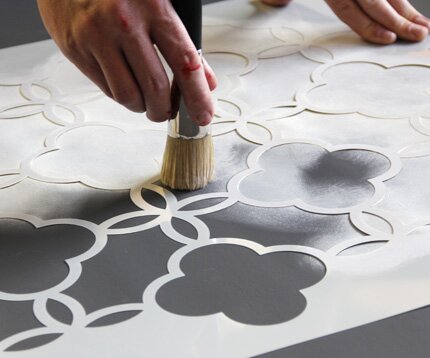
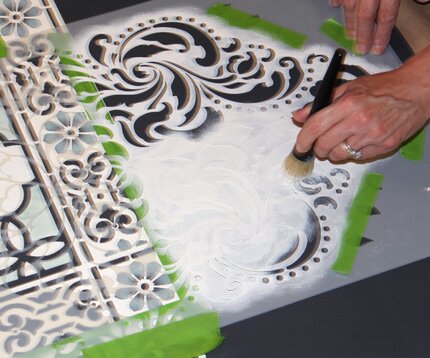
Now to the stenciling! We measured to locate the center of our large inner rectangle and centered one of the cloverleaf elements over it. This ensures that your symmetrical pattern will end the same at opposite edges. I used our new larger 2″ stencil brush to stencil the whole design first with Old White Chalk Paint. The Chalk Paint covers very well, but it did take two passes to get full coverage with the white. Fortunately, the Chalk Paint dries SO quickly that you can go immediately back over it. This isn’t possible with latex paint-you must let the first coat dry so you don’t lift it off by going back over it too quickly. Of course, I used a dry-brush method with the brush, meaning I dipped just the tips of the bristles into the paint and offload a bit onto paper towels before stenciling.
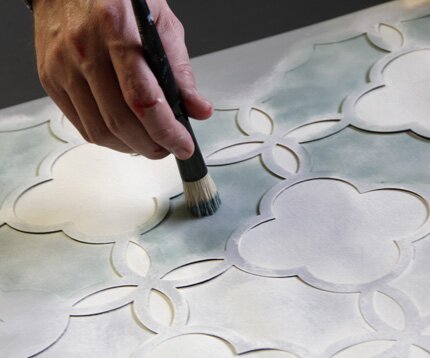
The Duck Egg Blue color was then stenciled right over the Old White, JUST in selected areas of the design. In order to avoid the hassle of taping off the pattern to isolate this area, I simply switched to a smaller, 3/4″ brush which allows for more control. You just have to be careful as you near the edges to keep the bristles from creeping in the areas you want to remain white.
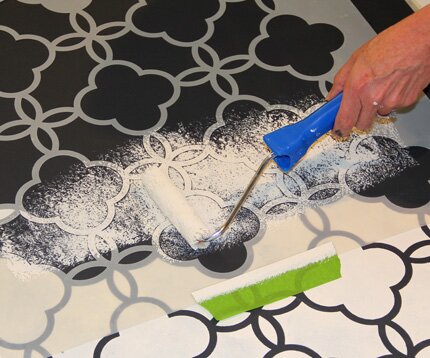
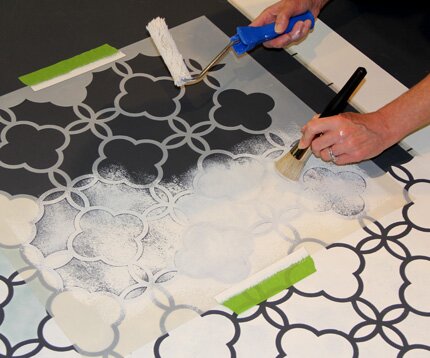
After a few repeats like THAT I decided to try for a speedier method. The dry brushed method looked fabulous, but I was in a time crunch, as always! I switched to a roller/brush combo that worked quite well with the Chalk Paint! After offloading the roller slightly (again on paper towels) I used a light pressure to roll the wet paint onto a portion of the stencil repeat.
Then, while the paint was still wet, I used the brush to smooth and swirl it out on the surface for the first layer. This was definitely faster, but I did have some paint seepage here and there which I touched up easily with Graphite at the end. Once I switched to this technique I just continued on doing all the white and then went back and replaced the stencil to apply the blue.
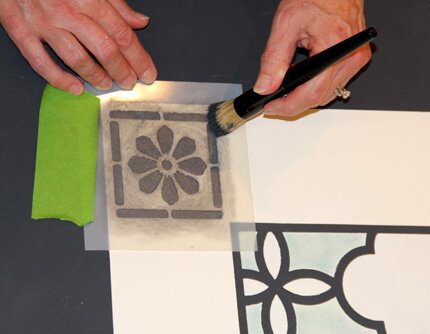
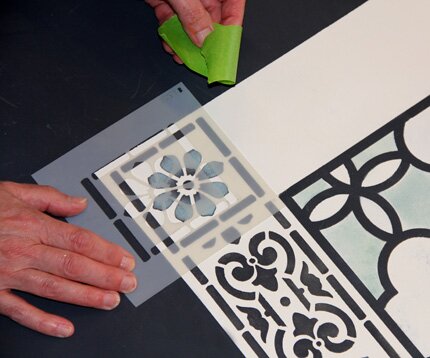
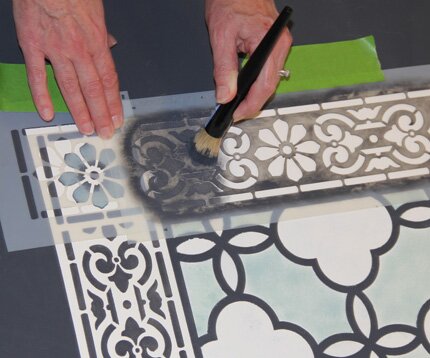
Next up! The stenciled border. The Classical Border and Corner stencil is perfect for this because it comes with a corner tile piece that gets stenciled in the corners and the border design can simply run in between. These were visually centered in the corner area and stenciled in the Graphite Chalk Paint again.
To finish off the border with a nice clean edge, simply use the edge of the corner piece to mask off and protect the area, leaving a nice open space that mimics the stencil “bridges”.
The border design was centered in the space between the corners (simply mark the center point and place a central element right over it) and then stencil with the repeat until you hit the corner. This way, your design will naturally end at the same point on opposite corners.
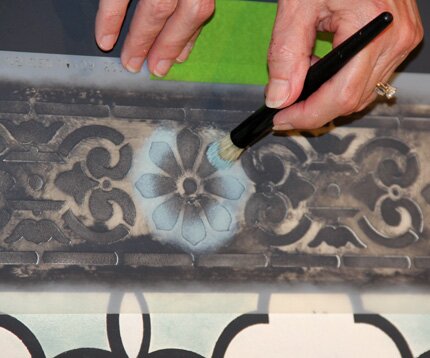
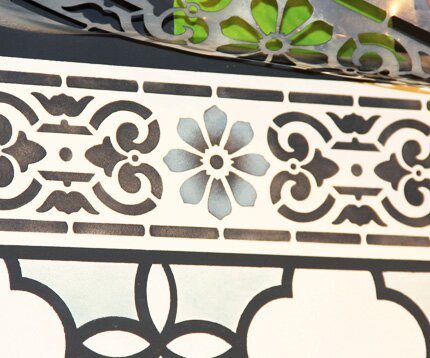
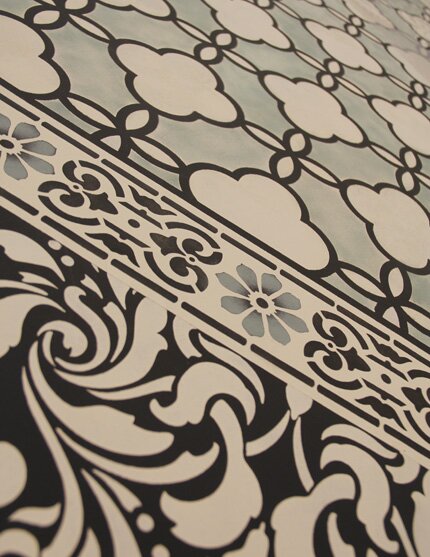
I wanted to bring a bit of the Duck Egg Blue Chalk Paint color into the border pattern so used a dry-brush technique to shade it just around the outer edges of the flower petals.
Voila!
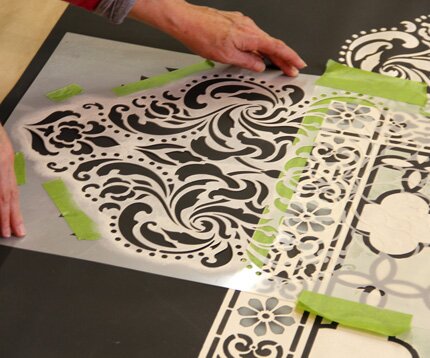
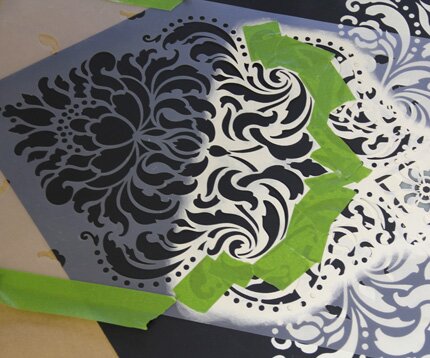
For the lacy edge, I positioned the Florentine Damask stencil at the same point each time. Notice that tape was placed over the border area to protect it from having Old White paint creeping into the black parts of that design.
I began by stenciling on either side of the corner first and dry-brushed on two quick layers of Old White Chalk Paint. Once I had my corners done, I spaced the damask repeats out equally along each side between the corners. On the long edges I was able to stencil 5 repeats total, and 4 repeats total along the short edges. How much space you will have will depend on the size of your floorcloth and it’s best to measure plot it out on paper beforehand if you are doing a different size than our 8′ x 10′.
I could have left the corners as is, but wanted to add a little more detail, so I flipped the stencil around and played with it till I found a nice “fit”. Then I isolated that area with painter’s tape and stenciled in the finishing touch!
Happiness! I love this combination of colors and patterns, which would also look super fab on a ceiling or tablecloth, I think. To protect my lovely floorcloth I used two thin coats of Annie Sloan Lacquer. This is a matte, water-borne finish that is designed to work with the Chalk Paint-particularly over concrete floor surfaces. It is very thin, and penetrates the paint surface to provide a highly durable finish.
It was quite dirty after being walked on at the Home Show, and I was able to clean it up nicely with a Mr. Clean Magic Eraser without any ill effects to the paint finish! Unfortunately the cheap, thin vinyl did get some tears in it here and there. Like I said above….buy good, thick, vinyl-or paint directly on your floor or traditional floorcloth canvas-available here! For another cool idea for a hand painted vinyl floorcloth, check out this Pinterest pin!
I hope you enjoyed this floorcloth idea and tutorial! Let me know….
January 5th, 2012
Chalk Paint Giveaway Winner!
And the winner of the Annie Sloan Chalk Paint gift basket is……
Kim Lombardi. Kim left comment #7 and ALSO left two other bonus comments including a comment about which Royal Design Studio stencil she would like-our amazing Springtime in Paris Typography stencil. Way to wish big! Kim, you WIN and are also entered in this weekends drawing to attend the Annie Sloan North American Tour date of your choice.
Thank you all for your comments!! I really enjoyed reading your fav Chalk Paint color combinations and stencil choices.
December 27th, 2011
Simple. Stylish. Stencils.
I hope your Christmas was fabulous, enjoyable, and joyful! Ours was filled with family-as it should be. On Christmas day we traveled north from San Diego (about 2 hours) to spend the day with my husband’s family at my sister-in-law Anne’s new house in Claremont, CA.
I always love seeing a “new” place she is in because she is one of those people blessed with an amazing decorating gene. Even more impressive, she excels at decorating “on the cheap” with restyled thrift store bargains.
When she was visiting us last Spring, we loaded her arms up with a bunch of random stencils from our studio-and she couldn’t wait to show me what she’d done with them. Fortunately, I had my handy iPhone with me, so I can share them with you!
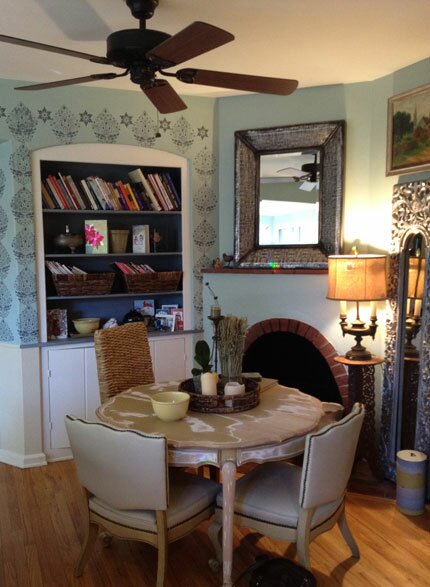
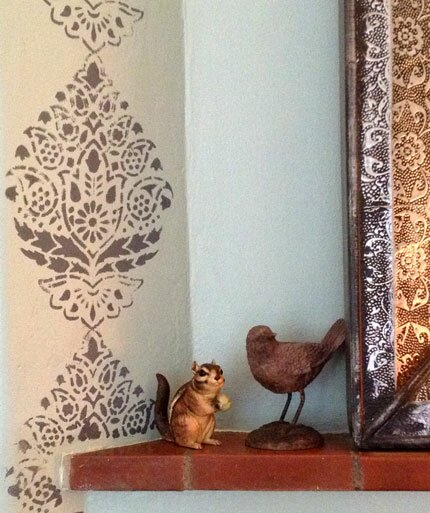
Here’s an adorable little nook area off the kitchen. The wall on the right is filled with mirrors to reflect the sunlight that comes in the windows on the opposite wall.
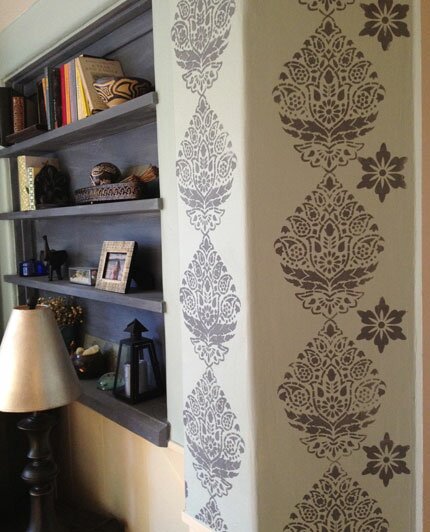
The built-in bookcase is surrounded by a randomly stenciled pattern using our Indian Paisley stencil.
The gray paint color on the pale blue looks soft and soothing and ties in nicely with the antiqued, punched silver mirror frame.
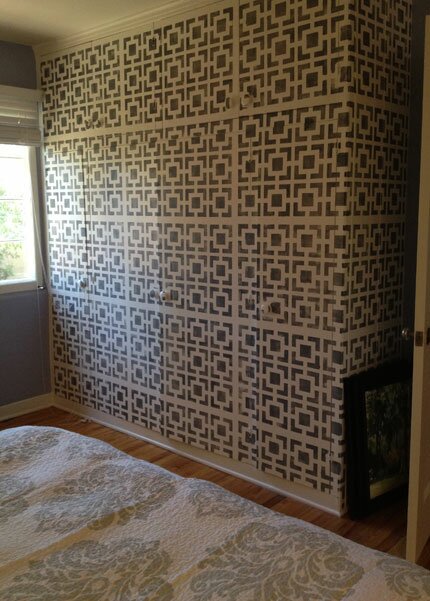
In the bedroom, Anne used our Large Hollywood Squares wall stencil to accent the closet-again with a blue and gray color scheme. I like the juxtaposition of the geometric pattern softened by the oriental paisley on the comforter.
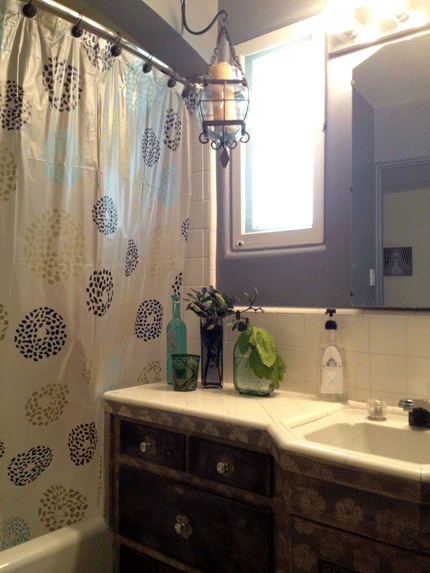
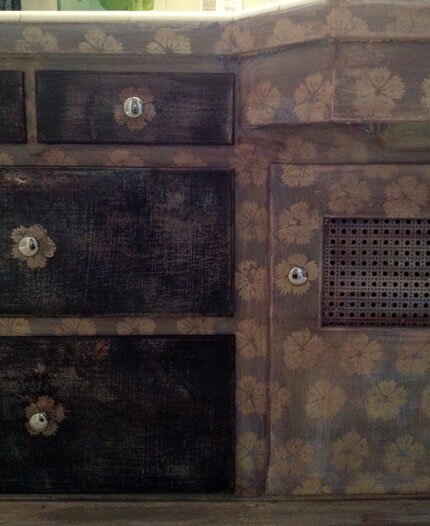
The bathroom cabinet had been layered with years of coats of white paint, applied with a heavy hand that produced a lot of brush stroke texture.
This proved the perfect background for a distressed patterned finish of grayed denim blue colors. Anne layered spray paint, latex paint washes, and wood stains with some sanding and distressing to get this fabulous look.
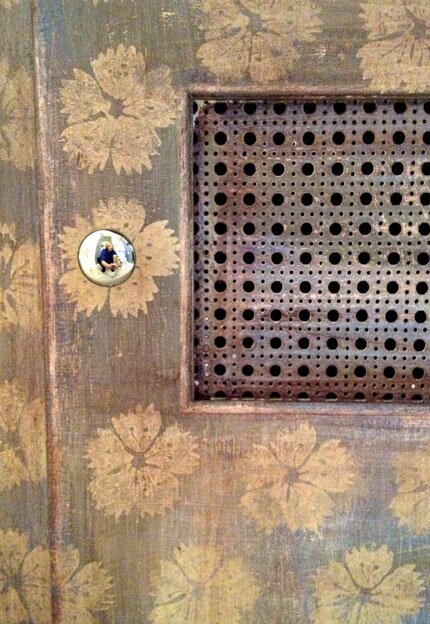
This little floral stencil is actually a freebie stencil that we have been including with stencil orders for some time now. I love how she used it to create a random flower field on the lighter blue here and then just as accents behind the knobs on the darker blue drawers. Hey! Whose that person in the door knob??
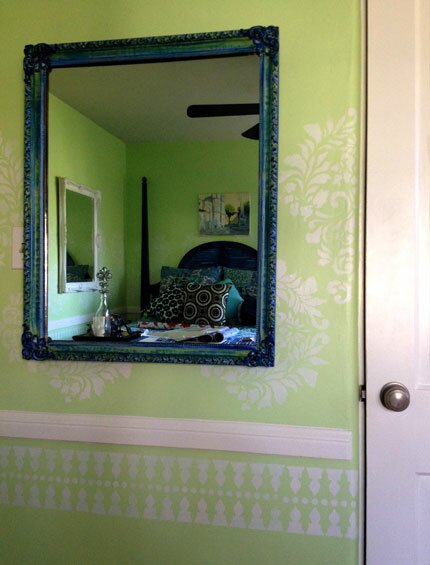
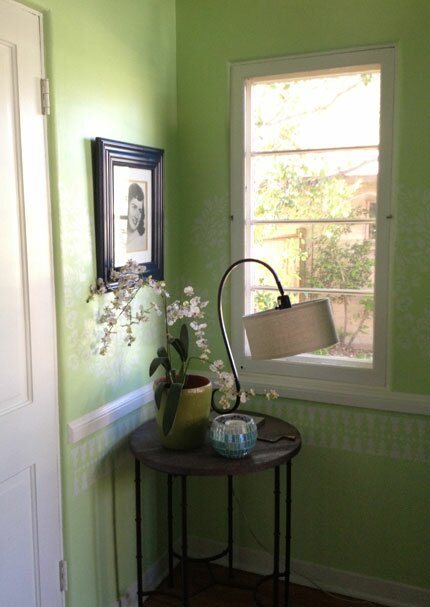
On to the guest bedroom for another “out-of-the box” stencil application that works beautifully! Here Anne used our classic Fabric Damask stencil in just two rows above the chair rail. I love how the pattern alternates from horizontal to vertical to give a soft lacy edge to the molding. It’s just enough!
Down below is one of our Moroccan stencils, the Minaret Border. I would never have thought to pair this with the Fabric Damask stencil, but again, the combo of geometric and soft floral is a perfect compliment! I hope you enjoyed this inspiring little stenciled house tour along with me!
November 30th, 2011
Metamorfaux
Allow me to introduce you to Sylvie Bilger and Metamorfaux.
I had the great pleasure of meeting Sylvie this past October when she attended my last painting trip to Marrakech as one of our very special Peacock Painters. Originally from France, Sylvie has a joie de vivre that is both infectious and endearing. She also happens to be a classically trained decorative artist with an impressive resume. Sylvie learned her craft first during 4 years in the Ecole National des Arts Appliques et des Metiers d’ Art. She followed that with a year at the Institute de peinture Van Der Kelen in Brussels where she perfected her decorative painting skills in trompe l’oeil, wood graining, marbleizing and lettering. Impressed yet? Well, to top that off she then proceeded to work for two years doing restoration at the Palace of Versailles. Yeah. Cool. For the last 25 years she has lived and worked in NYC, and established her decorative painting company, Metamorfaux with her artist/husband Joe Bilger.
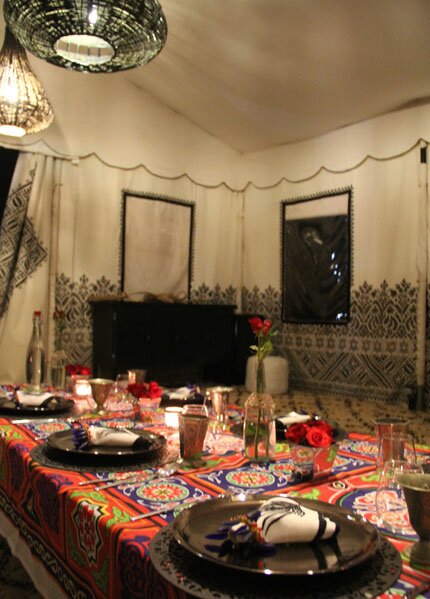
Right before we left for our Morocco trip, she contacted me regarding the opportunity to sponsor the decoration of a space in the annual Holiday House NYC-an annual showcase and fundraiser for the Susan G Komen foundation for breast cancer research. Of course I said yes! The space was of the sort normally given to decorative painters-a hallway. Hallways are actually fabulous, because they are generally lacking the need for furniture and you can be left to let the paint treatment be the star. Sylvie was inspired by the stenciling that I had designed the year before for a dining tent in Morocco, and this became the basis for the hallway decoration at Holiday House. Of course, she reinterpreted the idea unique and special way. Let’s see, shall we?
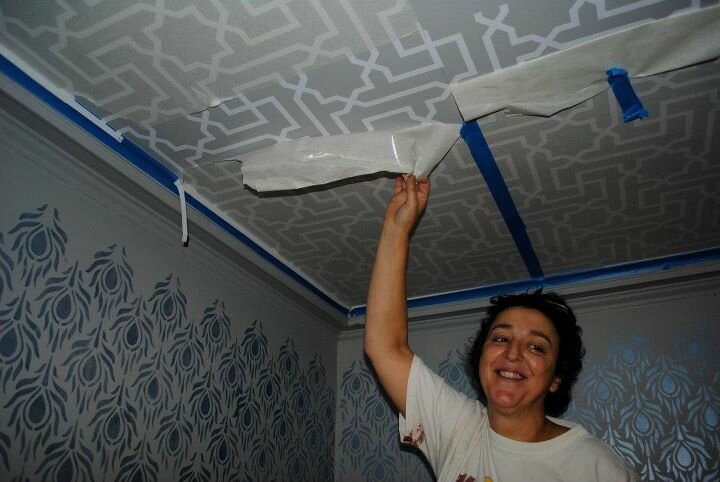
Sylvie used a combination of Royal Design Studio stencils and Modello masking patterns. I suggested the Modello patterns for the ceiling, because they can be so much easier than trying to maneuver a large stencil around, and we were able to cut the design to fit the space exactly. Above, she is removing the transfer tape to begin the painting process with metallic paints from Modern Masters.
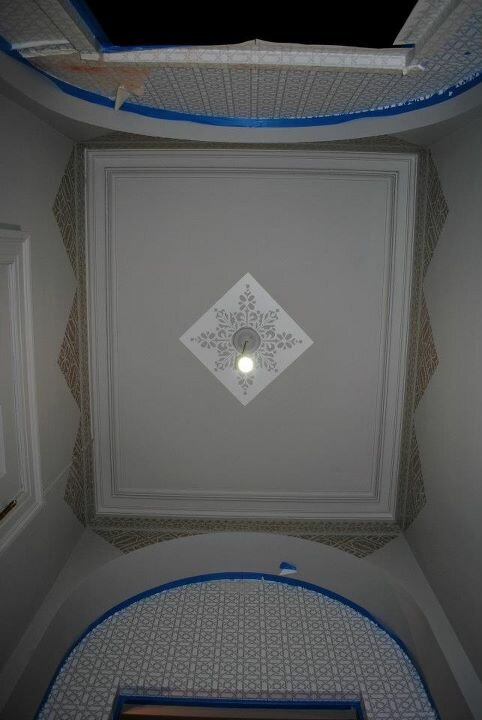
We also provided Modello patterns for the the arches and medallion. Again, the Modellos are much easier to apply and decorate an otherwise difficult space like these arches!
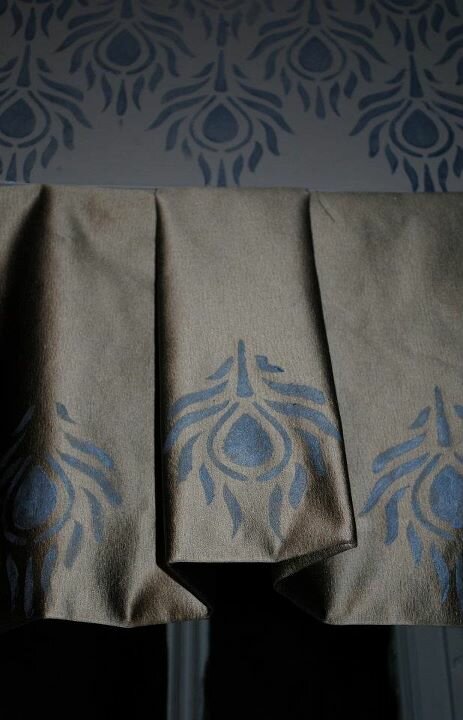
Cut to a week later, and…..voila! Sylvie used our new large Peacock Feather stencil on the walls. I love how she has them trailing randomly from the ceiling line,
and added just a little extra touch on the window treatment.
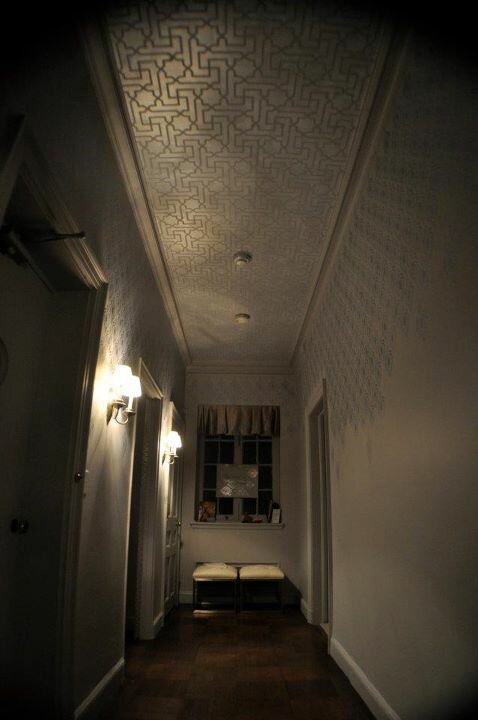
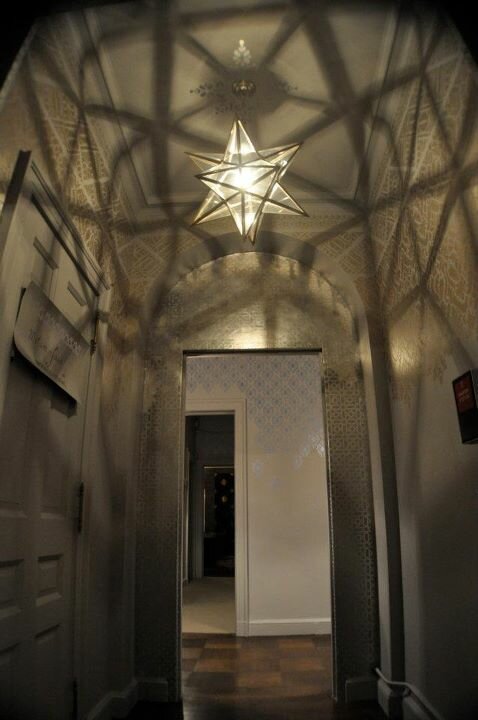
More of our Moroccan stencils were used in the small hallway, including Moroccan Lace, the Fez Corner, and the Fez Floral Border.
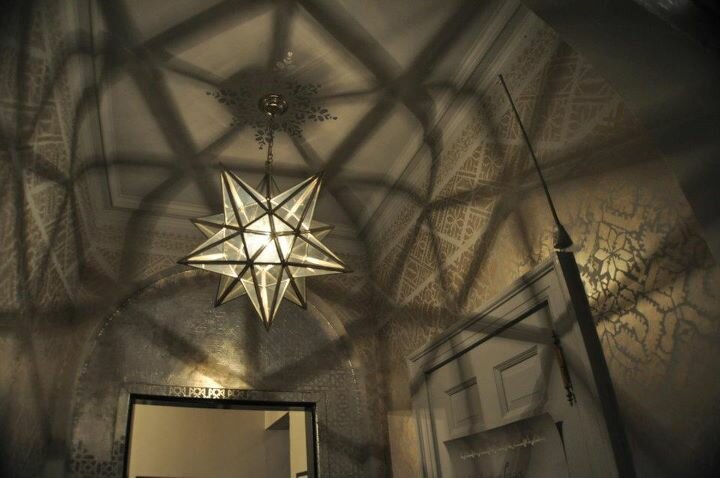
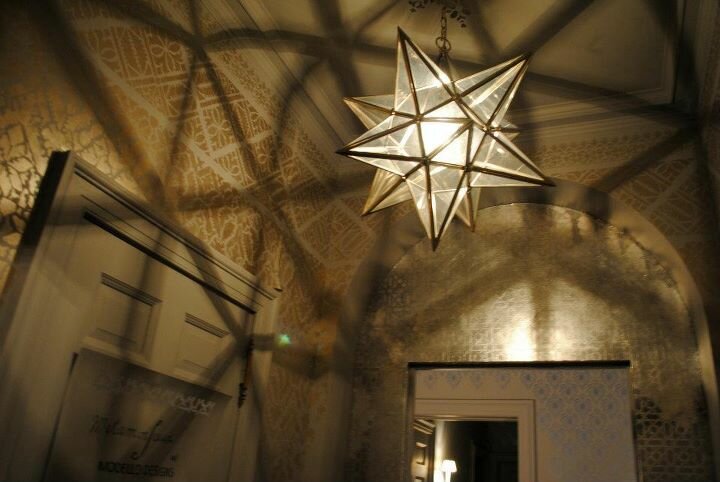
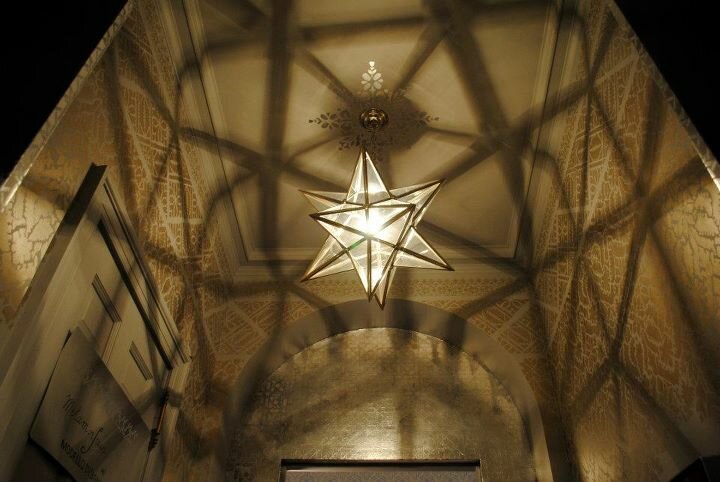
A final touch of magic happened when the light fixture was installed. Along with a warm, reflective glow, it adds a whole other dreamy layer of geometric pattern to an already beautifully designed space.
Here is a shot of Sylvie and our mutual Moroccan traveler and friend, artist Tom Henman-her lucky date to the opening night Gala! If you happen to be in the NYC area you can check out Sylvie’s work along with many other beautifully designed and decorated rooms at Holiday House NYC through December 11!














 Copyright © Designamour