January 17th, 2008
Feeling Blue?
Lest you think we do nothing but floors around here I offer up this wall finish we completed one of our Operation Decoration classes. This was a modification of one of the finishes I designed for our Italy trip. It is, typically, hard to get a decent shot of the finished wall, but….
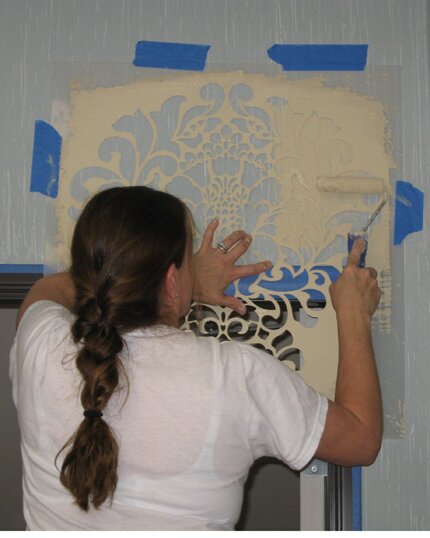
This uses the Oikos product called Kreos, which is quite nice for embossing and texures. Even rolling it over a texured background we had very little material creep under the stencil. Here is Christine to demonstrate.
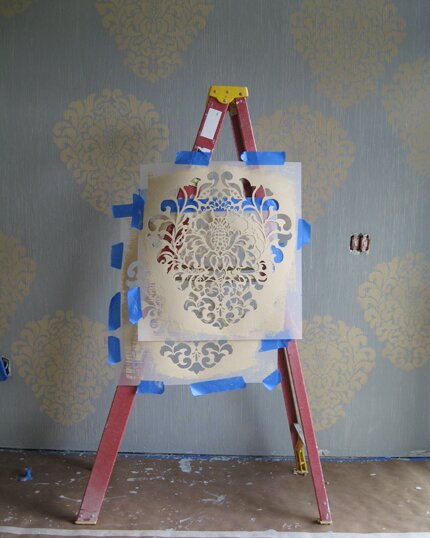
Tired stencils resting after a hard days work.
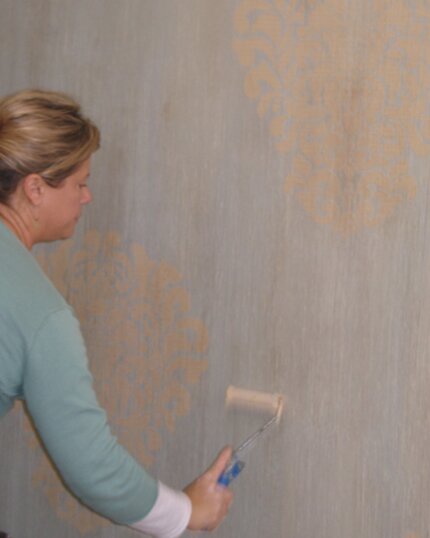
Sweet smelling bees wax is tinted with mica powder and rolled on. Easy breezy and so fast, it’s blurry.
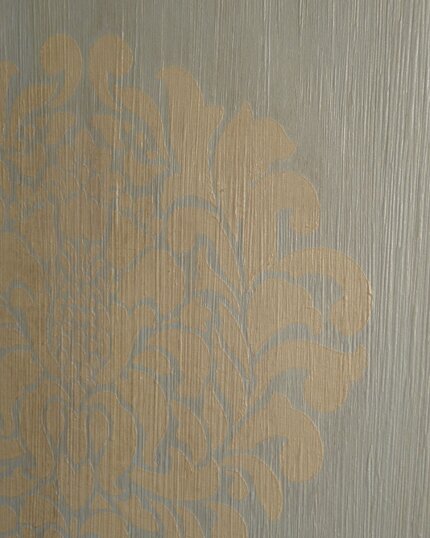
And it looks like this when it dries. This is our romantic, shabby chic, boho modern (a term I stole from decor8) lobby for Royal Design Studio, which features stencils such as the Grand Damask and our new Florentine Damask which, she says coyly, will be unveiled at a later date.
January 5th, 2008
The Dust Settles
Phew! You may have wondered why you haven’t heard from me? On the other hand, maybe you didn’t notice I’ve been MIA for a few weeks. At any rate-I’m ba-a-a-ack. After weeks of major chaos we have settled into only minor chaos after moving both my businesses, Modello Designs and Royal Design Studio into our new building. I have some serious catching up to do in just about every area of life and business, but am starting here with some photos of our very green and black Creative Office. I had drywall beams installed on this ceiling because I had the idea to see just how many different patterns I could graphically represent in one room and thought “what a cool way to break ‘em up”. Also, I wanted to do something graphic and simple (to ME, this is simple). We painted. We plastered (my favorite color of Jasmine Portofino). Thanks Kari!

We picked out lots of pieces of Modello vinyl. Thanks Michelle and Melissa!

We have pattern! I chose to alternate black trellis designs with green intricate floral patterns. To tie it all together, this Transitional Border runs around the room between the beams.

I surely need to get a wide angle lens!

This room isn’t totally ready for it’s closeup as it is still being decorated, but it has a wonderful big black Pottery Barn desk/wall unit and some really cool FLOR tiles on green marmoleum. It’s coming along……
Designs used: Fol All 152, Eas All 105,106,107, Trans Bor 129.
November 15th, 2007
Marquetry Madness
OK, I’ll admit it. I am totally and irretrievably obsessed with repetitive patterns: How to translate them onto different surfaces, how to apply them with different mediums, how to make them work, and how to make all of this profitable for my customers and, yes, me! I WOULD like to retire someday, preferably to a villa/vineyard in central Italy. SO, I started messing around with this simple and brilliantly efficient Modello Marquetry Masking System for applying pattern to wood and other porous surfaces (see the cork below) and think it’s so slick that I’ve filed a patent on the process.
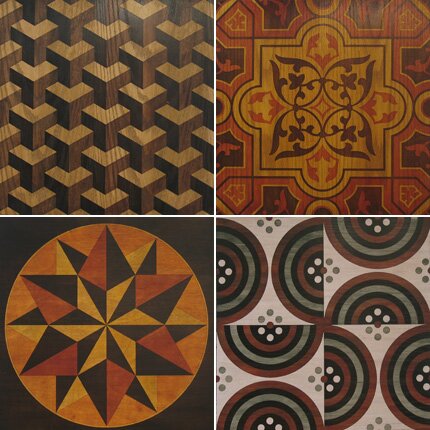
It’s all still a bit “in the works”, like everything else in my life, but I wanted to share these first samples with you. I was in a rush to find wood and get it cut, so settled on Oak plywood (bleech!). The grain of the wood fights with some of the patterns but you get the idea.

I’ve had a bunch of unfinished maple flooring laid down at the new building (see what I did at my house here), and some large unfinished birch doors, so will have some really nice surfaces to decorate. Now, to pick out which patterns……
September 7th, 2007
In Love with Lime
Wow! I have been SO busy in the studio. I have so much to share and so little time! I was just reworking some of the samples for our Italy trip and feeling very happy with the results so I want to share! One of the finishes we will do is meant to replicate some of the gorgeousl woven silk fabrics found at Antico Setificio Fiorentino.
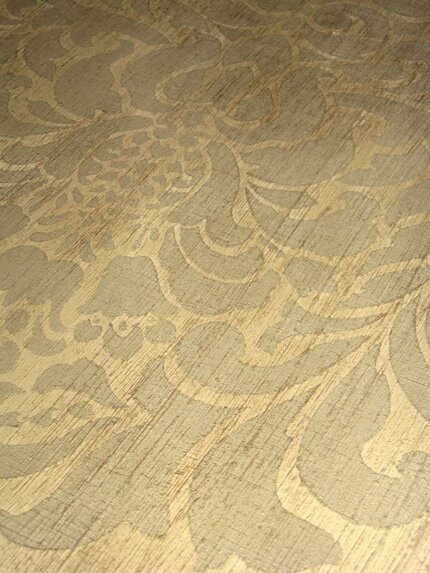
This one is done with Oikos’ Kreos material, which is much like a really thick, somewhat gritty paint. It’s fabulous for creating highly textured looks. For this I troweled on the lighter color and then stria’d it with their Corduroy tool (which resembles really cheap Astroturf). It works better than anything I’ve tried before for creating a slightly irregular stria with lots of nice “nubs”. Once dry I used a stencil and was actually able to roll on the darker color through the stencil and stria through it with a brush without pushing the product under the stencil-even over a textured surface. You really can’t see it well in the photo, but the finishing touch is using two different colors of mica-tinted Bee’s Wax (from Kathy Carroll) and manipulating them a bit.
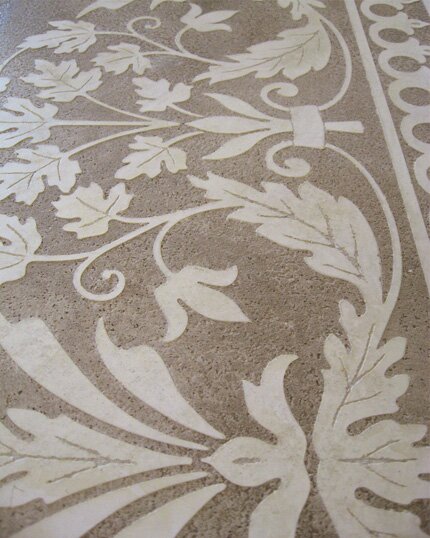
I wanted to rework the Sgraffito finish done earlier for another room and found that the combination of using a 10mil Modello for the main pattern and just a bit of “scratching” with a sharp tool for the vein details makes it look like I was scratching and carving all day-not! I LOVE the Oikos Travertino texture on the background on this one.
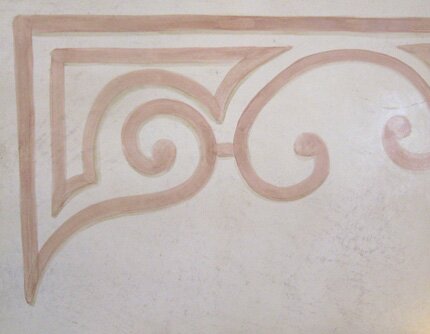
Most of the finishes we will be doing in Alison’s studio need to be kept fairly simple and neutral, as they will serve as backdrops for her own beautiful handpainted and gilded furniture pieces. This Oikos Lime Wash (actually it’s called Pittura Calce Verona) with some handpainted accents will hopefully fill that bill. All of these products can be ordered through Kathy’s site here.
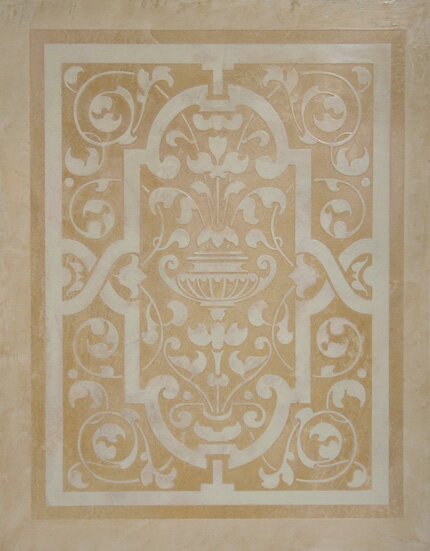
This one uses Safra lime plasters from the School of Italian Plasters and is a sample to test the technique for some cartouche designs what will go around a door and as a frame for artwork. It is a Marmorino base with Calcenova Arredo through the Modello. I have not done much personally with lime plasters in the past, but after the last week, I think I am hooked! Now, to tackle some real walls…..
September 1st, 2007
Operation Decoration
When you are planning an assault or military campaign it’s a good thing to have a really good icon and/or catchy slogan to get people to rally ’round your cause. You know, “Uncle Sam Wants You!” and all that jazz. Well, I am in the final planning stages of a full-blown assault on my new building and it’s freshly primed and painted walls, ceilings, concrete floors, cork tiles, hollow core doors and sheet vinyl. AND I have the icon. Lauren designed this great logo for us and I added the camo because that’s the kind of mindset I’m quickly developing.
We like it so much we are going to have it silkscreened on Alternative Apparel’s Ivory colored “Destroyed” tee. The shirt is all worn out around the collar and hem. Just the kind of tee shirt we USED to turn into a dustrag. Now we LOVE it. Cracks me up. So, we are going to put the logo on the front and a slogan on the back. I am thinking of “Waging war on white walls and boring surfaces”. Does that grab anyone?!?!
I am putting together an extensive series of low-cost, study/work classes that will allow participants to learn the techniques, create samples and then immediately apply them to real-world situations-that just happen to be available in my new and needy building. I am also bringing in some special guest instructors. We will be emailing the workshop schedule to our student database next week, so be on the look out for incoming information if you have taken classes here. If you have studied with me at other locations and wish to consider enlisting, please email me. I promise you a really cool tee shirt….
August 29th, 2007
Kimono Obsession Continued
Lest you think I have abandoned my kimono and Japanese design obsession, fear not! I have written previously about being asked to participate in an upcoming mural compilation book that my friend Gary Lord is doing. Well, seems I promised the editor some “new” mural photos for the gallery section a few months ago and she suddenly surprised me by wanting to collect on that commitment!?!? If the sign of a true artistic soul is to produce under pressure, then my hand is held high. Sign me up!

I decided to try a different kind of “mural”. This one is on canvas (typically) but the Roclon canvas is cut into the shape of a hanging kimono. Everytime I have picked it up I have always gone back to this one page in the book,Kimono, Vanishing Tradition, to look at this lovely wedding kimono shown above.
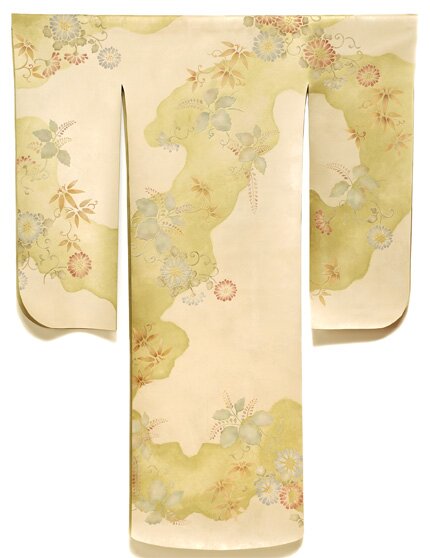
The crunch-time mural commitment finally gave me the opportunity to reinterpret it using a series of stencils from our Royal Design Studio Kimono Collection.

I used Shimmerstone (a metallic plaster) as the base and to do the embossed stenciling over the glazed green area. I then simply used different colors of Modern Masters Metallic paints to add the colors through the stencils to the dried embossed designs. It is a much softer look than the original, and not quite as detailed, but I was pretty pleased with the outcome and now have something new to hang on the walls at the new building. The photography is by Gary Conaughton.
May 4th, 2007
Project Wood Floor: Part 1
It’s project time! I have been searching for a long while for some new bedroom furniture that would fit my decorating vision as well as my small space. Trips all over the web and to local furniture stores proved frustrating as they are making everything either really BIG or really modern these days and I want something that will go with the delicate and romantic Chinoiserie murals that I will be adding.

I finally settled on this Victoria Collection from the William Sonoma Home catalog. Unfortunately, all I can squeeze in is the bed and a couple of dressers, but I think (hope) it will be really pretty!
Before that gets delivered there is a new unfinished maple floor going down next week. The wood is sitting behind me “adjusting to the environment” as I speak. It smells good. Now to design the finish! I want it to be formal but not uptight, classic, space expanding, decorative but not competitive.

I’ve been pouring over intricate patterns and through my library and found some great marquetry examples in two books that I think are “must haves” for any design library. The first is Molyneux, shown above and below/left.

The second is Roomscapes: The Decorative Architecture of Renzo Mongiardino, photo shown above right. His style was so over the top and so dead-on gorgeous, I will have to scan some more pages to show you here tomorrow! I, however, have decided to keep it more simple and safe and am playing with some classic octagon and dot patterns with ornament like the one shown above/left. I’ll be using a Modello pattern to make it fast and easy, along with water-based gel stains. Stay tuned!




 Copyright © Designamour