April 29th, 2008
Glamour Glass
Our new studio has a little “kitchen” area with cabinets and a countertop. I had them install stock cabinets from Lowe’s and a simple black formica countertop. This was more of a budget than design decision (story of my life!) and of course provides the opportunity for yet another painting project. The cabinets will get some sort of eggplanty finish on them with patinated mirrors (cut to size) on the upper doors. For the countertop, I opted to do something simple. It’s all relative! *Simple* turns out to be getting a large piece of glass cut to size. Of course I didn’t take careful enough measurements and the builders didn’t take care to make anything plumb or square in the building so my nice square-cornered glass has a slight *fit* problem. What to do? Distract the eye like crazy!
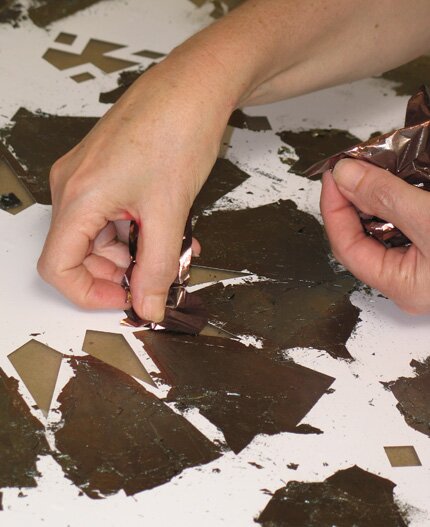
I had a classic Moroccan zelij tile pattern cut and placed it on the back side of the 2′ x 7′ glass to do some reverse gilding with the new Celestial Leaf (colors: Dawn, Moonbeam and Twilight again). I used our Marquetry Weed technique to reveal different areas one at a time which receive a different color leaf.
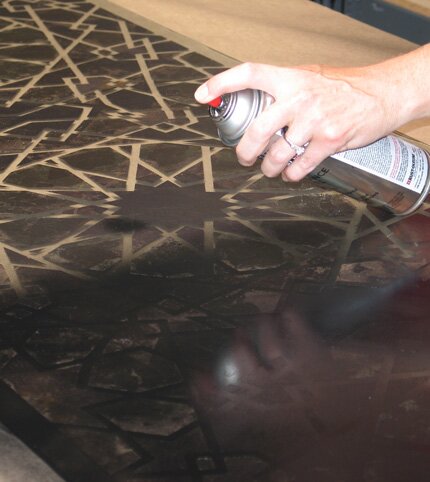
When it’s all done and dry it receives multiple coats of black lacquer spray paint….
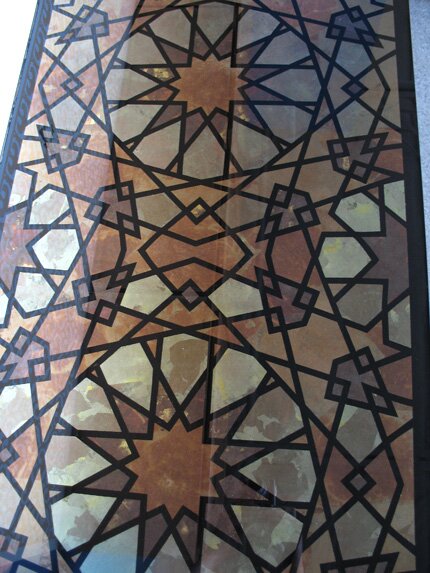
gets flipped over and viola! we now have a lovely surface that is easy to clean (and check out your hair in). This is a really quick and easy finish and can be applied to any piece of furniture that you can lay a piece of glass on!
April 20th, 2008
Behind Closed Doors
When I was imagining my wish list for a new studio, these things came to mind: Tons of space, lots of natural light with good ventilation and a place to stash stuff out of sight. Well, one out of three isn’t bad! I have a very hard time being creative in a messy, chaotic environment. I generally need to clean up and throw out (clear the plate, so to speak) before beginning a new project. My attention wanders so easily anyway, I don’t need the added temptation to dust off paint cans rather than getting down to work. SO, I planned my new studio to accomodate a VERY long wall of closet doors to conceal the seemingly endless array of products I seem to need to have at my fingertips.
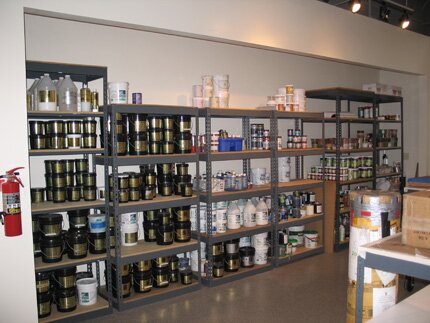
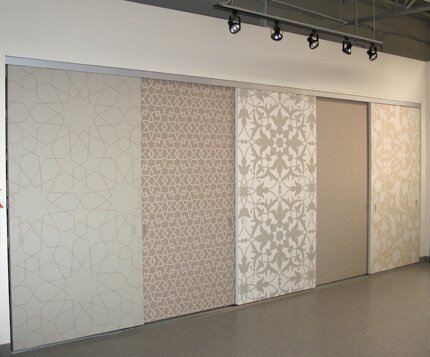
For some reason known only to God, it took the contractor over 4 months to actually get these doors (ordering the right size to begin with would have helped) and then another month or so to figure out how to get them up and sliding (don’t ask!). Finally, the 4′ x 8′ blank canvases arrived and were installed so that they could actually move! My idea was to show some restraint with the designs (remember, I am trying NOT to distract myself) so I chose a neutral palette of 5 colors and super-sized some new Moroccan-inspired patterns we have coming out in the Modello line. Each door was painted a different color and I installed the Modello masking patterns all at once.
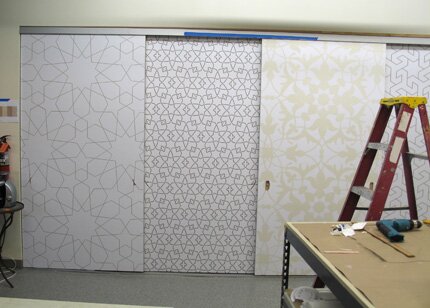
To keep the next layer of paint from bleeding, I rolled a coat of water-based varnish over the patterns to “seal” the edges and then rolled two coats of contrasting paint from my limited palette over each door through the open areas of the masking pattern. I chose paint colors from the new Benjamin Moore Aura line’s Affinity Color Collection. I LOVE this paint! It covers like a dream and dries very quickly. Other than the priming and base painting this project took just a day-and keeps a world of sins behind closed doors. If you are interested, here are the colors used: Hush, Pashmina, Weimaraner, Fossil, and Cotswold.
March 28th, 2008
Bamboo Forest Floor
We are closing in on getting all of our floors finished up in the new building-all 8300 square feet of them! We’ve done cork, wood and LOTS of decorative concrete. Our latest concrete floor project for our laser cutting room was inspired by this rug picture:

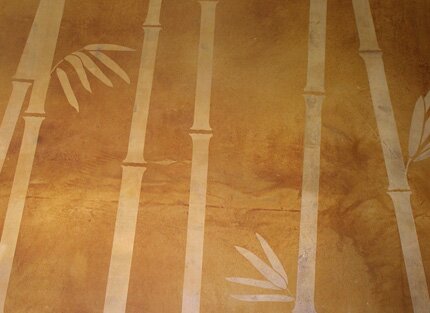
I wanted to do something organic and VERY different, so I reworked our Royal Design Studio Bamboo stencil into a Bamboo Forest that we cut from the Modello masking material. I decided that the best way to achieve this look of mottled color variations was with acid staining and acid etching.
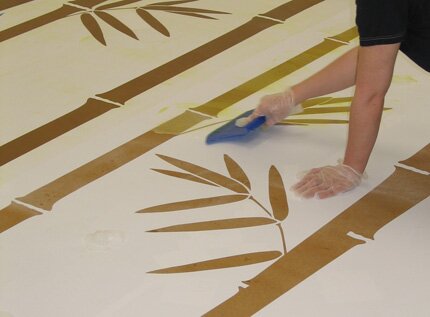
Acid staining involves spraying on diluted acid stains (essentially muriatic acid, mineral salts and water) and letting it work it’s magic as the acid etches and opens up the concrete surface to allow the mineral salts to react with the lime, creating the soft, mottled color. Once that was cleaned up and dry we applied the vinyl pattern and troweled gelled acid through the open areas of the pattern.
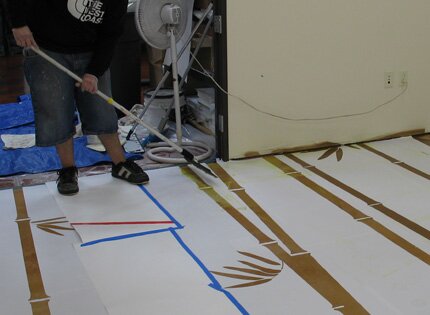
The gelled acid pulls the color back out from the concrete in the exposed and treated areas-again in a way that is random with subtle variations.
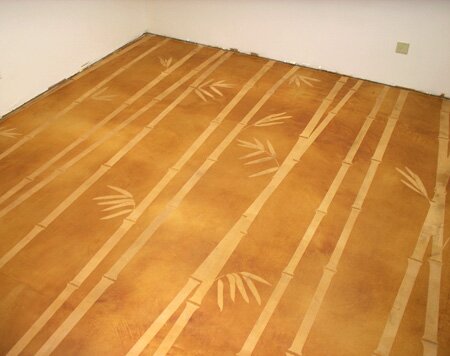
Acid is not the most pleasant material to work with and you must take precautions and get lots of ventilation going, but it’s a standard finish for decorative concrete and MAN it’s gorgeous!! Special thanks to Melissa and Richard for their help with this project. We actually were able to get through this in a few hours. This type of pattern would typically be used on a vertical wall surface, but the stripe effect on the floor really looks quite nice and makes the room seem a little bigger as well!
Speaking of concrete! Please check out this post from my Artofliving blog about our weekend wine country trip with the fabulous Bob Harris and Bob and Lee Ann’s harley ride across the country to raise money for Breast Cancer Research.
March 3rd, 2008
Silk Purse
Just how DOES one make a silk purse from a sow’s ear? I haven’t quite figured that one out yet, but I have discovered some easy ways to transform standard-issue commercial-grade bathroom fixtures such as paper towel dispensers and toilet seat sanitary tissue cover holders into something quite lovely!
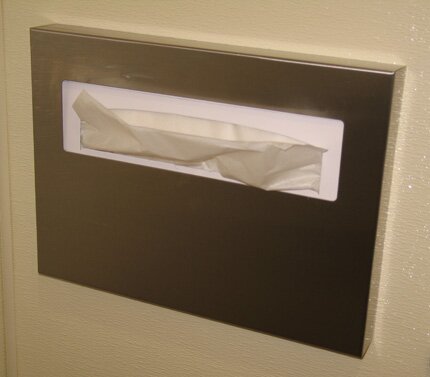
I am sure I violated some ridiculous city code (there are many) by gussying up these ugly fixtures but I will throw caution to the wind and share them with you. Shhhhhhhhh.
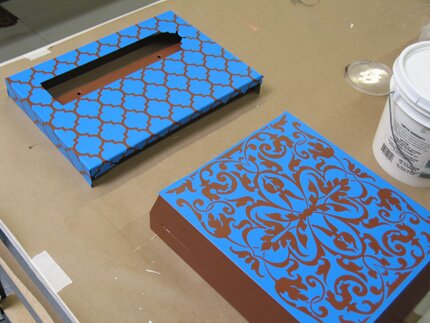
Since we were using Modern Masters Metal Paints, we began by spraying Kilz, a bonding primer, on the metal surfaces. Be sure to do this outside and with good ventilation. We then applied a coat of their Acid Blocking Primer. After applying the Modello patterns we troweled on a thick stone texture product, Fauxtex, to a create a raised, “embossed” pattern.
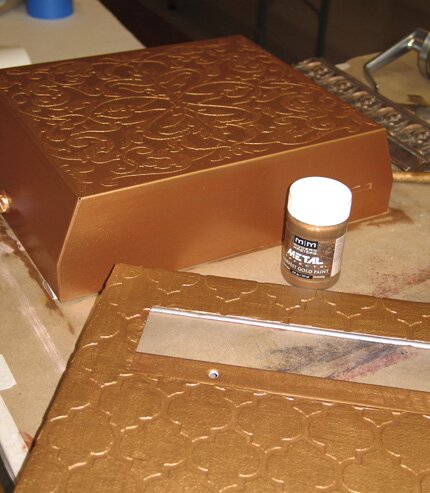
When that was completely dry we removed the Modellos, applied another coat of Acid Blocking Primer and two coats of Harvest Gold.
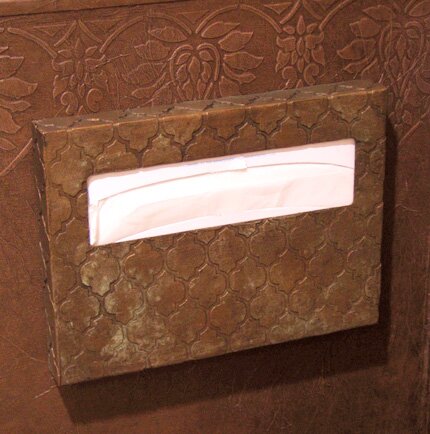
We spritzed and dabbed with some Green and Black Patina Solution to “age” and patinate the Metal Paint and then sealed. After applying some stain to antique and accentuate the raised designs we now have the MOST beautiful sanitary toilet tissue paper cover holders….
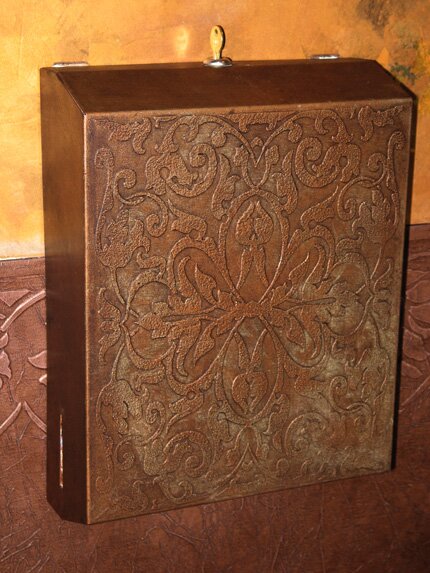
and paper towel dispensers in all of San Diego!
PS The designs used were EasAll112 and EasPan126.
February 26th, 2008
Heavenly
I wrote about my Turkish door idea a week or so ago. It’s done and we finally have the room put together (more on that tomorrow!) I photo’d the door before we hung it up because the bathroom is so small I never could have gotten a shot off!
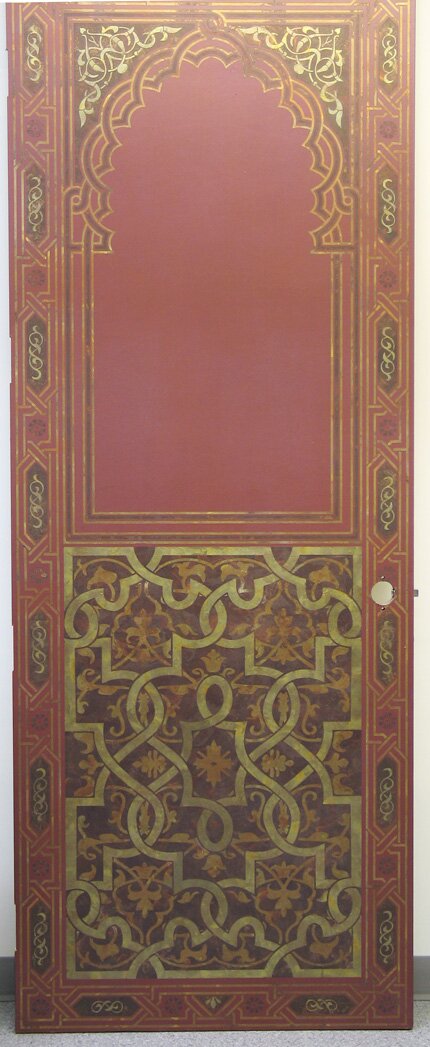
Here it is, all metallic-y and gilty from a combo of metallic paint and Celestial Leaf.
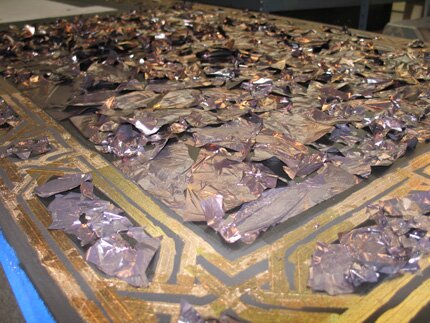
This is a fun shot that Melissa snapped of the leaf laid in place and ready to be burnished.
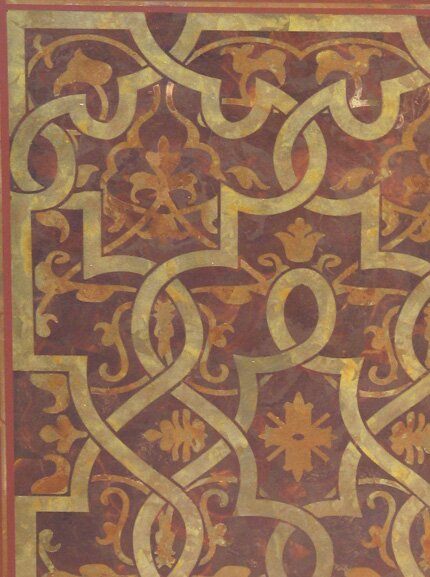
and a detail of the lower panel of the door. Still using my favorite colors here: Dawn, Moonbeam and Twilight. The effect is so great and the application so easy that we finally got something done to this little table that has been taking up storage space for 5 years.
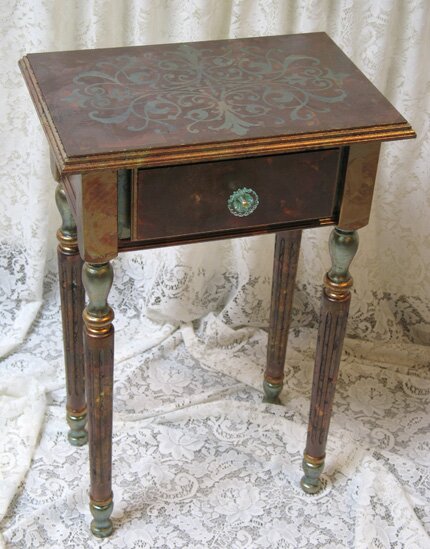
Coat of black paint and then size and leaf each color separately.
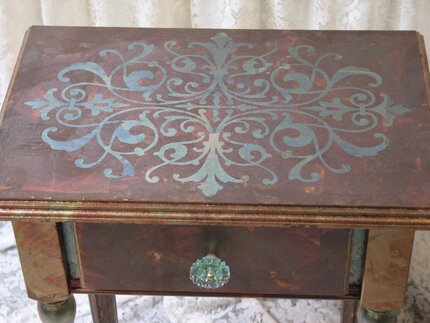
A detail of a Modello pattern on the top (OrnCen170). Cute knob by Anthro, of course!
February 21st, 2008
Larger Than Life
One of the very bestest things about owning your own business space/office/showroom that I’ve found it that you can do WHATEVER you want-at least from a design sense. It’s not someone’s home or expectations or limitations you are designing for so you can go couture, catwalk, over the top! Well, at least that’s MY goal!
I am still very inspired by Geishas and the whole Japanese design aesthetic so when it came time to think about a design for a door for this room I knew I had found my girl when looking through a Dover book one day.

This is a 3′ x 8′ door, so she looms quite large! We reworked the design quite a bit, adding some color, body parts and coordinating patterns to her obi.
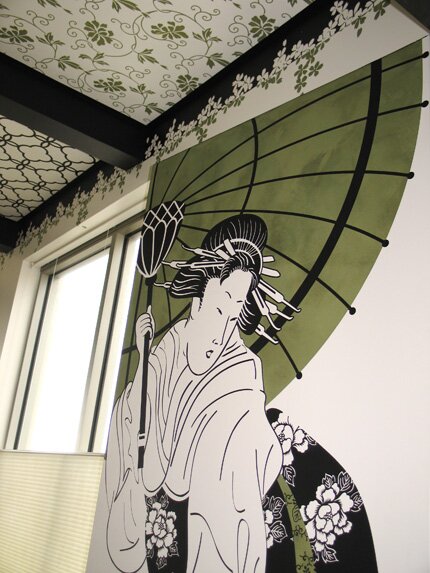
Here she is in her space, coyly greeting all who enter in the way that only a true geisha can. This design was done with a two layer Modello pattern. For the first I troweled Jasmine Portofino to colorblock in her parasol and part of the obi. When dry I placed the second layer and simple rolled black paint through. VERY IMPORTANT tip: When you are rolling paint through a Modello, seal the pattern first by rolling over it with two coats of a water-based satin varnish, allowing it to dry between coats.

She has friends, and they are available! I was originally wanting to add these other Geishas to different walls in the room, but decided to show some restraint-at least for now. Due to the intricate details they contain, the girls must be cut quite large-6′ high minimum. I imagine them on a large 3-panel screen or on the walls of a salon, spa or fun boutique dressing room walls.
February 20th, 2008
More Floor
Remember this? It’s done, it’s gorgeous, it’s mine! I won’t bore you with all the layers-the many layers….
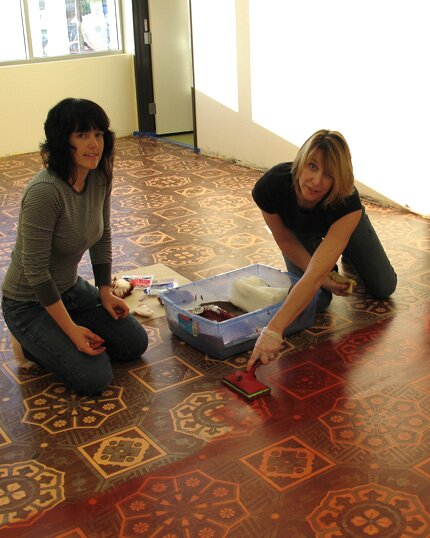
We stained for days.
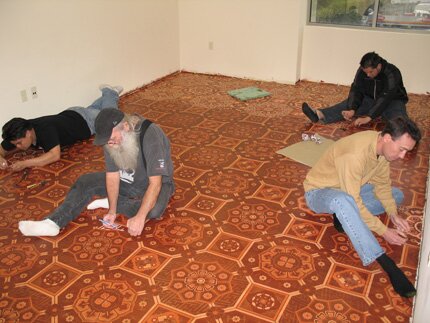
They removed the pattern for hours.
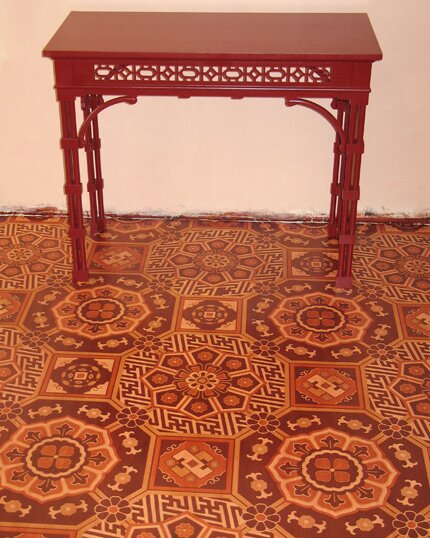
I can hardly wait to decorate. Oh wait! We still have to do the walls and ceilings. Back off, girl.
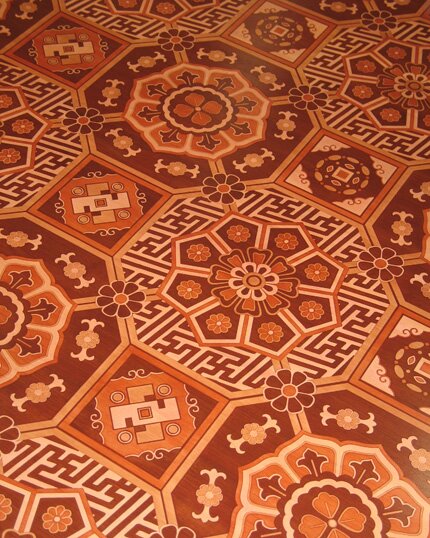
Let’s just enjoy the uninterrupted pattern for awhile.
February 12th, 2008
View from the Throne
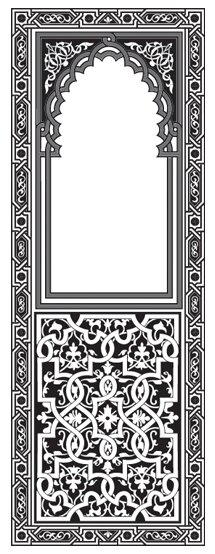
We are finally getting round to putting the finishing touches on the Celestial Powder Bath. The thing is, once you start to go “over the top” with surface decoration in a room it becomes a runaway train. With extravagently decorated walls, you simply can’t leave other surfaces untouched. They stick out like an ugly sore thumb. And so, we have moved on to the hardware and the inside of the plain white door. As the back of the door will only really be seen when the facilities are “in use”, I imagine that this will become our most popular bathroom in the building. (Once the door is back on, of course). Here is the design-
And here are the samples to test some possible color variations. I will actually be adding some dark brown areas to really punch up the Celestial Leaf colors.
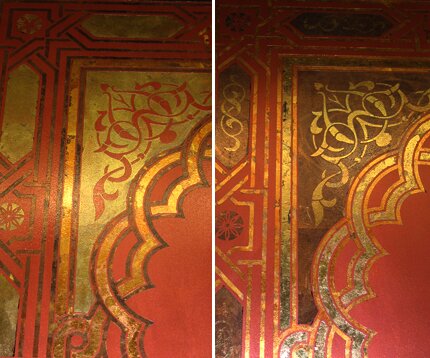
The Celestial Leaf is one of my new favorites toys! There are nine color variations that the manufacturer in Italy has come up with through a special heat treating process they’ve developed. I seem to keep gravitating to the colors Dawn, Moonbeam and Twilight, which are seen in the samples above, but they are all quite gorgeous!
February 7th, 2008
The Insanity Continues….
Your’e familiar with the K.I.S.S method? Keep it simple stupid! That just doesn’t seem to fly around here. Wow, it would have been SO easy to just stencil a nice simple border design around the edges of the hardwood floor in my office. That way, I might actually be WRITING this from a real office instead of setting up a makeshift desk out in the hallway. But no-o-o-o, I had to fall in love with this classic, historical oriental design and the challenge of actually being able to do something with it! We decided to make it work with our Modello Marquetry Masking System, wherein we just weed a portion of the design to start and then remove certain elements for certain colors and apply stain in a sequence of layers. Well, I think it took a month or so just to get the design to work, cut correctly and fit together properly, but Lauren and Miguel came through and guess what? It works!! It’s not actually DONE yet, but I feel so thrilled that we’ve gotten through the hardest part (getting it to work and getting it laid down) that I feel compelled to share…..
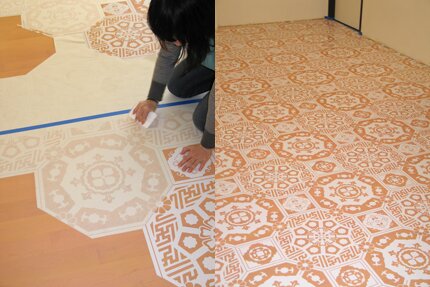
Here is the design in all its dizzying glory being puzzle-pieced together and how it looks tonight whilst awaiting the first layer of stain.
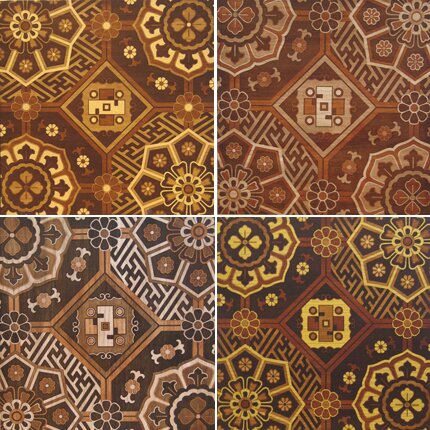
Just so you have an idea WHY I even wanted to do this in the first place, here are the color samples I did. Each one was colored and weeded a little differently. Can you see?? Can you find Waldo? If you do, I’ll give you a million dollars. No kidding!
February 3rd, 2008
Stair Master
Our wood surfaces adornment assault continues! I showed you some of the finished landings in an earlier post. Now I’m happy to report that the connecting staircases are finished as well and they are GAWDeous!
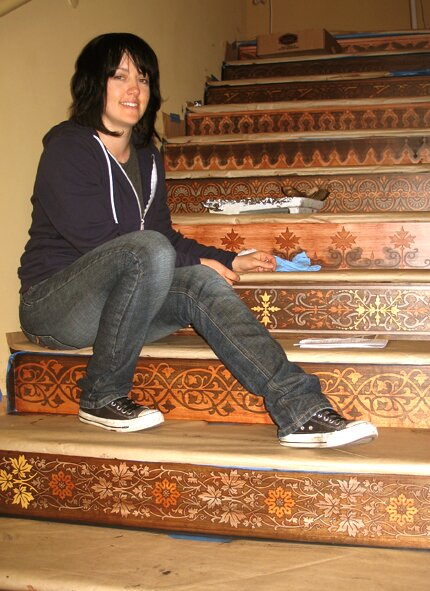
My ever-abler new studio assistant, Melissa, did all the actual staining work on the stairs so is now an official “stair master”. You can imagine by looking at all that pattern on all those stairs that this was quite a bit of work!
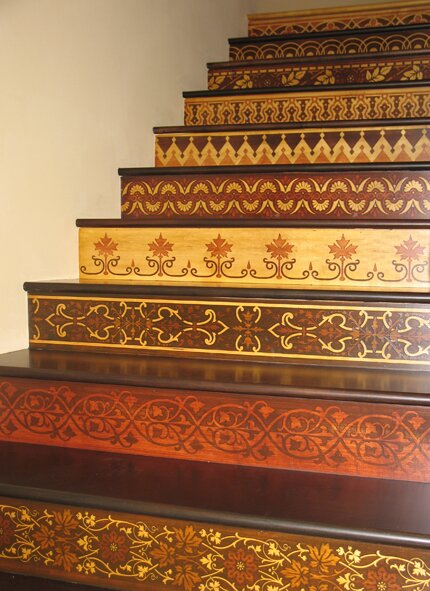
There are 24 different border patterns used. I was able to set up the colorways first in Adobe Illustrator to try and get some nice balance and contrast over the length of each set of stairs.
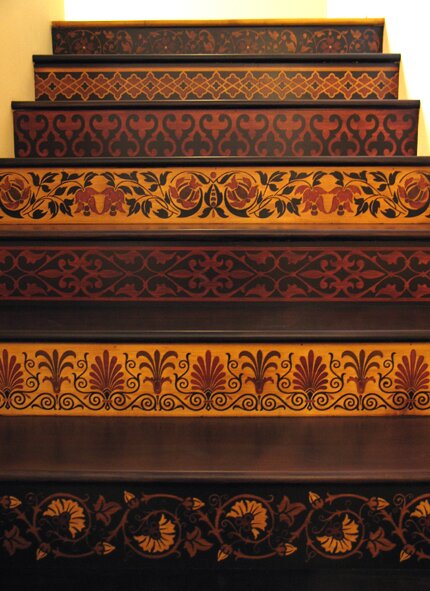
The stair treads themselves are alternately stained a dark brown and a warm black and they look great from above as well but it’s the view looking up that is extra special. On a technical note, we have been using Bona’s Traffic for the topcoat and used this on the cork floor as well. It’s a bit tricky and pricey but lays down a lovely soft satin finish that has already proven it’s worth as a very durable topcoat for a commercial setting.





 Copyright © Designamour