April 26th, 2008
Breakin in the Studio
Finally! The sound of laughter, paint talk and trowelling has been ringing through the studio as we have just held our first classes here the last couple of weeks.
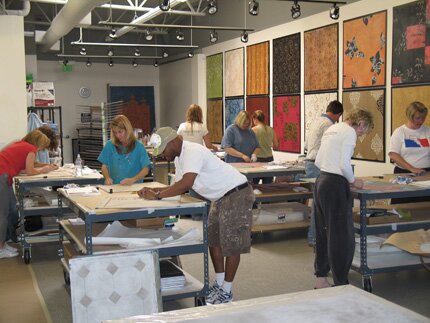
I had a great group of 10 for the ever-popular SkimStone/Modello class, which is one of my favorite to teach because it only involves one product! It’s amazing how many different looks you can get by changing colors, patterns and application techniques.

Here is the lovely Diane (with the also lovely Julie) modeling her cool new Operation Decoration t-shirt. Wonder where she got that?
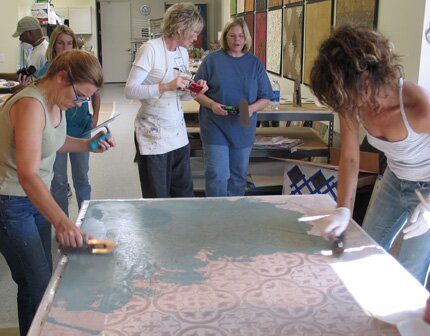
They were a dedicated bunch who teamed up and stayed late to work on not one, but two Concrete Carpet designs, which will be hung in the front stair landing.

I love the old crusty look of the Ibiza…

and the fresh color scheme of this one, a new pattern we have coming out with our new Design Library Binder. Thank you guys for a great inagural class!
March 28th, 2008
Bamboo Forest Floor
We are closing in on getting all of our floors finished up in the new building-all 8300 square feet of them! We’ve done cork, wood and LOTS of decorative concrete. Our latest concrete floor project for our laser cutting room was inspired by this rug picture:

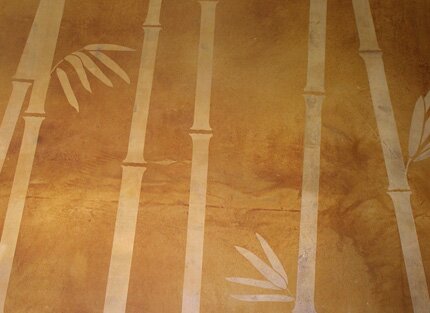
I wanted to do something organic and VERY different, so I reworked our Royal Design Studio Bamboo stencil into a Bamboo Forest that we cut from the Modello masking material. I decided that the best way to achieve this look of mottled color variations was with acid staining and acid etching.
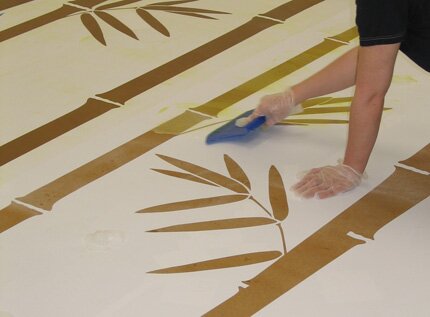
Acid staining involves spraying on diluted acid stains (essentially muriatic acid, mineral salts and water) and letting it work it’s magic as the acid etches and opens up the concrete surface to allow the mineral salts to react with the lime, creating the soft, mottled color. Once that was cleaned up and dry we applied the vinyl pattern and troweled gelled acid through the open areas of the pattern.
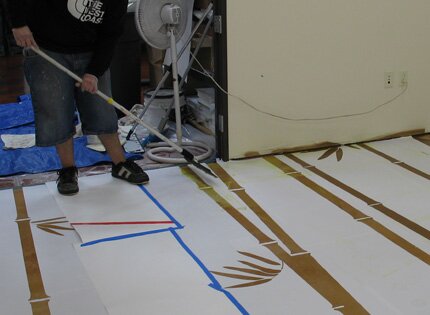
The gelled acid pulls the color back out from the concrete in the exposed and treated areas-again in a way that is random with subtle variations.
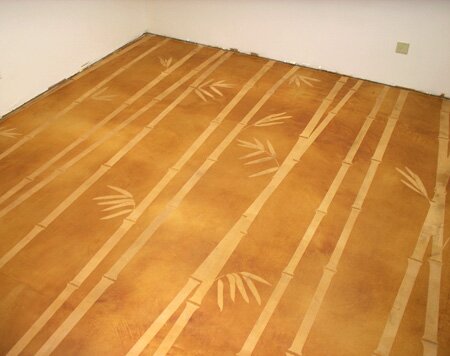
Acid is not the most pleasant material to work with and you must take precautions and get lots of ventilation going, but it’s a standard finish for decorative concrete and MAN it’s gorgeous!! Special thanks to Melissa and Richard for their help with this project. We actually were able to get through this in a few hours. This type of pattern would typically be used on a vertical wall surface, but the stripe effect on the floor really looks quite nice and makes the room seem a little bigger as well!
Speaking of concrete! Please check out this post from my Artofliving blog about our weekend wine country trip with the fabulous Bob Harris and Bob and Lee Ann’s harley ride across the country to raise money for Breast Cancer Research.
February 6th, 2008
Artistry in Concrete
The World of Concrete is a HUGE show-full of testosterone and all things that testosterone infused beings like: Mega-large machinery, tools, big displays of bags of cement and the like. Tucked away out back of the three huge halls filled with this stuff is a small area dedicated to “Artistry in Concrete” where 10 people are selected to show their stuff on a 10′ x 10′ slab that is poured just for the occasion. For the last fours years Modello Designs has supported some participating artists with design and products and this year we were pleased to have our product used by a couple of lovely ladies!

Stevi Michner was there representing her Detroit-based decorative concrete company, Surface. She created a concrete sculpture of a kimono using overlays and colorants from Colormaker Floors and decorated it with a customized version of our EasPan 114 Plum Blossom tree.


My friend Nancy Jones from Artworks! Spokane (and a participant on our recent Italy trip) create this very cool tiger mural. She worked with Aaron on developing the artwork into a two-layer Modello that was used with custom-tinted SkimStone. She achieved the subtle shading and color variations by applying by both brush and trowel and adding in more hand-painting after the Modello pattern was removed. The only sad thing about this is that they jack-hammer these slabs up at the end of the show. I hope you got better pics than I Nancy and that you get to apply this somewhere with some more permanence!
January 22nd, 2008
A Man and His Machine
Seeing as how myself, Eric and Aaron are here in Las Vegas at the World of Concrete show I thought this would be an apropos time for this post. Aaron Knight is the go-to guy in the graphic department for our decorative concrete customers. With a fine art degree from Chico State he likes to utilize Adobe Illustrator vector art in many of his own studio projects. When it came time to contemplate what type of design to use on our concrete production room floor I gave Aaron the challenge of coming up with something that would be a little ”different”, reflect what happens in our company, and that would appeal more to men-our primary customers for decorative concrete.
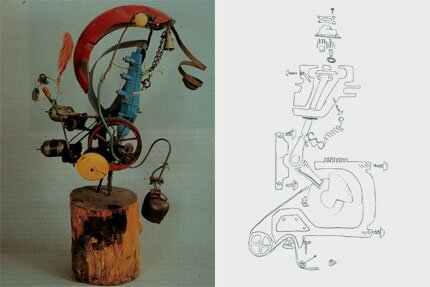
Aaron was inspired by the work of Jean Tinguely and his scupltural machines and developed a working sketch for our floor after Tinguely’s work.
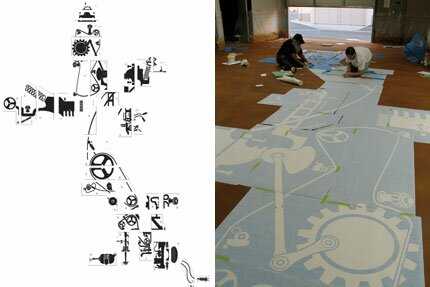
This became a series of vector art, gears, screws, belts and other assorted ”parts”, that we worked into a “machine” that travels across our production room floor, much as our jobs flow through.
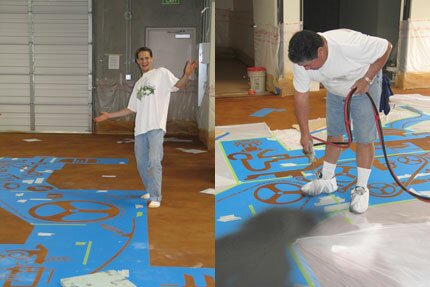
After many hours spent applying the various parts of the Modellos in proper order (see Aaron left) we had Ernie Archuleta (right) come and and spray Concrete Solutions Spray Top in a matter of minutes. This sprayable overlay is ideal for large-scale production as it lays down an even layer of colored concrete very quickly and we almost immediately were able to begin removing the vinyl.
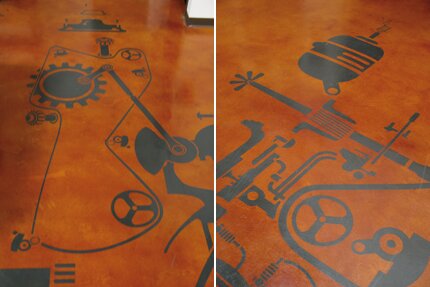
Some shots of various parts of the final machine. Aaron is a man who puts alot of thought into his life and work and these were his thoughts for this project:
Machines are a refined process. This machine has been abstracted to suggest an openness to new ideas or methods. This site specific design is representative of the way I seen the different people who make up the business of Modello Designs. The design department feeds the machine with ideas. The gears turn in production to realize the idea of the designer. The finished patterns are then sent to the decorative artists who then apply their own unique twist. This machine was not meant to have one refined process, not condemned to a life spent stamping out fenders. This machine is an “idea” machine, capable of bringing together and realizing the ideas of many people.
January 12th, 2008
Going for Gold
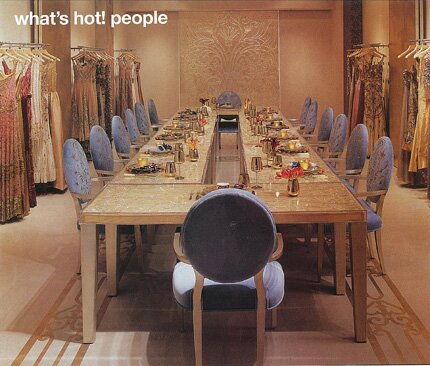
In going through one of the many stacks of things I rip out of magazines I rediscovered this Elle Decor feature from months ago on the opening of the Reem Acra flagship boutique in New York. Ms. Acra’s passion and business revolves around luxury bridal and eveningwear designs. I ripped out the page not because I needed a gown (but they are gorgeous, aren’t they?!) but because it had a beautiful gold design on white floor: Unique and elegant and oddly familiar….
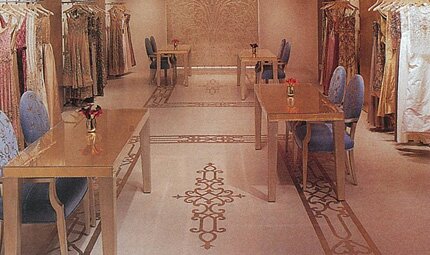
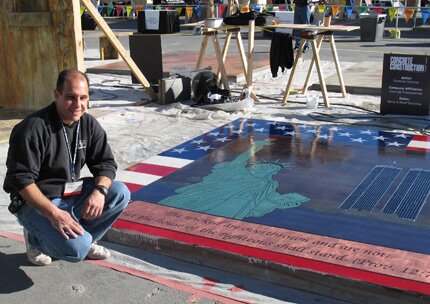
After picking it up again and actually reading the copy I realized that it was the familiar work of one of our favorite decorative concrete customers, Dominick Cardone The Concrete Impressionist. One of Dom’s specialties is gilding with 24k gold on concrete and he had been sending us progress shots but we never saw the final result-until now. Isn’t this just swanky?
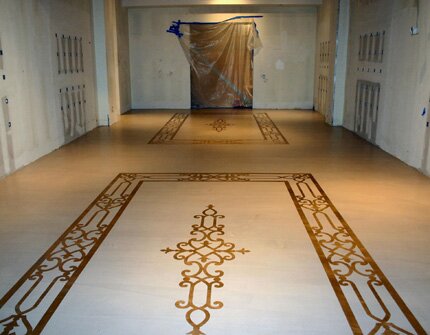
Here’s Dom two years ago at the Artistry in Concrete event at the World of Concrete show where he used custom-designed Modellos for a 9/11 tribute-again with his special gilding techniques.
December 3rd, 2007
Chocolate, Pistachio and Raspberry
Mmmm. Mmmm.
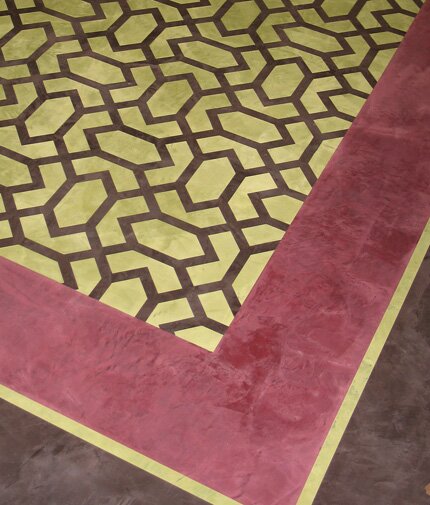
We did a SkimStone “carpet” to finish of the Gingko Leaf office, using Modello EasAll104 in the center. I LOVE this trellis pattern. Originally, there was to be an elaborate decorative border overlaid in the raspberry outer border but we liked the relatively simplicity so much as this point we decided to stop here. With everything already going on in the room and yet more just outside the door, I think it was a good call!
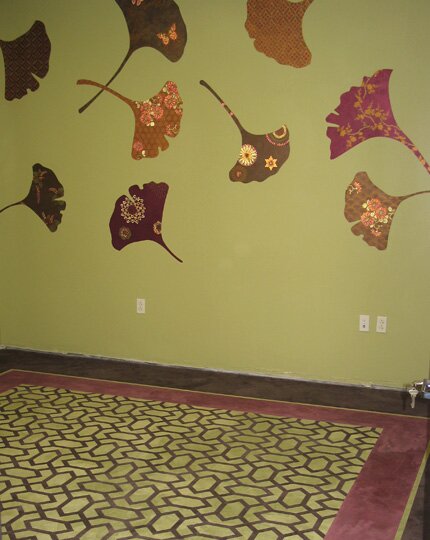
This shows how it relates in size, scale and color to the wall finish. I custom-tinted the green on the floor to match the paint color on the wall using their French Mint and Yellowstone colors. It’s almost spot on. Just so’s you know, there is all that empty space at the bottom of the wall because it will be filled up with a row of filing cabinets. Sigh.
November 1st, 2007
Floored
So, yeah, Italy was amazing! We were really lucky to be accompanied by a fabulous group of 30 people. Now, that may seem like a lot-it sure did to me-and we were working in a smallish space but I’ve never seen a group of diverse people work so well together. We were able to get an incredible amount of work done in a week and there were smiles all around all the time. Maybe it had something to do with the many bottles of red wine on our lunch tables. Hmmm?
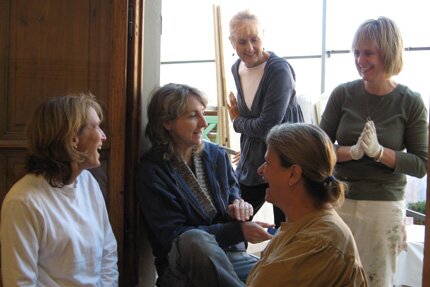
This is my favorite shot. Do you think that they are engaging in some girl talk? Naw, probably discussing trowelling techniques. Speaking of that, we did quite a bit of it on this 250 sq. ft. floor area.
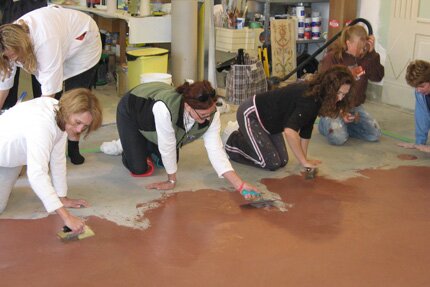
Racing to the finish line.
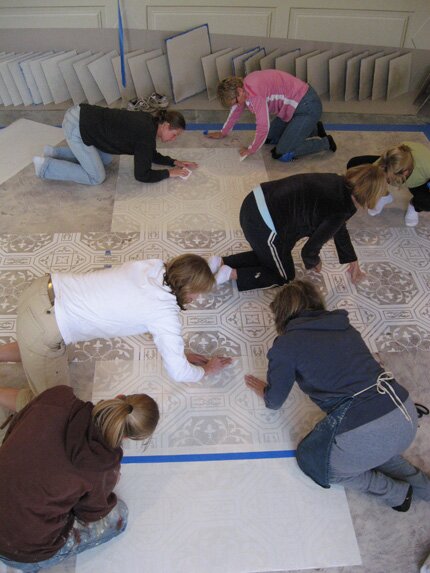
All hands on deck.

Me posing (just a little)
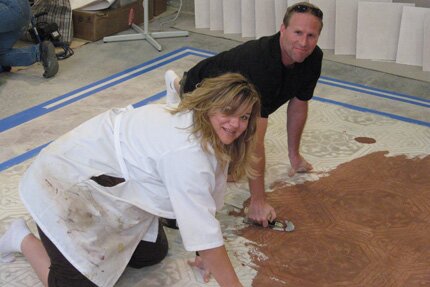
Susan and Todd (who really never did stop smiling)
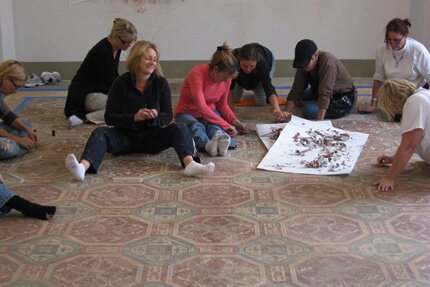
A pattern picking party. I think many were looking for the opportunity to sit down at this point!
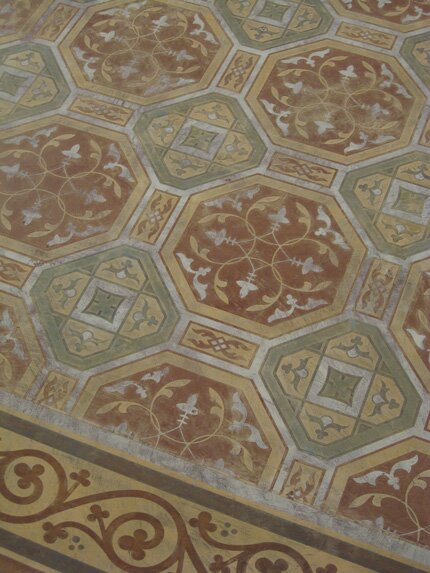
Ta da! The floor turned out to be seriously gorgeous. We were all wishing we could take it home but happy to leave our mark in lovely Florence. A very special Thank You to Modern Masters for their generous donation of SkimStone for this major Modello project that uses one of our Ornamental Allover patterns, OrnAll 107.
September 24th, 2007
Fab Floor
Well the first project for Operation Decoration (our new lobby floor) is done and it turned out FABULOUS! Not without some issues and necessary adjustments midstream, but that’s what decorative finishing and decorative concrete are all about-problem solving!
The incredible Bob Harris, with his equally incredible lady LeeAnne and right hand man Mark came in to teach a class of 18 people who got to see the process and work a bit on the floor. The design concept was scattered, layered tiles over an acid stained floor that would be done using three different techniques.
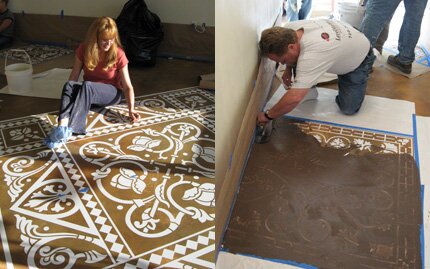
Here is my very helpful friend Jackie putting the finishing touches on getting the Modello ready on the floor. This was our largest tile! One of the students is shown using an integrally colored overlay to thinly trowel over the surface to create a slightly raised image.
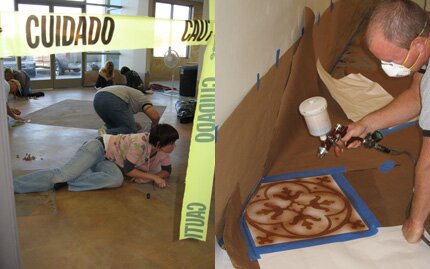
After drying, we hit the floor en masse to remove the Modello patterns so we could continue on with the next “layers” of tiles. The next series was airbrushed using thin layers of solvent dyes. We let Bob handle this part!
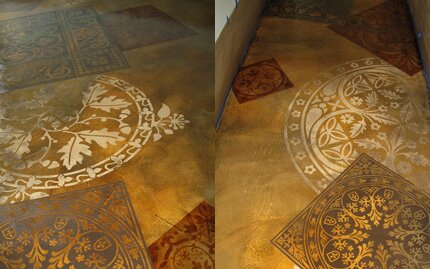
I was too busy doing the etching on the last series of tiles to think about pictures but the lighter tiles you see were accomplished by using a gelled acid through the Modellos to remove the stain from the surface. As we were going for a distressed, antiquated look we just left the acid on the surface for a few minutes.
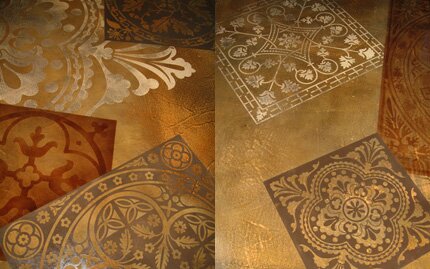
This was actually a huge project that was completed in 2 1/2 days. I can’t give enough credit to Bob (thanks for being so flexible!!!), LeeAnne, Mark, Jackie, John and the rest of the students who got their hands in on this amazing floor project. Now, I’m off to cover it up with heavy contractor’s paper so nothing happens to it over the next couple of months worth of decorating projects there. Next-the walls!
September 12th, 2007
Florence Tile Floor
One of our decorating projects in Florence next month will be to do a large floor area (250 sq. ft) in Alison’s studio with an aged tile treatment that we will accomplish with SkimStone and Modellos. I had shared some of the tile treatments we did in a recent SkimStone class and these four samples build on that idea.
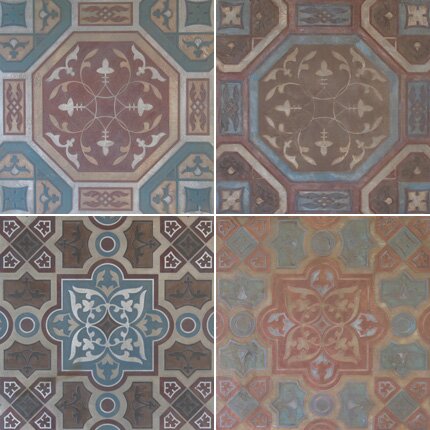
With the exception of altering the blue color slightly these all use the same few colors, but they are layered a little differently. I am always amazed at how many different looks can be achieved with the same pattern, product and colors. The advantage of creating your own “tile” floor, of course, is that you can make it look any way you want. You can’t get that at Home Depot folks!
September 9th, 2007
Bob Harris in the House
I am beyond thrilled that we are finally beginning the decorative phase on the new building. We actually begin troweling a decorative finish in one of the offices tomorrow! Even better, next week we have Bob Harris, decorative concrete master, coming in to teach a class that will be decorating our large lobby floor with Colormaker’s concrete system of overlays, stains and dyes.
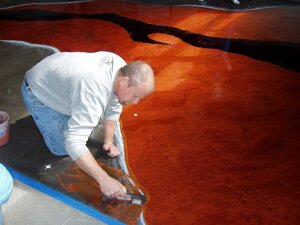
Bob and his team from the Decorative Concrete Institute are super people and super knowledgeable, so I know that it will be in good hands. Troweling concrete IS something that I have done, and really have no desire to do again, LOL. I DO like to design though and think that I have come up with a pretty cool idea.
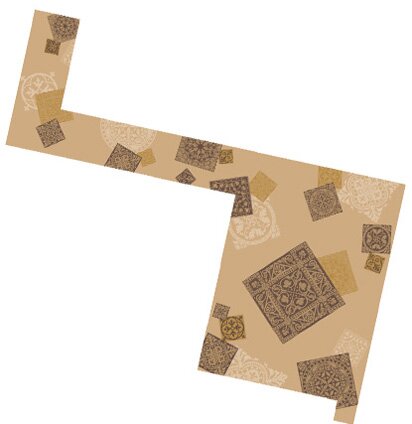
The lobby will be done in what I am calling “New” Old World. We will be working with classic, Italianate patterns but applying them in more contemporary and “less predictable” ways. The floor will feature scattered and “layered” tiles that will be done with a combination of embossing, stains, dyes and acid etching-all in subtle earth tones. The artwork above shows the rough layout and to give you an idea of scale, the large tile in the middle measures 9′ x 9′.






 Copyright © Designamour