January 10th, 2012
Floorcloth Fancy
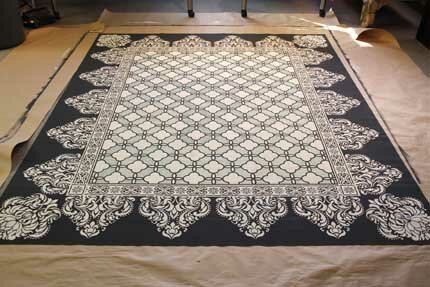
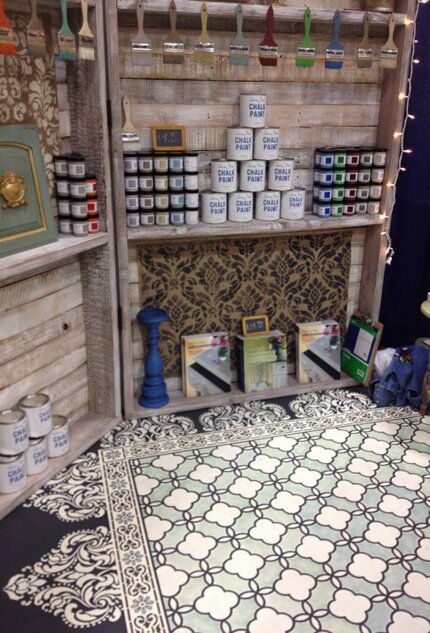
I created a stenciled vinyl floorcloth using Annie Sloan Chalk Paint recently for a booth display that got rave reviews so thought it would make a good step-by-step tutorial to share!
Stenciled floorcloths (sometimes referred to as oil cloths or floor canvases) have a long history of use in both England and the United States. Often made from recycled canvas ship sails, painted and stenciled floorcloths offered a less expensive and more hygienic alternative to carpeting and were used extensively in homes both grand and common prior to the invention of linoleum. Most modern day floorcloths are still made from heavy canvas, which requires priming, stretching, and hemming. As I was looking for a quick and easy alternative-fast-I turned to another modern option: flooring sheet vinyl!
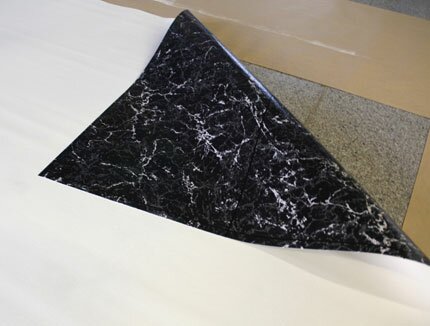
Now, as you know, sheet vinyl comes in many different colors and patterns including brick, tile, and more. Because I wanted a nice smooth surface and blank canvas for my floorcloth, I chose a roll of sheet vinyl that had a smooth, felt-type backing and painted on THE BACK side. NOTE! I just purchased a very inexpensive, thin vinyl that was pre-cut and prepackaged for my trade show floor, but if you are doing this for yourself I highly recommend that you go with a much thicker, harder, and better quality vinyl.
After applying a coat of white primer and allowing that to dry, I rolled on two coats of Graphite Chalk Paint. Now, you could use any latex and/or acrylic paint for a floorcloth. I happened to choose Chalk Paint because
- I love it, and
- I was showcasing Chalk Paint in my booth!
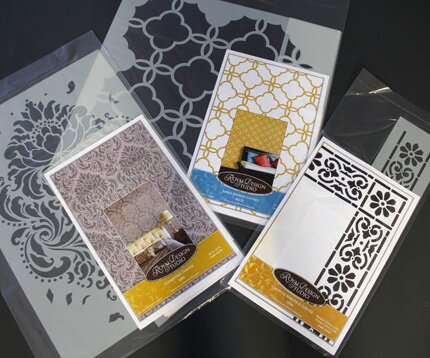
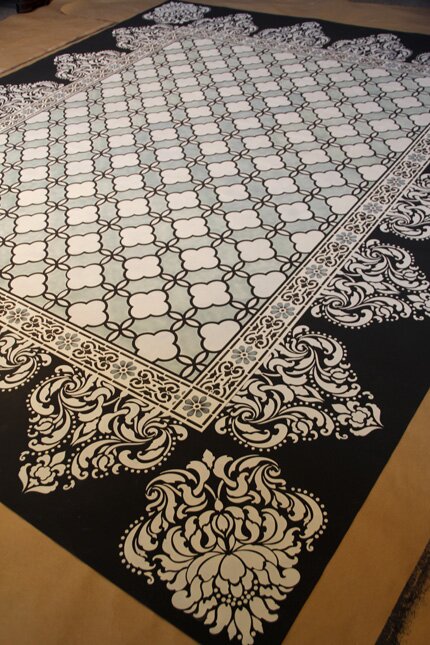
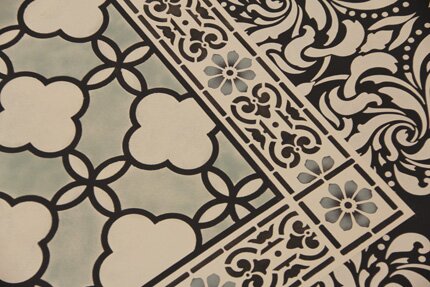
I found it super easy to use on this large scale and quite ideal for stenciling! I LOVE combining complimentary stencil patterns on a project and this large 8′ x 10′ surface provided lots of space to be creative! I decided that I would use our Large Eastern Lattice stencil as the centerpiece and frame it with the Classical Border and Corner stencil. For a lacy scalloped edge, I chose the Florentine Damask stencil, with plans to just have the bottom portion of it coming off the linear border. When picking patterns to go together, I generally look for ones that offer a variety of scale but also contain unifying elements. To my eye, the lattice pattern has a petal effect that is echoed in the border pattern. The border pattern has some small dots in it which are echoed in the damask pattern. Works for me!
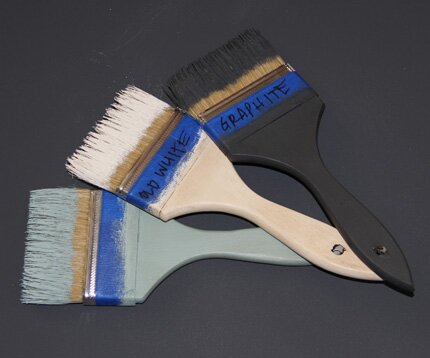
For a color palette, I chose Old White and Duck Egg Blue over the Graphite. I think that the addition of the Graphite with these soft, classic colors adds a little big of a fresh modern edge.
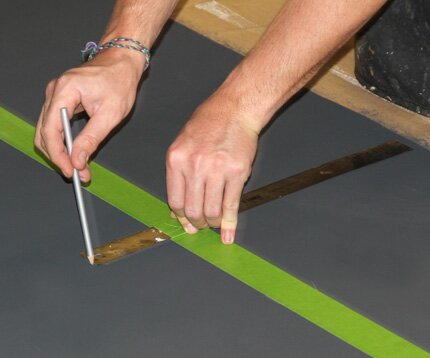
The first step was to determine where to place the Classical Border and Corner “frame”. Since the Eastern Lattice stencil is a symmetrical allover pattern, I knew that that could be repeated as much or as little as needed, but I HAD to determine how much space to leave at the edge for my Florentine Damask “lace edge” on my 8′ by 10′ floorcloth. We then measured 14.5″ in from the edge, made tick marks with a chalk pencil and ran tape on the outside of those marks. Then we measured in 4″ from there (enough to accomodate the border design and ran tape on the inside of those marks to leave a 4″ opening between the strips of tape.
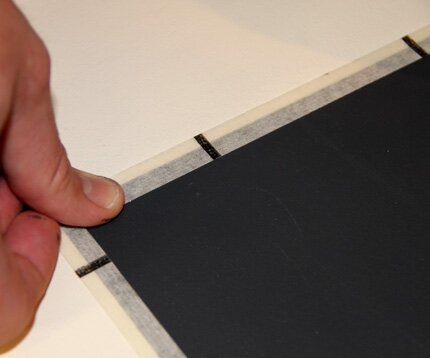
We burnished the tape well and rolled on two coats of Old White Chalk Paint with a short-nap 4″ roller (not shown). When dry, we used a translucent tape to overlap just inside the frame. This was placed at roughly the width of the lines of the lattice stencil to preserve a nice black outline there. If you don’t have a similar tape you could mark lines and use blue or green painter’s tape.
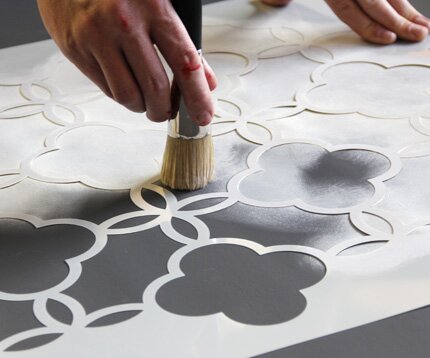
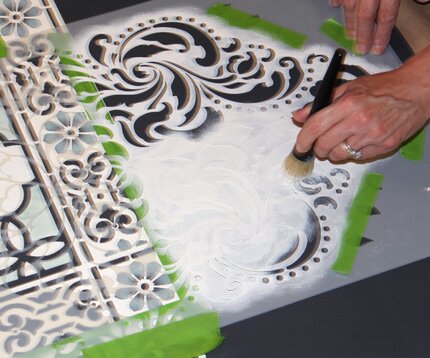
Now to the stenciling! We measured to locate the center of our large inner rectangle and centered one of the cloverleaf elements over it. This ensures that your symmetrical pattern will end the same at opposite edges. I used our new larger 2″ stencil brush to stencil the whole design first with Old White Chalk Paint. The Chalk Paint covers very well, but it did take two passes to get full coverage with the white. Fortunately, the Chalk Paint dries SO quickly that you can go immediately back over it. This isn’t possible with latex paint-you must let the first coat dry so you don’t lift it off by going back over it too quickly. Of course, I used a dry-brush method with the brush, meaning I dipped just the tips of the bristles into the paint and offload a bit onto paper towels before stenciling.
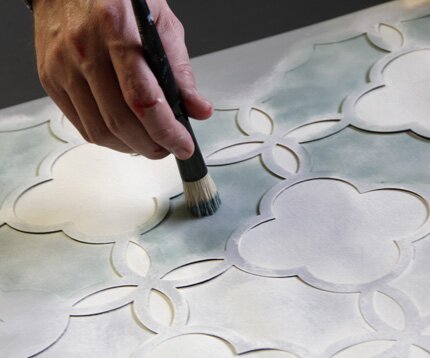
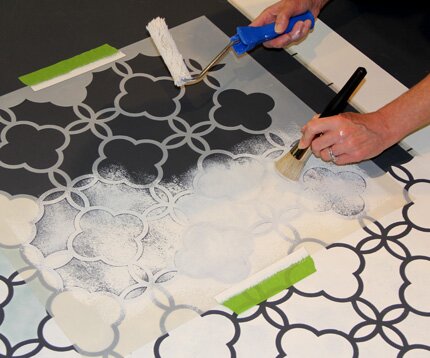
The Duck Egg Blue color was then stenciled right over the Old White, JUST in selected areas of the design. In order to avoid the hassle of taping off the pattern to isolate this area, I simply switched to a smaller, 3/4″ brush which allows for more control. You just have to be careful as you near the edges to keep the bristles from creeping in the areas you want to remain white.
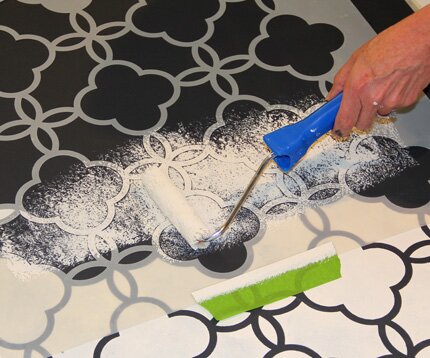
After a few repeats like THAT I decided to try for a speedier method. The dry brushed method looked fabulous, but I was in a time crunch, as always! I switched to a roller/brush combo that worked quite well with the Chalk Paint! After offloading the roller slightly (again on paper towels) I used a light pressure to roll the wet paint onto a portion of the stencil repeat.
Then, while the paint was still wet, I used the brush to smooth and swirl it out on the surface for the first layer. This was definitely faster, but I did have some paint seepage here and there which I touched up easily with Graphite at the end. Once I switched to this technique I just continued on doing all the white and then went back and replaced the stencil to apply the blue.
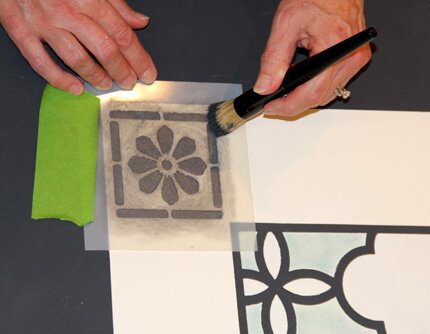
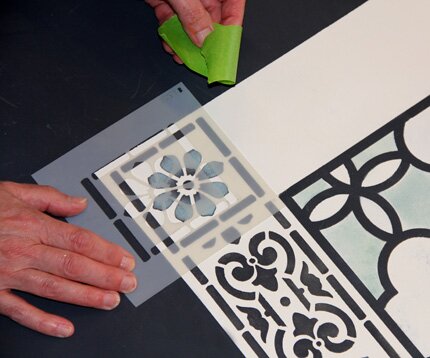
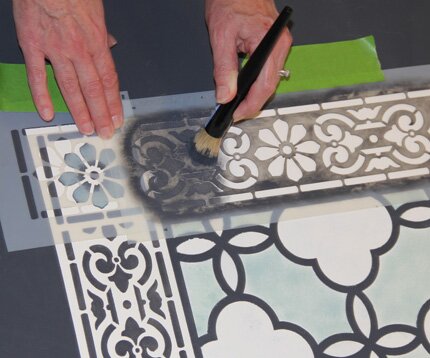
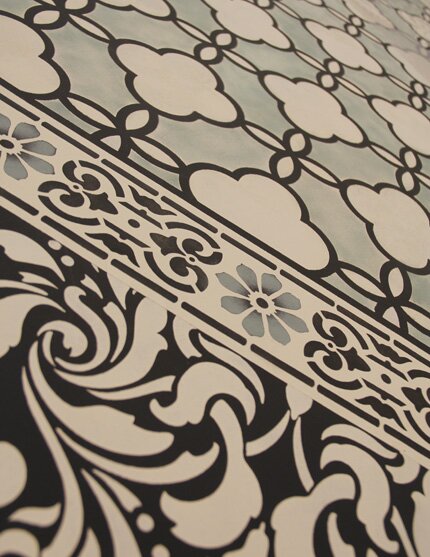
Next up! The stenciled border. The Classical Border and Corner stencil is perfect for this because it comes with a corner tile piece that gets stenciled in the corners and the border design can simply run in between. These were visually centered in the corner area and stenciled in the Graphite Chalk Paint again.
To finish off the border with a nice clean edge, simply use the edge of the corner piece to mask off and protect the area, leaving a nice open space that mimics the stencil “bridges”.
The border design was centered in the space between the corners (simply mark the center point and place a central element right over it) and then stencil with the repeat until you hit the corner. This way, your design will naturally end at the same point on opposite corners.
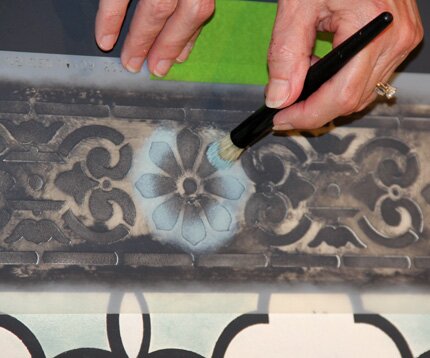
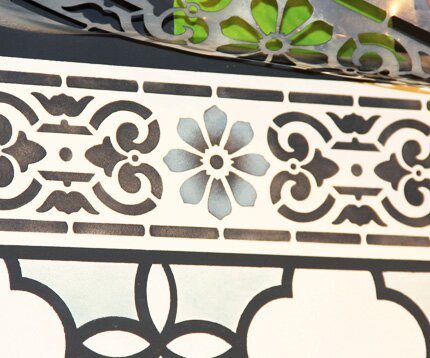
I wanted to bring a bit of the Duck Egg Blue Chalk Paint color into the border pattern so used a dry-brush technique to shade it just around the outer edges of the flower petals.
Voila!
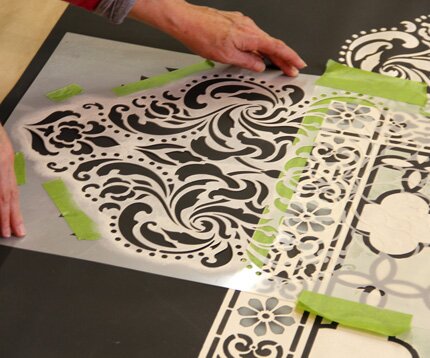
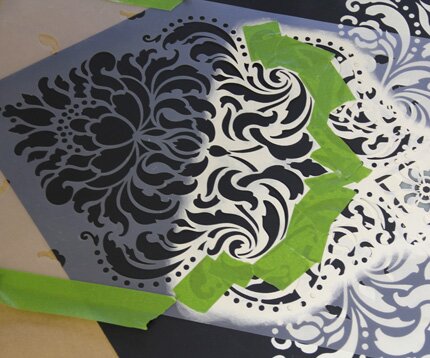
For the lacy edge, I positioned the Florentine Damask stencil at the same point each time. Notice that tape was placed over the border area to protect it from having Old White paint creeping into the black parts of that design.
I began by stenciling on either side of the corner first and dry-brushed on two quick layers of Old White Chalk Paint. Once I had my corners done, I spaced the damask repeats out equally along each side between the corners. On the long edges I was able to stencil 5 repeats total, and 4 repeats total along the short edges. How much space you will have will depend on the size of your floorcloth and it’s best to measure plot it out on paper beforehand if you are doing a different size than our 8′ x 10′.
I could have left the corners as is, but wanted to add a little more detail, so I flipped the stencil around and played with it till I found a nice “fit”. Then I isolated that area with painter’s tape and stenciled in the finishing touch!
Happiness! I love this combination of colors and patterns, which would also look super fab on a ceiling or tablecloth, I think. To protect my lovely floorcloth I used two thin coats of Annie Sloan Lacquer. This is a matte, water-borne finish that is designed to work with the Chalk Paint-particularly over concrete floor surfaces. It is very thin, and penetrates the paint surface to provide a highly durable finish.
It was quite dirty after being walked on at the Home Show, and I was able to clean it up nicely with a Mr. Clean Magic Eraser without any ill effects to the paint finish! Unfortunately the cheap, thin vinyl did get some tears in it here and there. Like I said above….buy good, thick, vinyl-or paint directly on your floor or traditional floorcloth canvas-available here! For another cool idea for a hand painted vinyl floorcloth, check out this Pinterest pin!
I hope you enjoyed this floorcloth idea and tutorial! Let me know….


 Copyright © Designamour
January 10th, 2012 at 6:01 pm
WoW! This is absolutely gorgeous!! Can you tell me approximately how many hours you put in total? And can you tell me total cost? Thanks!!
January 10th, 2012 at 6:54 pm
Melanie, this floorcloth is amazing! I posted the link to your blog on my Facebook wall because it HAS to be shared, I hope that is okay!
January 10th, 2012 at 7:04 pm
Tami-of course!! Thank you for sharing
Aimee-it was done here and there but I would say plan to make it a three day project and work on it a few hours a day. Total cost of stencils: $118. If you bought quarts of Chalk Paint that would be about $115. Lacquer $55. Vinyl depends on the quality, but let’s say $75-so under or around $400
January 10th, 2012 at 9:01 pm
I did. Are you kidding. I gave complements to the girls about it this weekend. Excellent piece!
January 11th, 2012 at 2:35 am
Absolutely fabulous! To be put on my list for under my dining room table!
January 11th, 2012 at 3:44 am
I really LOVE the colors in this floorcloth. My Fav color is Duck Egg Blue. Beautifully done Melanie!!
January 11th, 2012 at 5:37 am
Fabulous job! I love the colours you chose.
January 11th, 2012 at 5:44 am
I’ve have always wondered what to use as the base of a floor cloth. The mystery is solved. Thanks so much for the tutorial. I definitely see one of these in my future. Awesome and pinned to Pinterest
January 11th, 2012 at 9:43 am
I am absolutely IN LOVE with this!! I am wondering IF you offer blog review/giveaways? I would LOVE to share this with my readers!
January 11th, 2012 at 9:49 am
A splendid result. Thanks for sharing. I can’t wait to attend one of your workshops.
January 11th, 2012 at 3:33 pm
This is absolutely stunning, Melanie, just like everything you do! It is so generous of you, as always, to share the process in such detail. Thank you!
January 11th, 2012 at 5:58 pm
What a beautiful piece of functional artwork.
January 24th, 2012 at 4:30 pm
Amazing! I’m thinking of this for outside on the deck…would it hold up?!